
Range Rover P38
76
CHASSIS AND BODY
NEW RANGE ROVER
20
REPAIR
67. Raise battery tray and air cleaner for access.
Route crash sensor harnesses, secure harness
clips, connect multiplugs to crash sensors.
68. Tighten battery tray and air cleaner bolts.
69. Connect multiplug to SRS control module.
70. Connect SRS harness multiplug to main
harness.
71. Fit air cleaner baffle beneath LH wheel arch,
secure with scrivet fasteners.
72. Fit wheel arch liners.
See this section.
73. All models:Route harness along sill, connect
multiplugs to BeCM.
74. Connect multiplugs at base of ’A’ posts and
secure plugs to brackets.
75. Fit earth wires to stud, tighten captive nut.
76. Connect vacuum hose and multiplugs to brake
and clutch pedal switches.
77. Position closing panel beneath passenger side
of fascia. Secure diagnostic plug, connect
footwell lamp. Align closing panel, secure with
scrivet fasteners.
78. Fit carpet retainer, engage sprag clips.
79. Fit seat base trim panel, secure trim studs,
tighten screw.
80. Fit fuse cover to seat base trim.
81. Fit both ’A’ post lower trim panels, secure sprag
clips. Engage door aperture seals.
82. LHD automatic vehicles only: Fit foot rest,
secure with bolts.
83. Fit radio.
See ELECTRICAL, Repair.
84. Fit wiper motor and linkage.
See WIPERS AND
WASHERS, Repair.
85. Fit steering column.
See STEERING, Repair.
86. Fit centre console.
See this section.
87. Refill cooling system.
See COOLING SYSTEM,
Repair.
88. Vehicles with SRS only: Fit battery.
See
ELECTRICAL, Repair.
89. Reconnect battery negative lead.
90. Evacuate and recharge air conditioning.
See
AIR CONDITIONING, Adjustment.
FASCIA ASSEMBLY - VEHICLES WITH SINGLE
POINT SENSED SRS
Service repair no - 76.46.23/99
WARNING: Refer to SRS safety
precautions before commencing repair.
WARNING: The fascia assembly houses
the heater distribution unit, blower
assemblies and air conditioning
evaporator and is therefore heavy. Assistance is
essential during removal and refit procedures.
CAUTION: When removed from the
vehicle, the fascia should be placed on a
work surface with a soft covering and
supported on suitable wooden blocks.
Remove
1. Remove key from starter switch and wait 10
minutes for SRS back up power circuit to
discharge.
2. Disconnect both battery terminals, earth lead
first.
3. Drain cooling system.
See COOLING SYSTEM,
Repair.
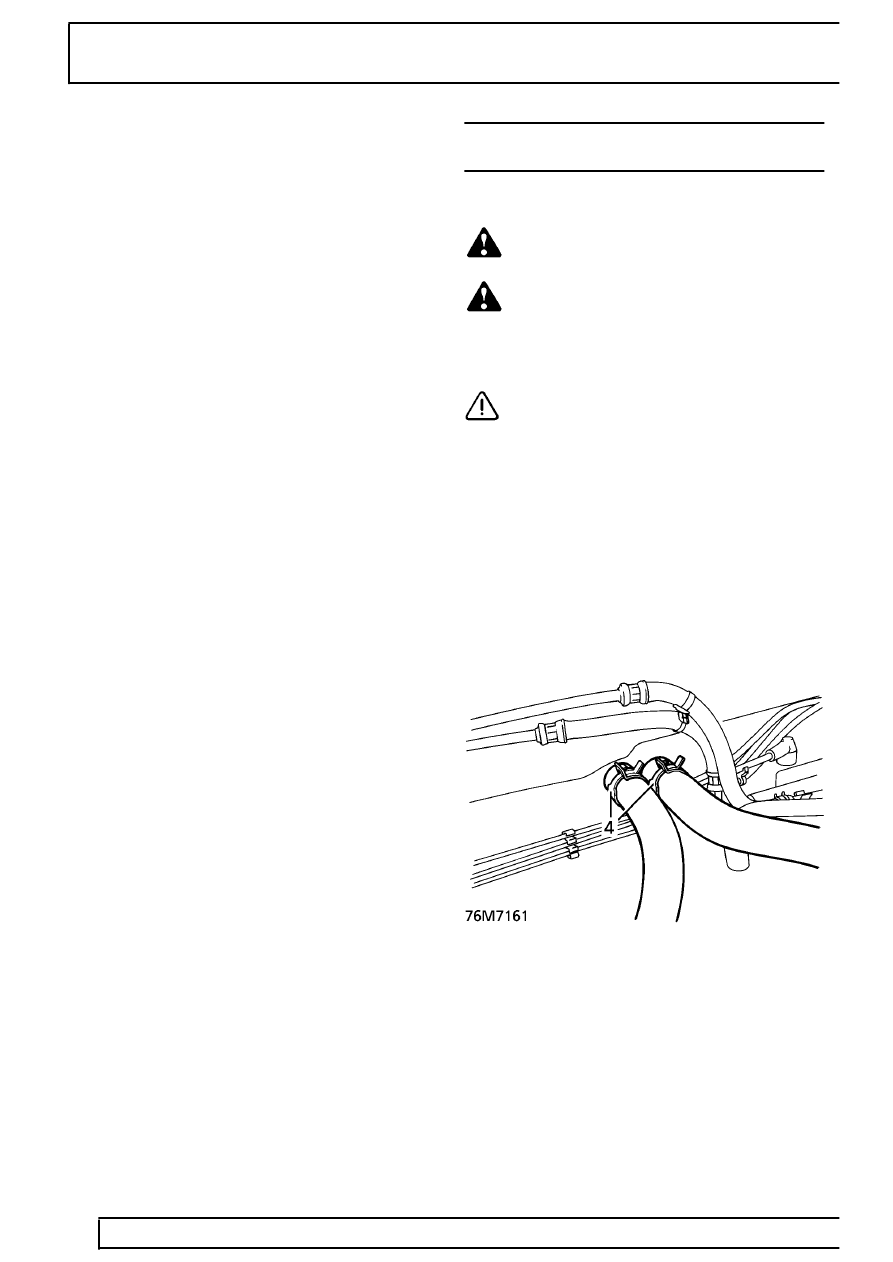
4. Release 2 clips securing heater hoses to heater
matrix and disconnect hoses.
5. Cap both heater matrix pipes to prevent coolant
spillage inside vehicle during fascia removal.
6. Recover refrigerant from air conditioning system.
See AIR CONDITIONING, Adjustment.