
Range Rover P38
86
ELECTRICAL
NEW RANGE ROVER
54
REPAIR
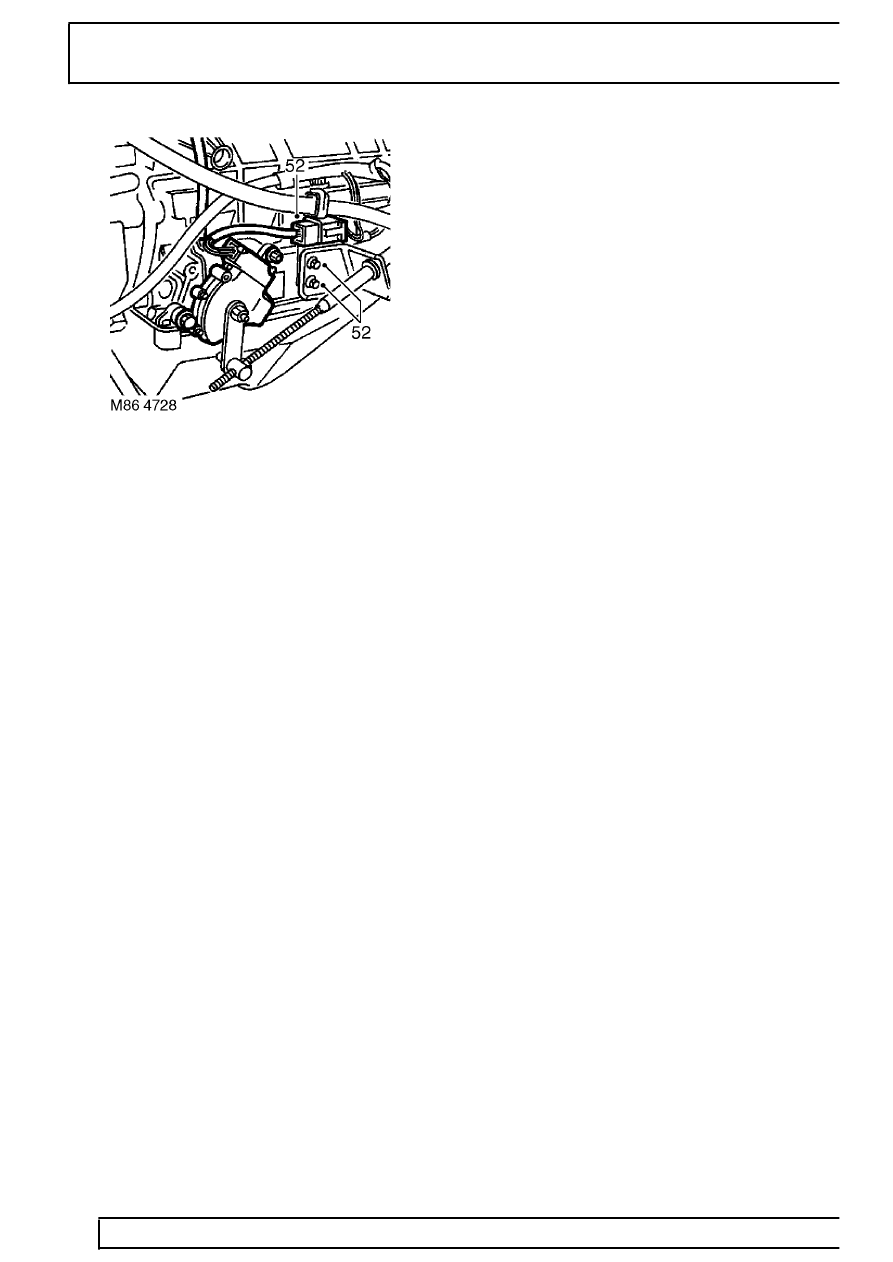
52. Models with automatic gearbox: Remove 2
bolts securing gear selector position switch
multiplug and selector cable abutment brackets
to gearbox.
53. Release engine harness from support bracket.
54. Release engine harness from above gearbox
and from behind LH cylinder head.
55. Remove engine harness.
Refit
56. Position engine harness behind LH cylinder
head and over gearbox.
57. Secure engine harness to support bracket.
58. Models with automatic gearbox: Position gear
selector position switch multiplug and selector
cable abutment brackets to gearbox and secure
with bolts.
59. Connect engine harness to LH front oxygen
sensor multiplug and fit multiplug to support
bracket.
60. Connect engine harness to LH rear oxygen
sensor multiplug.
61. Connect engine harness to RH rear oxygen
sensor multiplug.
62. Connect RH front oxygen sensor multiplug to
engine harness and secure multiplug to bracket.
63. Carefully raise transmission on jack.
64. Fit handbrake cable grommet to transmission
tunnel.
65. Models with automatic gearbox: Fit gear
selector cable to abutment bracket and secure
with ’C’ clip.
66. Models with automatic gearbox: Fit selector
cable trunnion to lever and secure with split pin.
67. Models with automatic gearbox: Adjust gear
selector cable.
See AUTOMATIC GEARBOX,
Adjustment.
68. Clean exhaust front and intermediate pipe
mating faces.
69. Align intermediate pipe to front pipe and tighten
clamp nuts to
25 Nm (18 lbf.ft)
70. Fit chassis crossmember.
See CHASSIS AND
BODY, Repair.
71. Connect handbrake cable to lever, fit clevis pin
and secure pin with clip.
72. Models with manual gearbox: Position gear
lever and tighten bolts to
25 Nm (18 lbf.ft)
73. Models with manual gearbox: Fit gear lever
gaiter and gaiter ring and secure with nuts.
74. Models with manual gearbox: Fit centre
console.
See CHASSIS AND BODY, Repair.
75. Models with automatic gearbox: Fit window
switch pack.
See this section.
76. Fit bolt to secure harness ’P’ clip to LH cylinder
head.
77. Connect harness to alternator and tighten B +
terminal nut to
18 Nm (13 lbf.ft) max and D +
terminal nut to
5 Nm (3.5 lbf.ft) max. B+ and D+
are marked on the rear of the alternator,
adjacent to each cable connection.
78. Connect multiplug to CKP sensor.
79. Connect multiplugs to fuel injectors and ECT
sensor.
80. Fit harness clips to fuel rail and heater coolant
pipe.
81. Connect multiplug to purge vent valve.
82. Connect engine harness multiplug to main
harness.