
Range Rover P38
ELECTRICAL
37
REPAIR
10. Release control arms.
11. Remove 4 bolts securing window lift panel.
12. Remove panel.
Disassemble
13. Release door latch remote cable from panel clip.
14. Remove 2 screws securing door latch remote.
Release remote.
15. Release sill locking button rod from 2 clips.
16. Remove sill button bellcrank securing screw.
17. Remove 2 studs securing door latch.
18. Position latch remote and sill button assembly
aside.
19. Remove 3 plastic clips and 2 plastic nuts from
panel.
Assemble
20. Fit 3 plastic clips and 2 plastic nuts to panel.
21. Position latch remote and sill button assembly.
22. Align sill button bellcrank. Secure with screw.
23. Secure sill button link to panel clips.
24. Position door latch remote. Secure with screws.
25. Secure door latch remote cable to panel clip.
26. Align latch. Secure with studs.
Refit
27. Apply grease to channels and control arms.
See
LUBRICANTS, FLUIDS AND CAPACITIES,
Information.
28. Reverse removal procedure.
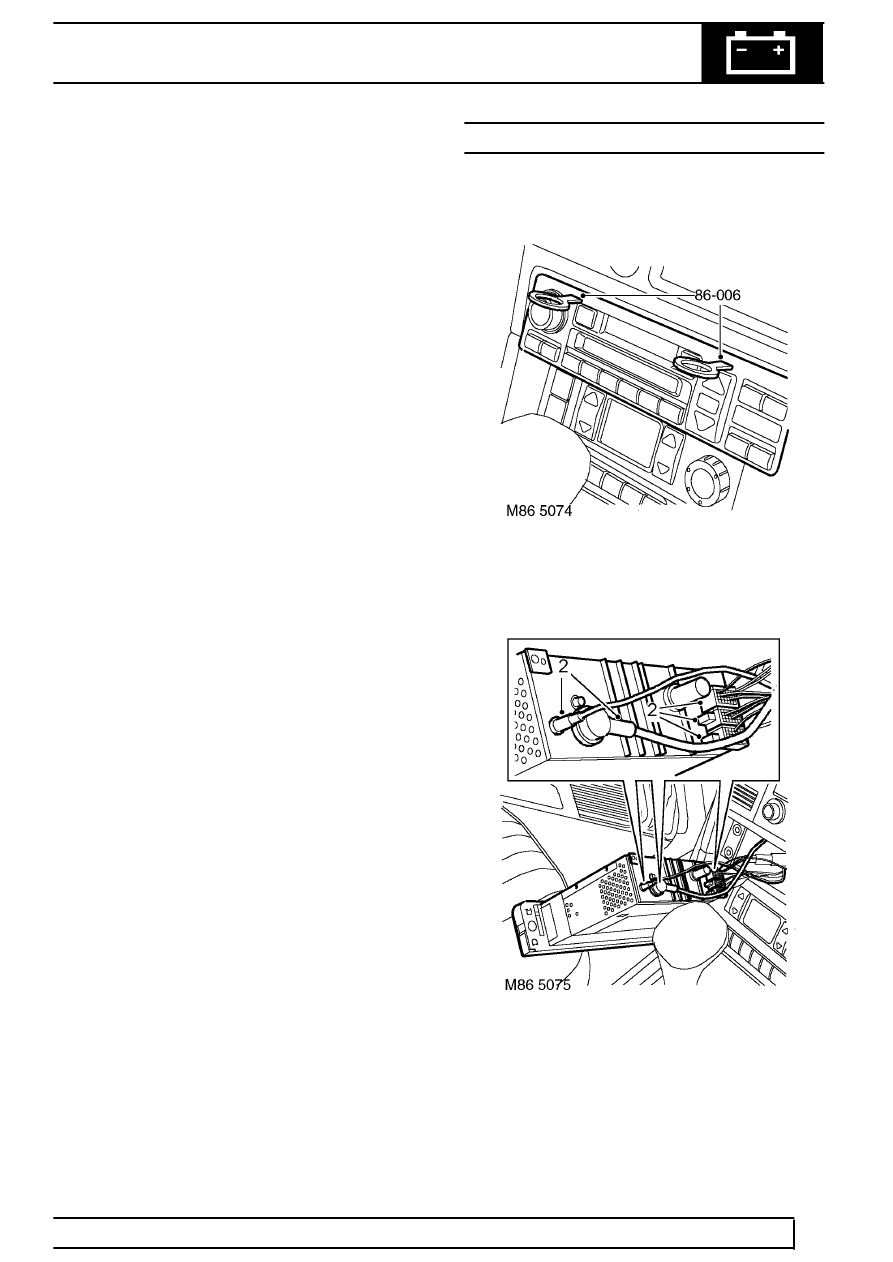
RADIO
Service repair no - 86.50.03
Remove
1. Using tool 86-006 release radio from centre
console.
2. Disconnect 3 multiplugs and 2 aerial
connections from radio and remove radio.
Refit
3. Position radio to centre console and connect 3
multiplugs and 2 aerial connections.