
3.9 V8 engine camshaft - knock
- Make
- Land Rover
- Model
- Range Rover Classic Technical Bulletins
- Section
- 3.9 V8 engine camshaft - knock › 3.9 V8 engine camshaft - knock
3.9 V8 ENGINE CAMSHAFT - KNOCK
- Model
- Range Rover Classic Discovery
- Affected vehicles
- 660001 to 647645 081991 to 137600
- Date
- 1996-09-04
- Reference
- 04/09/96
Bulletin text
3.9 V8 Engine Camshaft - Knock
MODEL
Range Rover Classic Discovery
DETAIL
Land Rover Engineering introduced a camshaft restraint plate on the front of the V8 block at the above VIN numbers. This is to prevent excessive camshaft end float, resulting in knock against the front of the block. Camshaft knock on engines after the above Vin is therefore very unlikely. If camshaft knock is suspected carry out the procedure below.
ACTION REQUIRED
Upon customer complaint of hot idle knock - knock disappears at 1500 RPM.
PARTS INFORMATION
Order all necessary fluids/Gaskets for front cover gasket replacement.
Camshaft restraint plate - ERR 5926 Camshaft - ERR 5924 Restraint plate bolts (2 off) - SH 505061L
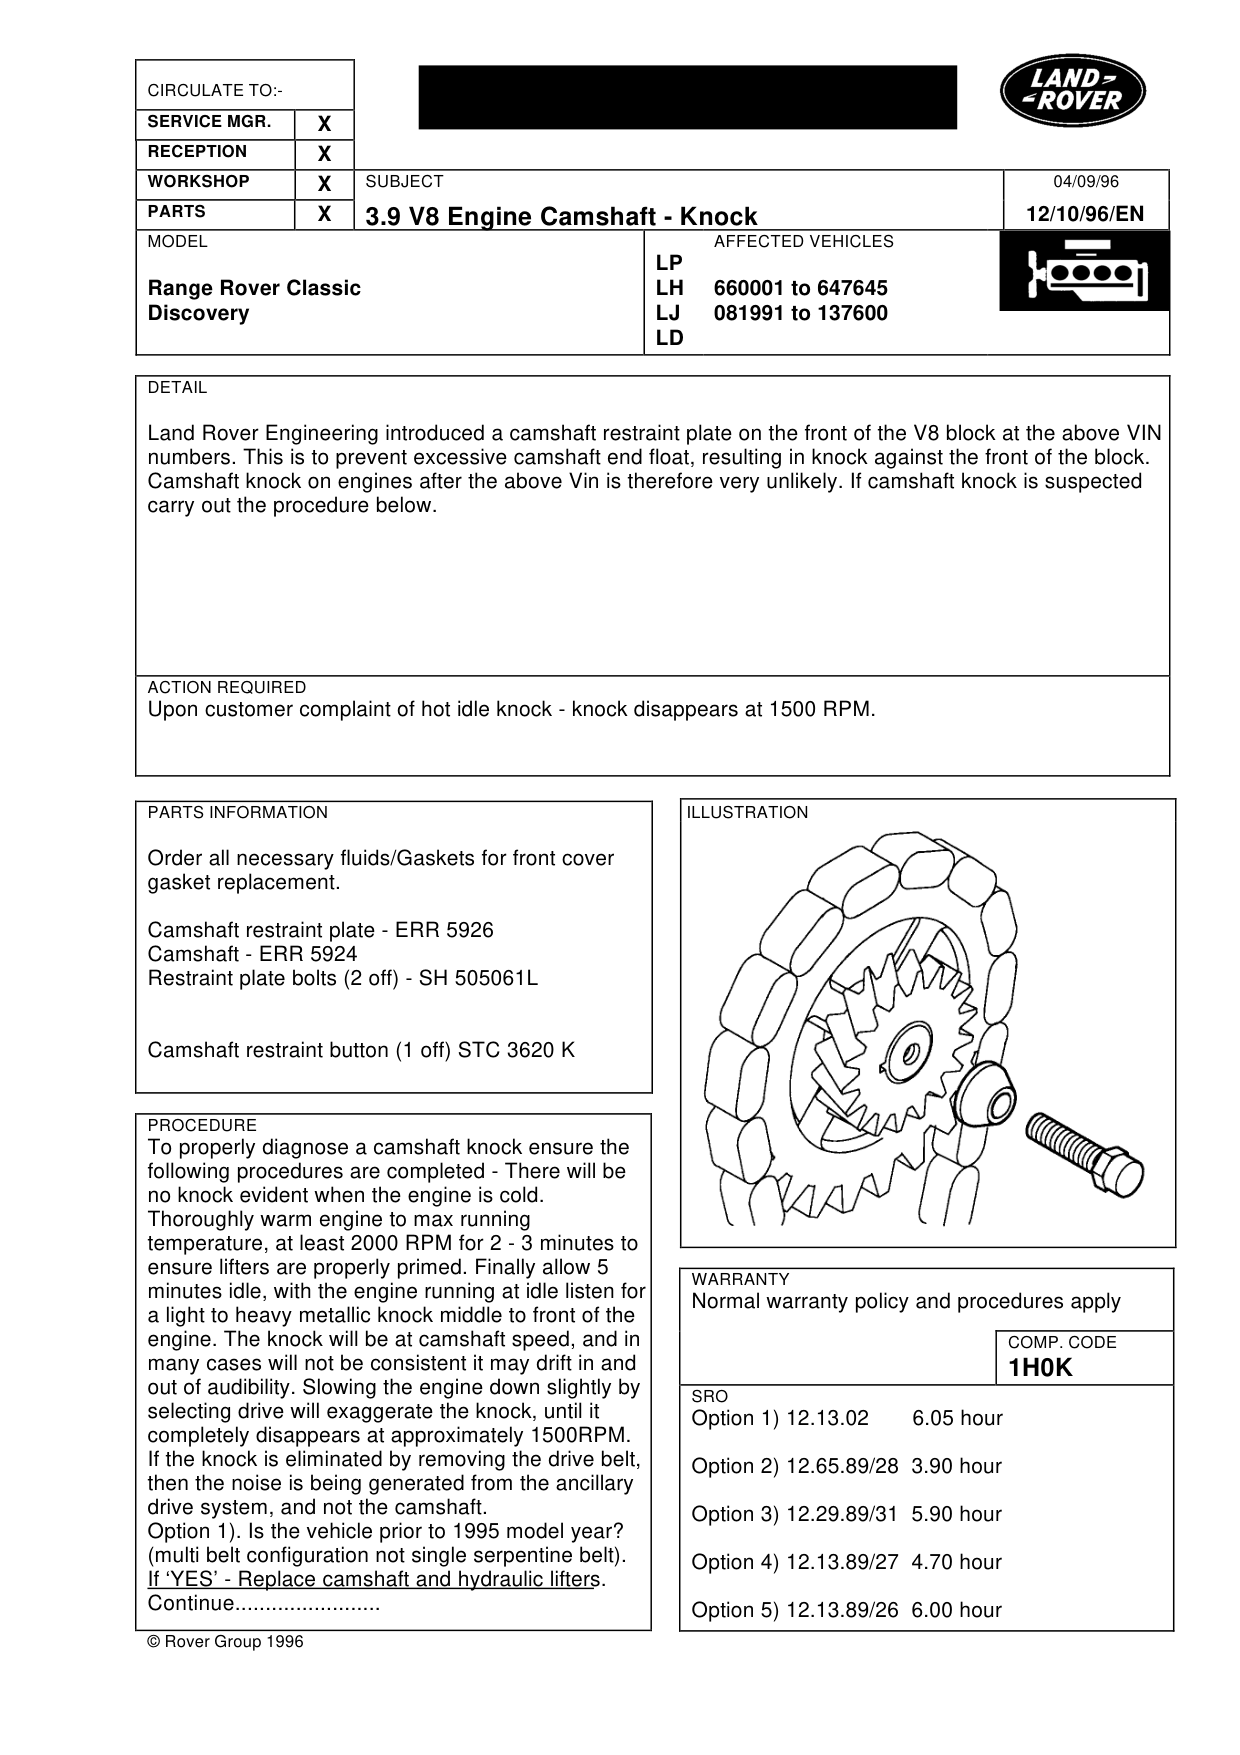
Camshaft restraint button (1 off) STC 3620 K
PROCEDURE
To properly diagnose a camshaft knock ensure the following procedures are completed - There will be no knock evident when the engine is cold. Thoroughly warm engine to max running temperature, at least 2000 RPM for 2 - 3 minutes to ensure lifters are properly primed. Finally allow 5 minutes idle, with the engine running at idle listen for a light to heavy metallic knock middle to front of the engine. The knock will be at camshaft speed, and in many cases will not be consistent it may drift in and out of audibility. Slowing the engine down slightly by selecting drive will exaggerate the knock, until it completely disappears at approximately 1500RPM. If the knock is eliminated by removing the drive belt, then the noise is being generated from the ancillary drive system, and not the camshaft. Option 1). Is the vehicle prior to 1995 model year? (multi belt configuration not single serpentine belt). If ‘YES’ - Replace camshaft and hydraulic lifters. Continue........................
© Rover Group 1996
04/09/96
12/10/96/EN
AFFECTED VEHICLES
LP LH 660001 to 647645 LJ 081991 to 137600 LD
WARRANTY
Normal warranty policy and procedures apply
COMP. CODE
1H0K
SRO
Option 1) 12.13.02 6.05 hour
Option 2) 12.65.89/28 3.90 hour
Option 3) 12.29.89/31 5.90 hour
Option 4) 12.13.89/27 4.70 hour
Option 5) 12.13.89/26 6.00 hour
3.9 V8 Engine Camshaft - Knock
MODEL
Range Rover Classic Discovery
Option 2) Is the vehicle VIN between the following: LH 647645 - 656881 LJ 081994 - 117885 If ‘YES’ - fit camshaft button (see below 3 for fitting process).
Option 3) Is the vehicle VIN between the following: LH 656881 - 660001 LJ 117885 - 137600 If ‘YES’ - fit new camshaft hydraulic lifters and new thrust plate.
Option 4) If the vehicle VIN is post the affected vehicle range. Remove the front cover assembly following the procedure in the workshop manual.
Discard old gasket.
Remove plenum chamber and both rocker covers. Relieve the pressure of the hydraulic lifters by loosing off the 4 bolts securing the rocker shaft assembly.
Ensure camshaft is now free to move backwards and forwards against the front of the block and the thrust plate. (camshaft end float).
With a suitable magnetic base DTI mounted on the chassis check the free movement or endfloat.
Option 5) If the endfloat is in excess of 0.012” (0.30mm), replace the camshaft hydraulic lifters and thrust plate.
Re-check the endfloat using procedure above, the endfloat should be between (0.002” and 0.010”), If OK replace front cover assembly with new gasket.
Re-torque rocker shaft assembly ensuring push rods are correctly located.
Replace rocker covers and plenum chamber.
Procedure for fitment of cam button STC 3620K
1. Remove the front cover assembly following the procedure in the workshop manual for replacing the front cover gasket Do not discard the old gasket. it is required later in this procedure.
04/09/96 12/10/96/EN
AFFECTED VEHICLES
LP LH 660001 to 647645 LJ 081991 to 137600 LD
2. Using a rubber or hide mallet drift the camshaft as far into the block as possible. Tap the cam bolt until the thrust face on the camshaft is tight up to the front face of the block.
3. Remove the bolt and washer securing the camshaft sprocket and discard them.
4. Install the new replacement bolt (with the thrust button installed) and the new conical spacer. Take care not to damage the nylon button. Use a deep socket and torque to 55-60 Nm (41-44 lb ft).
5. Because of component tolerances engine to engine it is necessary to check the clearance of the button to the inside surface of the front cover. Use the following procedure.
Obtain a small piece of waterproof plastigage (0.002” - 0.010”) and apply it to the exposed outermost end of the button, leaving the old front cover gasket in place, refit the front cover and torque the 4 uppermost bolts to specification.
Measure the width of the plastigage using the indicator chart supplied, clearance should be .005’’ to .010’’. If this is not the case then the button is too close to the front cover. If this is the case the button must be removed and its tip filed down. (care must be taken not to take too much off). The front cover clearance must then be rechecked with the plastigage.
Do not try and file the tip of the button with the bolt installed in the camshaft nose - the button will easily damage. Use a vice to hold while filing or carefully file the tip using a grinding wheel.
6. Remove the old front cover gasket and using a new one refit the front cover and reassemble the front end of the engine as described in the workshop manual.
Parts & tools for this job For Land Rover Range Rover
- PARTEngine gasket setSearch: Land Rover Range Rover engine gasket set
- TOOLTorque wrenchSearch: 3/8 inch torque wrench
- TOOLFeeler gauge setSearch: feeler gauge set
Links open Amazon search results in a new tab. As an Amazon Associate I earn from qualifying purchases.