Range Rover Classic

54
FRONT AXLE AND FINAL DRIVE
10
OVERHAUL
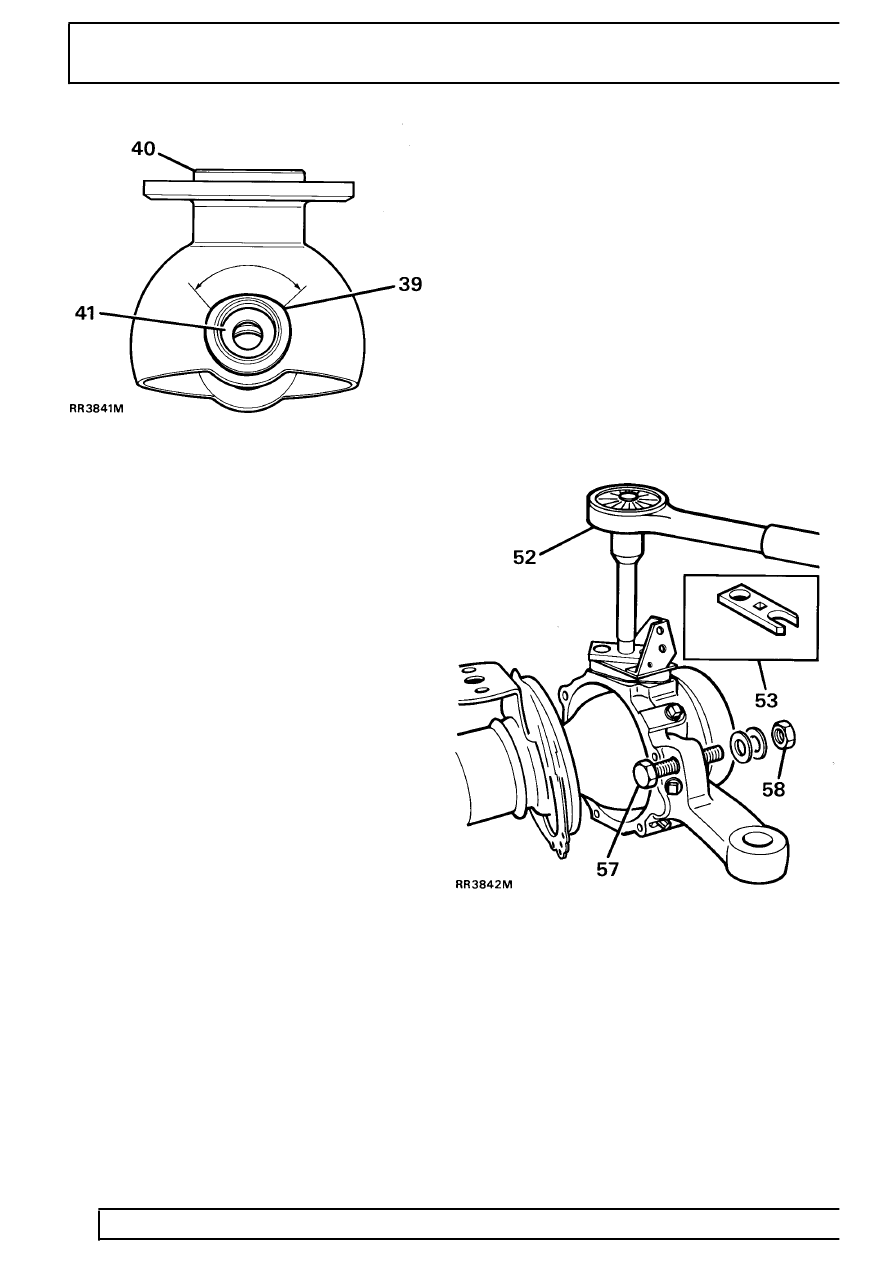
40. With seal lips trailing press axle shaft oil seal
flush into rear of housing. Grease lips.
41. Fit new thrust washers and bearing into top
swivel pin bush.
42. Hang swivel pin bearing housing oil seal and
retainer plate over back of housing. Ensure they
are in correct assembly order.
43. Fit a new joint washer and secure swivel pin
bearing housing to axle. Starting with top fixing
dowel bolt. Tighten to
72Nm.
Fit swivel pin housing
44. Grease and fit lower swivel pin bearing to
bearing housing.
45. Place swivel pin housing in position over swivel
pin bearing housing.
46. Using a new joint washer, fit lower swivel pin
with lip outboard. Do not secure with screws at
this stage.
47. Fit a new sensor bush and new oil seal, lip side
leading to top swivel pin.
48. Lubricate with a recommended oil and fit top
swivel pin with existing shims.
49. Coat threads of top swivel pin bolts with Loctite
542. Fit bolts and jump hose bracket (do not
tighten).
50. Coat threads of lower swivel pin screws with
Loctite 270 and fit, together with damper and
shield bracket. Tighten to
25 Nm.
51. Tighten top swivel pin and brake jump hose
bracket securing bolts to
65 Nm.
Check and adjust preload on bearings
52. The preload on bearings to be 0,25 to 0,30 mm,
without swivel housing oil seal and axle fitted,
and reading from centre of swivel pin. The
torque required to turn swivel assembly from
lock to lock to be
2.0 to 2.8 Nm. Adjust by
removing or adding shims as necessary.
53. To take a reading use special tool LRT-57-024
torque test adaptor, with a torque wrench and
extension as shown.
54. Apply a recommended grease between lips of
swivel housing oil seal.
55. Secure oil seal with retaining plate and securing
bolts. Tighten to
11Nm.
56. Fit track-rod and drag link and secure with new
cotter pins.
57. Loosely fit lock stop bolt for later adjustment.
58. Fit brake disc shield.
