
REAR BRAKE CALIPERS
- Make
- Land Rover
- Model
- Range Rover Classic
- Section
- REPAIR › REAR BRAKE CALIPERS
BRAKES
15
REPAIR
Assemble outboard pistons
13. Coat new fluid seal with brake fluid. Ease seal
into groove in bore using only fingers, ensuring it
is properly seated. Fluid seal and groove are not
same in section, so when seal is seated it feels
raised to touch at edge furthest away from
mouth of bore.
14. Coat appropriate piston with brake fluid. Insert it
squarely into bore by hand only. Do not tilt piston
during insertion, leave approximately 8mm
projecting from bore.
15. Coat new wiper seal with brake fluid and fit to
new seal retainer. Slide assembly, seal first, over
protruding piston and into bore recess. Use
piston clamp to press home seal retainer and
piston.
Mounting inboard pistons
16. Clamp outboard pistons and carry out same
procedure for removing and fitting outboard
pistons and seals, instructions 8 to 15.
Fit calipers and pads
17. Fit caliper, tighten bolts progressively to,
82 Nm.
18. Connect brake flexible hoses to caliper. Tighten
to
10 Nm.
19. Remove hose clamps.
20. Lightly coat back and edges of pads with brake
fluid, avoid friction material.
21. Insert pads. Fit pins and springs, secure using
new split pins.
NOTE: Ensure friction pad with wear
indicator is fitted to inboard side of front
RH caliper. New pads must be fitted to
each caliper.
22. Reconnect pad wear indicator plug.
23. Bleed brake system.
See Brake System Bleed
(non ABS)
24. Press brake pedal firmly several times to locate
friction pads.
25. Fit road wheels, remove axle stands. Finally
tighten road wheel nuts.
26. Road test vehicle. Note that new friction pads
require ’bedding-in’, this may take several
hundred miles before brakes are at maximum
efficiency.
REAR BRAKE CALIPERS
Service repair no - 70.55.06
Service repair no - 70.55.17
Service tool:
LRT-50-700 - Piston clamp
Remove caliper
1. Loosen rear road wheel nuts. Jack up vehicle,
lower onto axle stands, remove wheels.
2. Using a recognised hose clamp, clamp flexible
brake hose above rear axle.
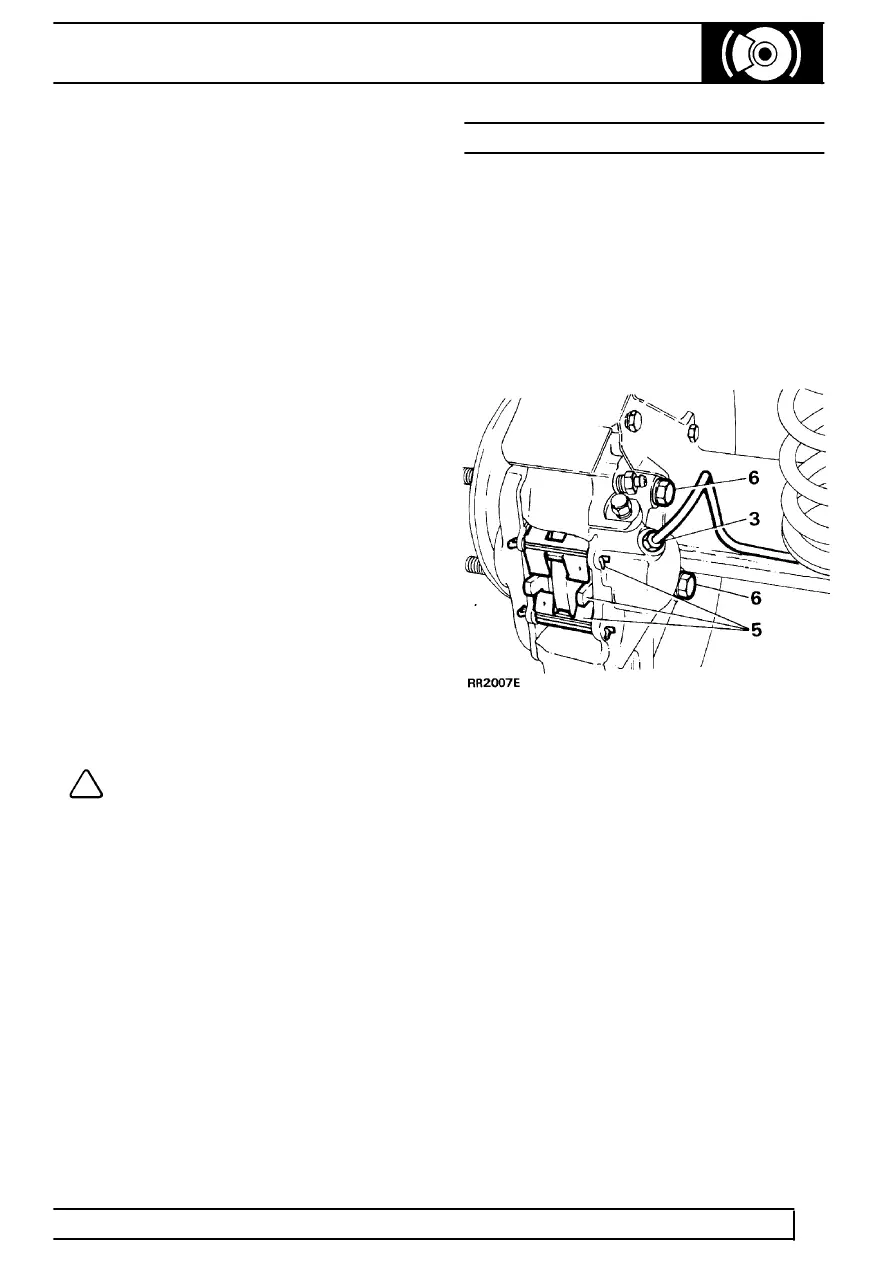
3. Remove brake pipe(s) from rear brake caliper(s).
Seal pipe ends to prevent ingress of dirt.
4. Rear RH caliper only, disconnect pad wear
indicator.
5. Remove retaining pins and springs and withdraw
pads. If same pads are to be refitted, identify
them for assembly in original positions.
6. Remove two bolts, withdraw caliper from axle.
Parts & tools for this job For Land Rover Range Rover
- PARTRear brake padsSearch: Land Rover Range Rover rear brake pads
- TOOLCaliper piston rewind toolSearch: brake caliper piston rewind tool
- FLUIDBrake fluidSearch: brake fluid
Links open Amazon search results in a new tab. As an Amazon Associate I earn from qualifying purchases.