Engine Overhaul Manual: Refitting the Sump for v8 40 46 Engine

ENGINE
OVERHAUL
21
Sump - refit
Early engines fitted with pressed steel sump
1. Remove all traces of old sealant from mating
faces of cylinder block and sump, ensure bolt
holes are clean and dry.
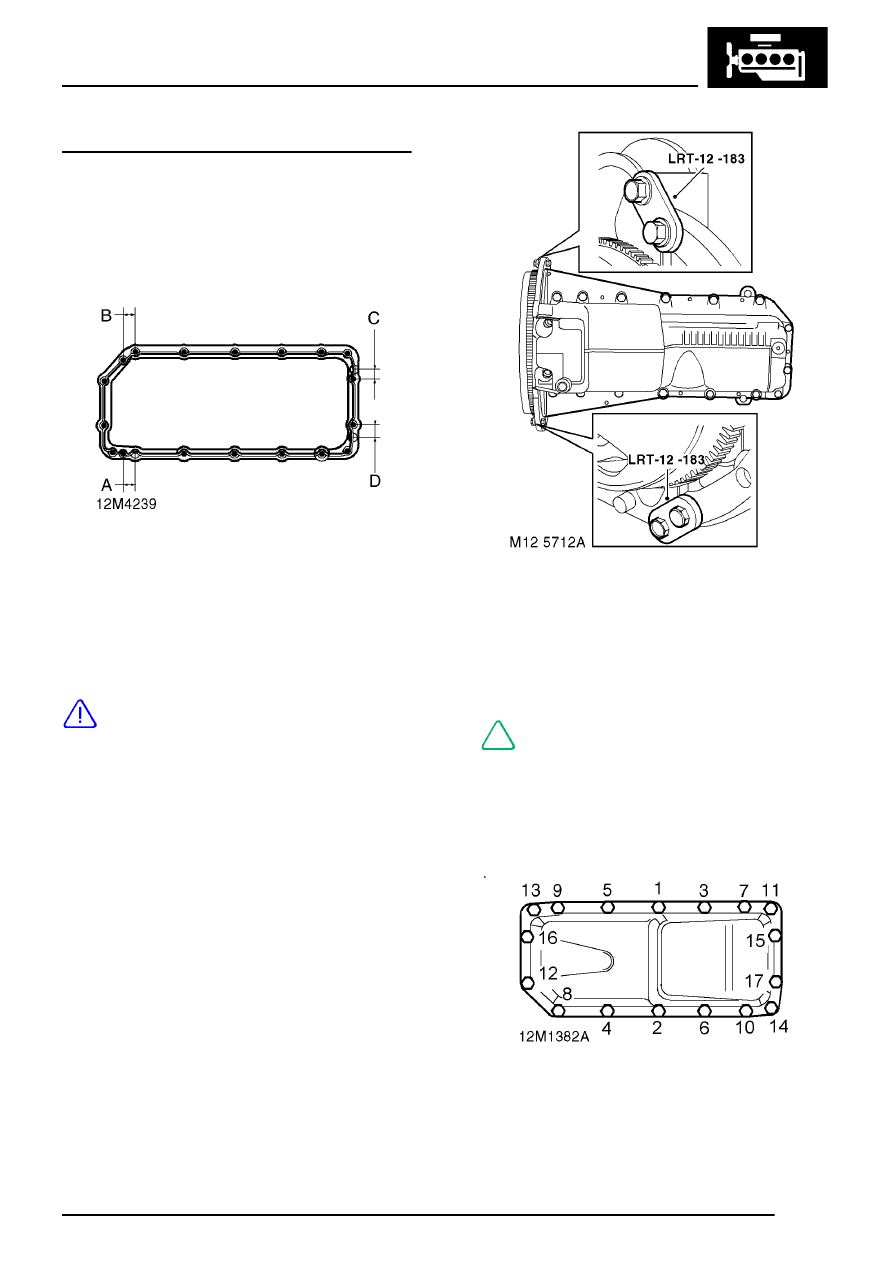
2. Apply a bead of sealant, Part number STC
50550 to sump joint face as shown:
Bead width - areas A, B, C and D = 12 mm (0.5
in)
Bead width - remaining areas = 5 mm (0.20 in)
Bead length - areas A and B = 32 mm (1.23 in)
Bead length - areas C and D = 19 mm (0.75 in)
CAUTION: Do not spread sealant bead.
Sump must be fitted immediately after
applying sealant.
3. Apply a globule of the sealant to cover the
ends of the cruciform seals.
4. Noting that the two parts of the tool are
’handed’, fit tool LRT-12-183 to the engine
backplate using slave bolts.
5. Secure the tool to the sump using the bolts
which are part of the tool.
NOTE: The holes in the tool are larger than
the diameter of the bolts in order to allow
the sump to move as the sump bolts are
tightened.
6. Fit sump, taking care not to damage sealant
bead.
7. Fit sump bolts and nuts and working in
sequence shown, tighten to 23 Nm (17 lbf.ft).
8. Remove tool LRT-12-183 .
