
Continental V8-4.6L DOHC VIN V (1998)
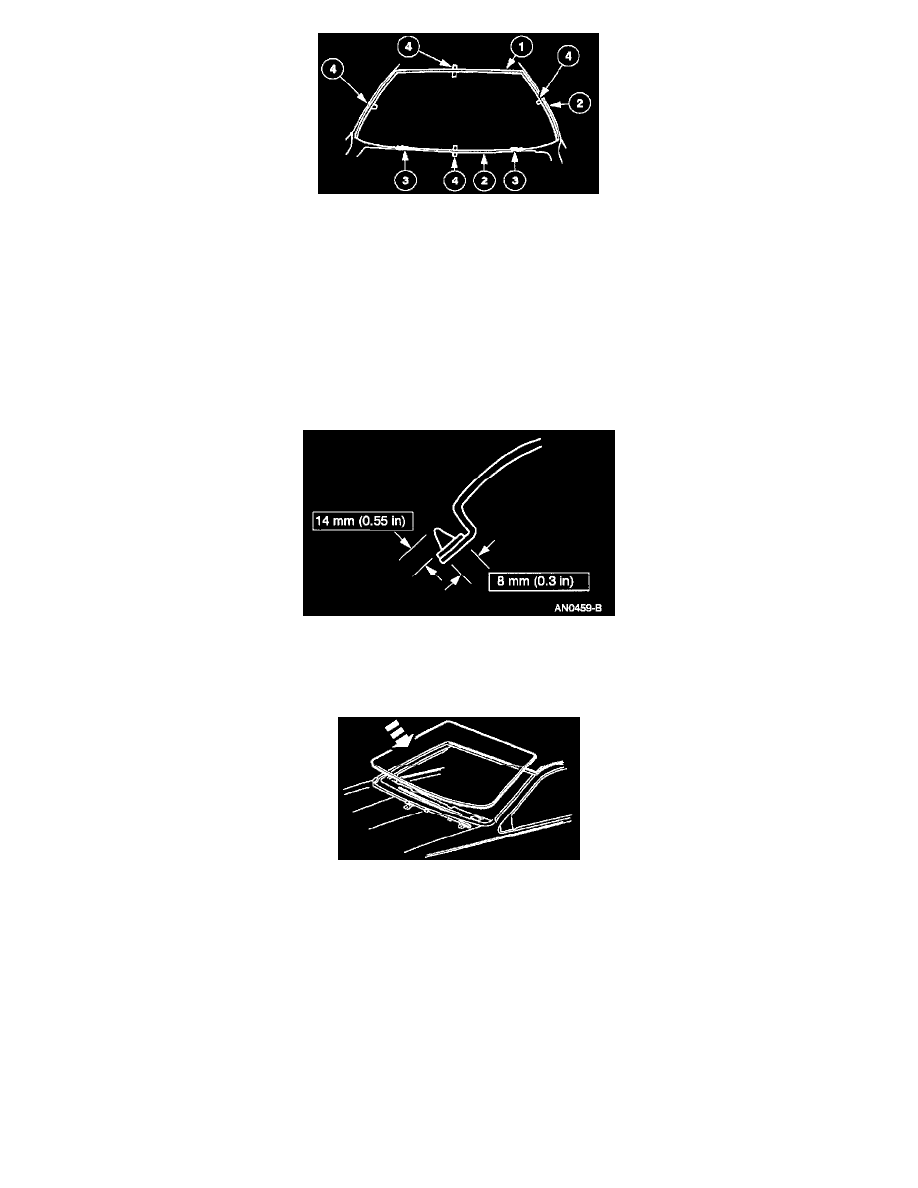
6. Align the windshield glass to the body.
1
Place the windshield glass to the body.
2
Center the windshield glass in the opening.
3
Adjust the windshield stops.
4
Mark the windshield glass alignment on the glass and on the body.
7. Apply the Urethane Glass Primer to the inside edges of the windshield glass.
NOTE
^
Remove the windshield glass and the moulding assemblies from the vehicle and place them on a work table.
^
The Urethane Glass Primer must be thoroughly mixed for even pigmentation.
^
The Urethane Glass Primer must cure for a minimum of five minutes before the windshield glass can be installed.
8. Apply the new Urethane Adhesive WSB-M2G316-B or equivalent in an even bead onto the existing urethane on the pinch weld. The applied bead
should be approximately 8 mm (0.3 inch) at the base and 14 mm (0.55 inch) high and triangular in shape.
NOTE: The windshield glass must be installed before the Urethane Adhesive skins over.
9. Install the windshield glass on the pinch weld. Align the windshield glass to the body using the alignment marks.
NOTE: Leave a door open slightly until the Urethane Adhesive has cured.
10. Install the windshield moulding assemblies.
11. Install the headliner.
12. Install the inside rear view mirror.
13. Install the cowl vent screens.
14. Install the windshield wiper arms and blades.
15. Inspect the windshield glass for air or water leaks through the urethane seal.