
Mark VI V8-302 5.0L (1982)
Ignition Switch: Service and Repair
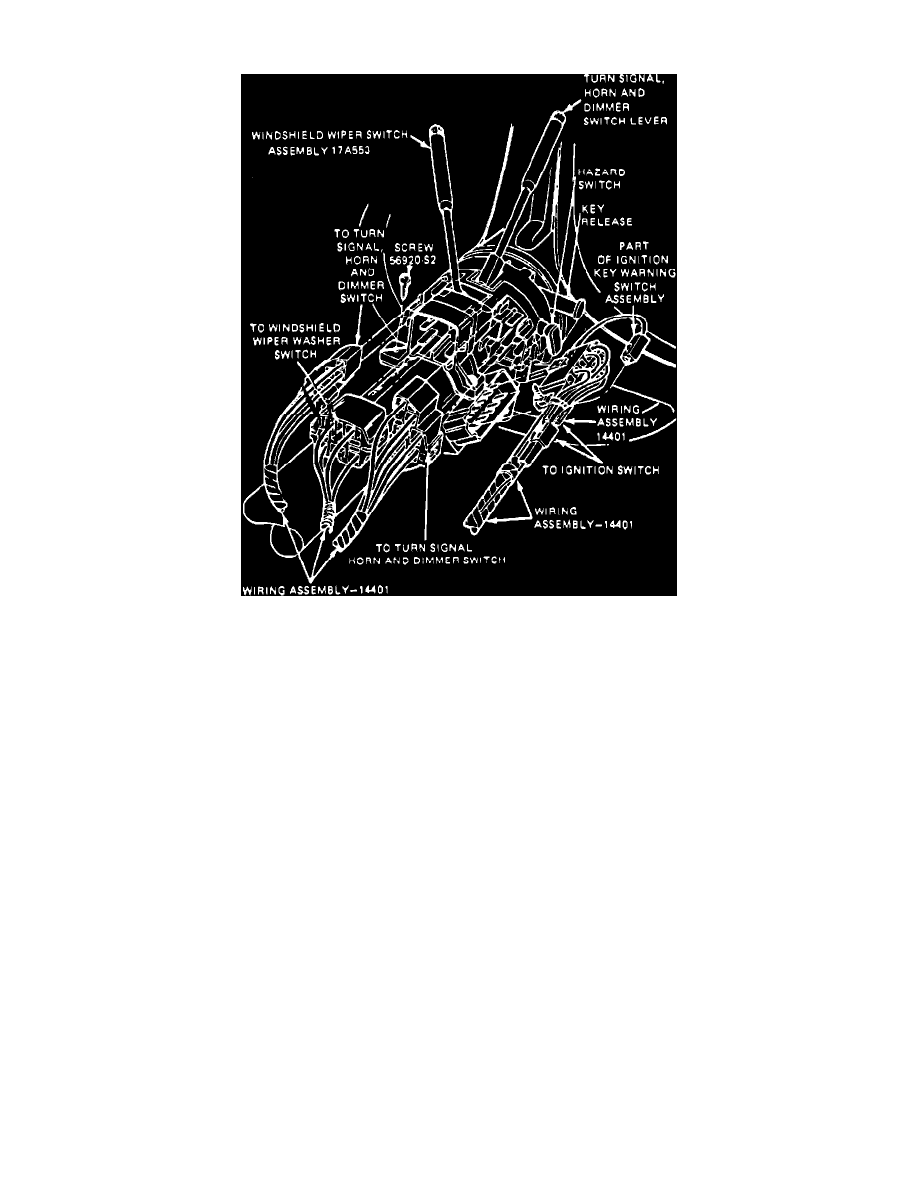
Fig. 1 Ignition switch installation
1.
Disconnect battery ground cable.
2.
For tilt wheel only, remove upper column extension shroud by unsnapping from retaining clip at 9 o'clock position.
3.
Remove steering column trim shrouds.
4.
Disconnect ignition switch electrical connector. Turn the lock cylinder to the ``On'' position.
5.
With a {1-8} inch drill, drill out the switch retaining bolt heads. Then, remove the bolts with an ``Easy Out'' or equivalent.
6.
Disengage ignition switch from actuator and remove from vehicle,
Fig. 1.
7.
Adjust ignition switch by sliding the carrier to the switch ``On'' position.
A replacement ignition switch will be pre-set in the ``On'' position.
8.
Ensure the lock cylinder is in approximately the ``On'' position and install the ignition switch onto the actuator pin.
9.
Install switch break-off head mounting bolts and tighten until heads shear.
10.
Reconnect switch electrical connector and battery ground cable. Check the ignition switch for proper operation in all switch positions. Be sure the
column is locked in the lock position.
11.
Reinstall shrouds.