
MKZ AWD V6-3.5L (2008)
3. Remove the battery tray.
4. Remove the bolt and disconnect the ground cable.
5. Disconnect the harness fastener and remove the 3 nuts and the PCM bracket.
6. CAUTION: Make sure that the aspirator tube is routed correctly and that the clamps are positioned so they do not make contact with
surrounding components or damage to the tube may occur.
Disconnect the vacuum hose/check valve assembly from the brake booster.
Automatic transmission vehicles
7. NOTE: It is not necessary to remove the fluid level indicator tube from the transmission. The tube can be positioned aside with only the bolt
removed.
Remove the transmission fluid level indicator tube bolt and position the tube aside.
^
To install, tighten to 8 Nm (71 lb-inch).
All vehicles
8. Remove the brake booster push rod pin and clip and disconnect the push rod from the brake pedal.
9. Remove the 4 nuts and the brake booster.
^
To install, tighten nuts to 23 Nm (17 lb-ft).
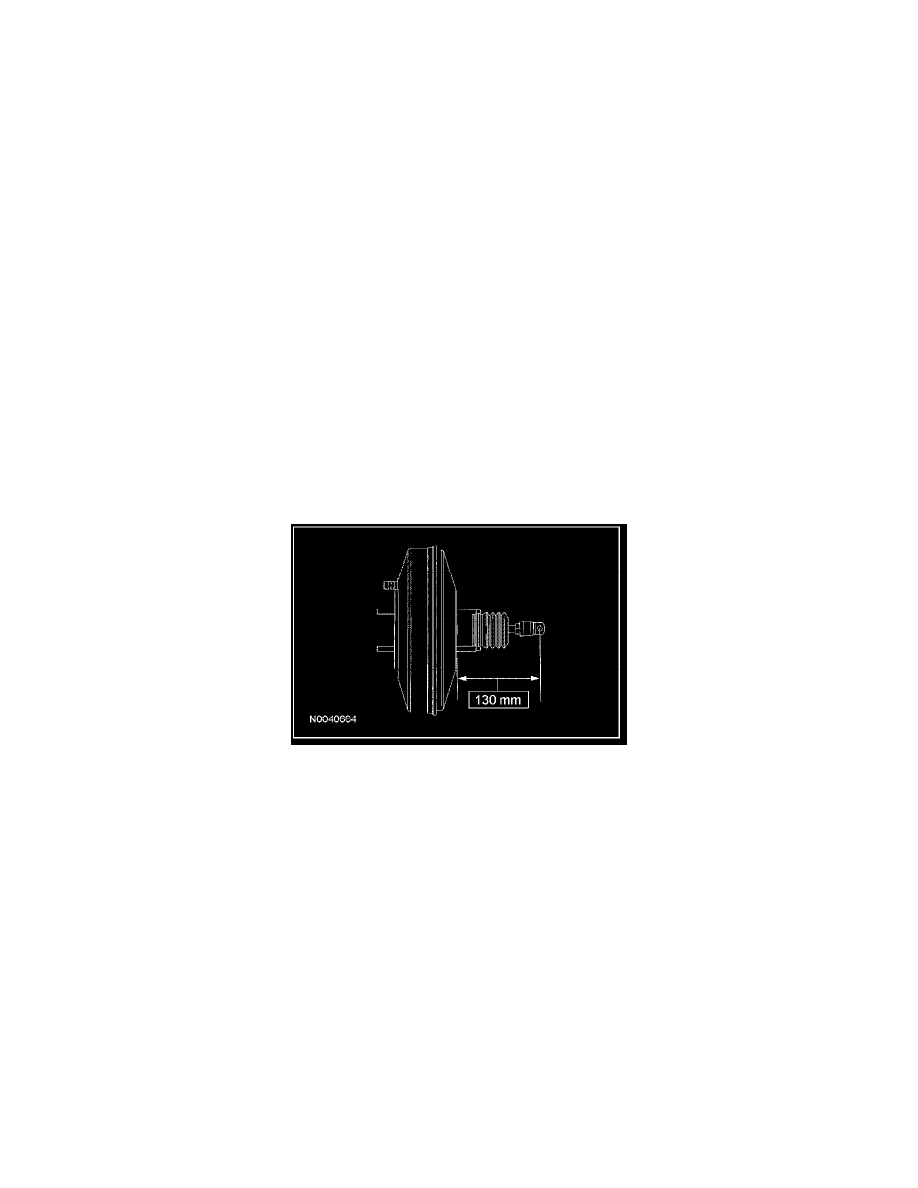
10. CAUTION: Prior to installation, make sure that the distance between the booster mating surface to the push rod centerpoint is as shown
or reduced brake assist may occur.
To install, reverse the removal procedure.
^
Check for correct booster push rod distance and adjust as necessary.
^
Tighten the booster push rod jam nut to 17 Nm (13 lb-ft).