
Zephyr V6-3.0L VIN 1 (2006)
Receiver Dryer: Service and Repair
RECEIVER DRIER
Removal and Installation
NOTE: Installation of a new A/C desiccant cartridge is not required when repairing the air conditioning system except when there is physical evidence
of system contamination from a failed A/C compressor or damage to the A/C desiccant cartridge.
1. Recover the refrigerant.
2. With the vehicle in NEUTRAL, position it on a hoist.
3. Remove the lower radiator air deflector.
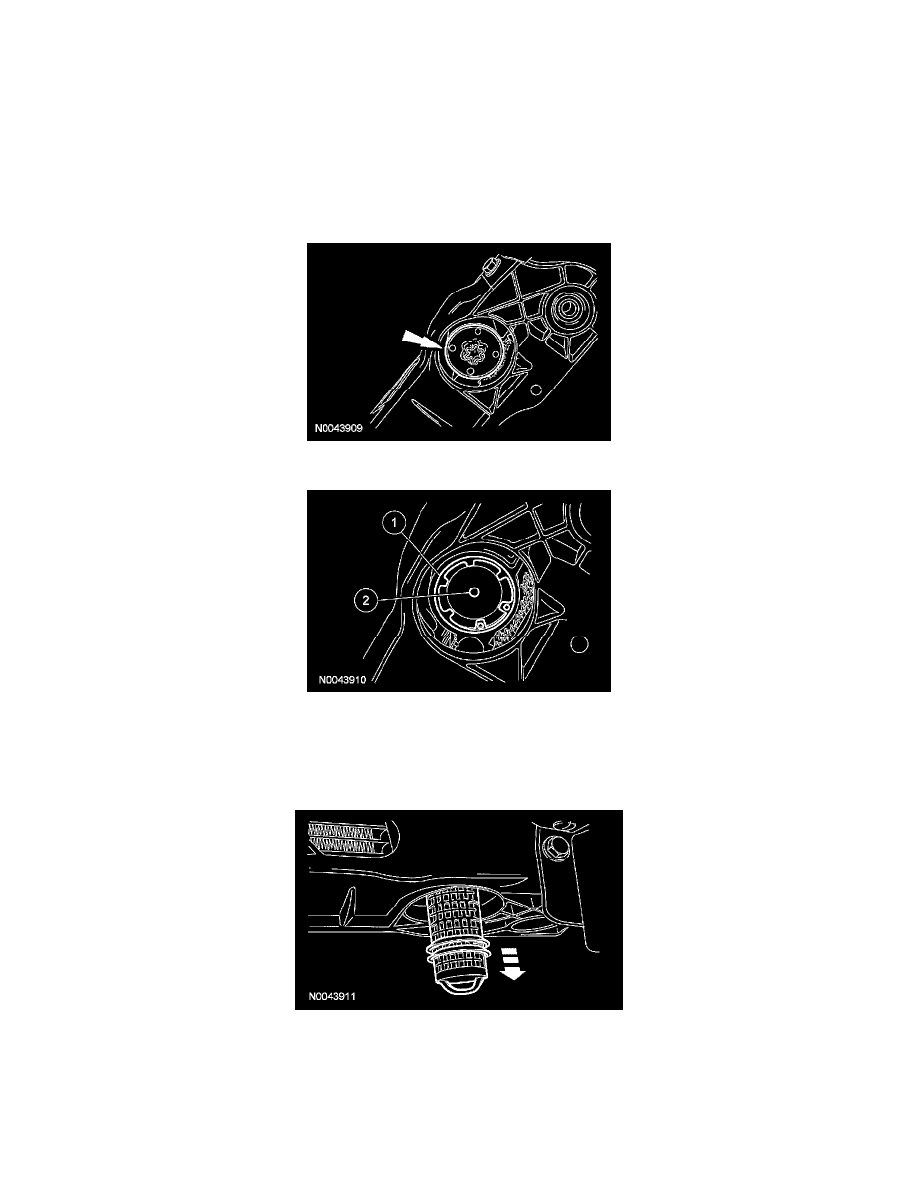
4. Unscrew and remove the plastic receiver/drier cap.
5. NOTE: If the receiver/drier plug is difficult to remove, open a refrigerant system fitting to relieve any vacuum created during refrigerant
recovery, and attempt to remove the plug again. Remove the receiver/drier plug.
1
Push the receiver/drier plug upwards and remove the snap ring.
2
Install the bolt included with the A/C desiccant cartridge service kit in the center of the receiver drier plug and remove the plug.
6. Using a suitable tool, grasp the A/C desiccant cartridge grab handle and remove the A/C desiccant cartridge.
7. To install, reverse the removal procedure.
-
Lubricate the receiver/drier plug O-ring seals using residual refrigerant oil from inside the receiver/drier.
-
Lubricate the refrigerant system with the correct amount of clean PAG oil.
8. Evacuate, leak test and charge the refrigerant system.