
Capri L4-1597cc 1.6L DOHC (1992)
Camshaft Gear/Sprocket: Service and Repair
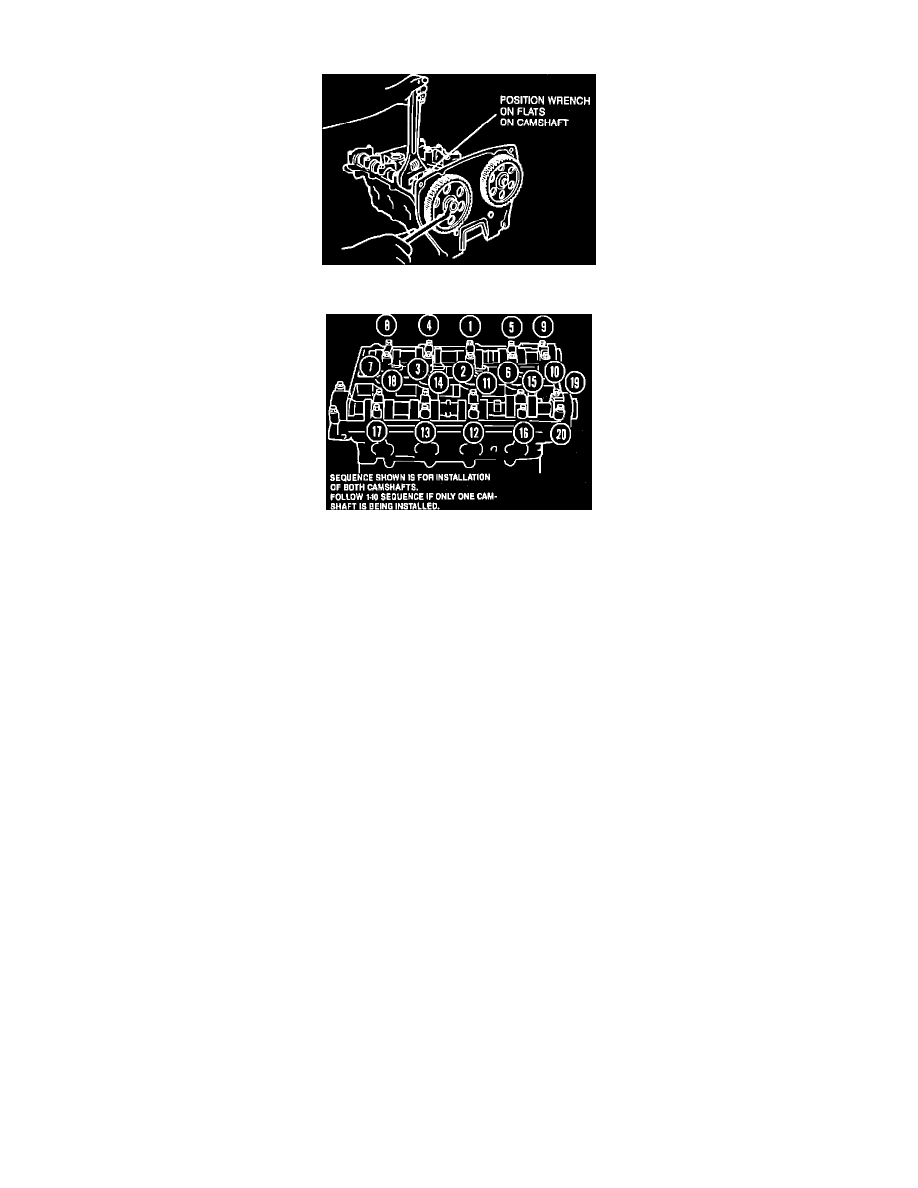
Fig. 6 Removing Camshaft Timing Belt Pulley
Fig. 7 Camshaft Bearing Cap Tightening Sequence
1.
Relieve fuel system pressure as outlined under MAINTENANCE PROCEDURES/FUEL SYSTEM PRESSURE RELIEF.
2.
Disconnect battery ground cable and drain cooling system.
3.
Disconnect air bypass hoses and remove intake air tube.
4.
Disconnect throttle cable and remove retaining bracket.
5.
Remove cylinder head cover.
6.
Remove timing belt as outlined under TIMING BELT & COVERS.
7.
Remove camshaft pulleys by holding camshaft with wrench then remove pulley retaining bolt, Fig. 6.
8.
Remove seal plate then camshaft seal using seal removing tool No. T78P-3504-N, or equivalent.
9.
If removing intake camshaft, remove distributor.
10.
Note cylinder number and rotation direction of each camshaft bearing cap, then remove camshaft bearing cap bolts alternator and gradually.
11.
Remove the camshaft.
12.
Reverse procedure to install noting the following:
a. Align timing marks on camshaft as outlined under TIMING BELT & COVERS.
b. Tighten bearing caps is sequence shown in Fig. 7 to specification.
c. Install new camshaft seals using seal installation tool Nos. T90P-6256-BH and T90P-6256-AH or equivalent.