
Capri L4-1597cc 1.6L DOHC (1992)
Air Bag(s) Arming and Disarming: Service and Repair
WARNING: To avoid accidental deployment and possible personal injury, the airbag system must be disarmed before servicing or replacing
any system components. On models with passenger side air-bag, both modules must be disconnected to properly disarm system.
NOTE: The electrical circuit necessary for system deployment is powered directly from the battery and a backup power supply. A back-up power
supply is included in the system to provide airbag deployment in the event that the battery or battery cables are damaged in an accident before the
sensors can close. The power supply is a capacitor that will retain a charge for a short period of time, after the battery ground cable is disconnected.
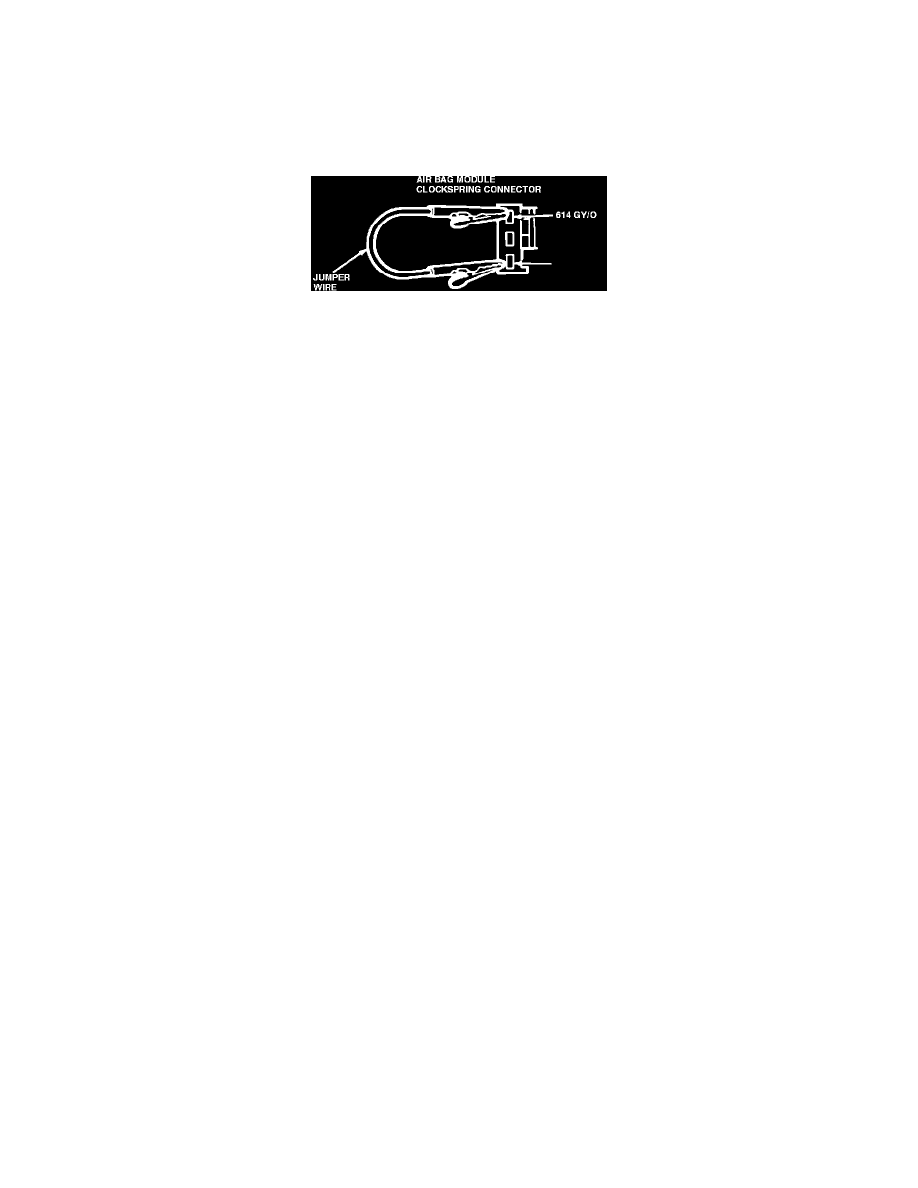
Fig. 1 Jumper Wire Connections
DEACTIVATION
1. Disconnect battery ground cable and isolate cable end with electrical tape.
2. Open glove compartment, then lower the door fully by depressing the stops.
3. Detach the battery back-up which is a blue rectangular box on the outer lefthand side of the glove compartment, then disconnect electrical
connector.
4. Remove four nut and washer assemblies retaining the airbag to the steering wheel.
5. Disconnect the airbag connector from the clockspring.
6. Attach a jumper wire between the gray/orange (GY/O) wire terminal and pink (PK) wire terminal of the clockspring connector.
7. On models with passenger side airbag, open glove compartment and rotate completely down past stops. Carefully disconnect passenger airbag
connector.
8. On models with passenger side airbag, install a jumper wire between the airbag terminals on clockspring connector.
9. Connect battery ground cable and backup power supply, if necessary for service procedures.
PRE-ACTIVATION CHECK LIST
1. Ensure safing sensor and all crash sensors are connected and properly mounted to vehicle.
2. Connect gray 3-way electrical connector at base of steering column.
3. Ensure airbag system diagnostic monitor is properly connected.
ACTIVATION
1. Disconnect battery ground cable and backup power supply.
2. Remove jumper wire from airbag terminals.
3. Connect airbag module to clockspring.
4. Position airbag on steering wheel and secure with four nut and washer assemblies. Tighten nuts to 17-26 in lb.
5. On models with passenger airbag, connect airbag connector and close glove compartment.
6. Connect battery ground cable and backup power supply, then verify system operation.
SYSTEM OPERATIONAL VERIFICATION
1. Turn ignition switch from OFF to RUN position and visually monitor airbag indicator.
2. Airbag indicator lamp will illuminate continuously for approximately six seconds, then turn off.
3. If an airbag system malfunction is present, the indicator will either fail to illuminate, remain lit continuously or flash.
4. Indicator flashing may not occur until approximately 30 seconds after the ignition switch has been turned to RUN.
5. If an airbag system malfunction exists and the indicator is inoperative, an audible alarm of five sets of five beeps will sound. This indicates that the
airbag indicator needs to be serviced before any airbag system diagnosis may be completed.