
Cougar/XR7 L4-140 2.3L SOHC Turbo (1983)
20.
Working in passenger compartment, remove screws attaching heater case support bracket and air inlet duct support bracket to cowl top panel.
21.
Remove nut retaining bracket at left end of heater case to dash panel and nut securing bracket below case to dash panel.
22.
Pull heater case away from dash panel to gain access to heater core access cover attaching screws.
DISASSEMBLE THE HEATER CASE:
23.
Remove heater core access cover attaching screws and the cover.
24.
Remove heater core and seals from heater case, Fig. 7.
25.
Remove the 2 seals from heater core tubes.
26.
Reverse procedure to install.
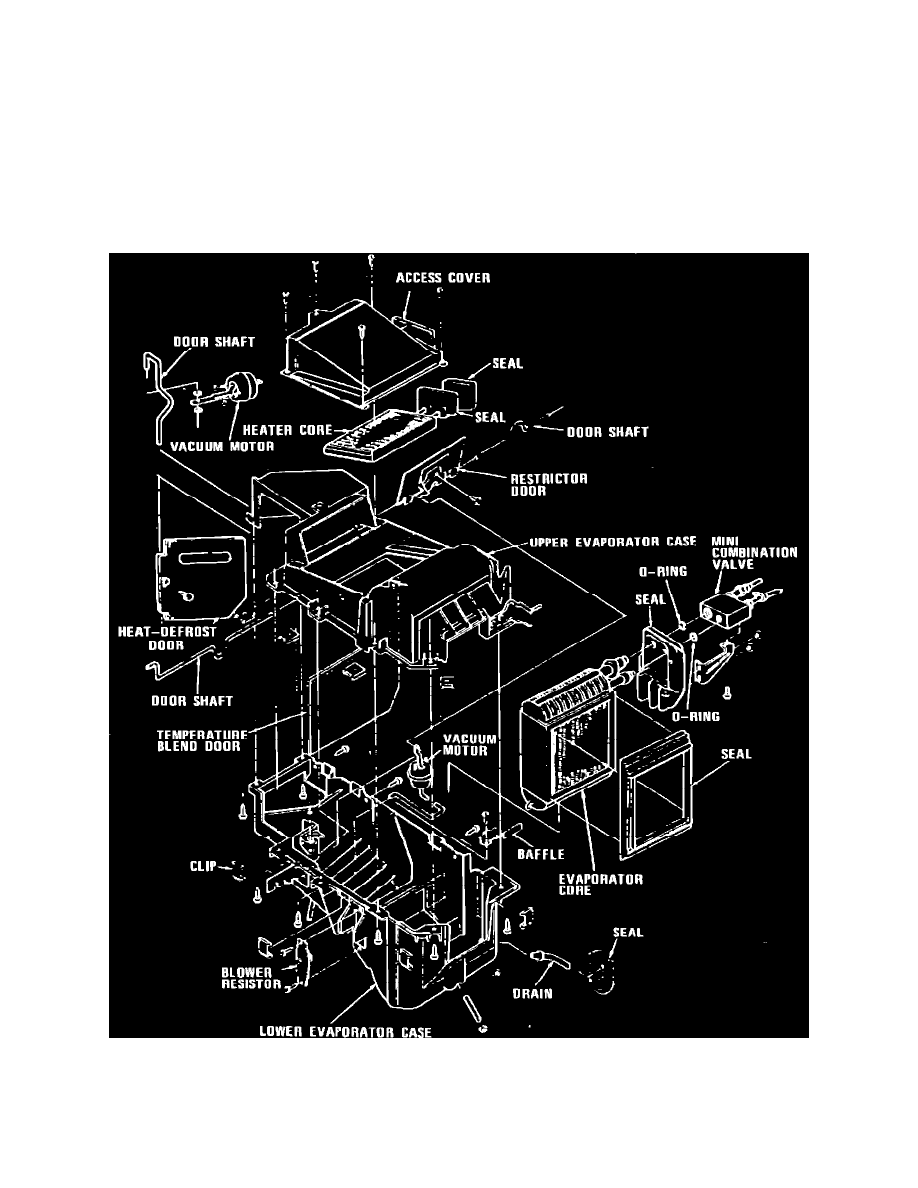
With Air Conditioning
Fig. 8 Heater core with A/C. 1982 Cougar XR-7, 1982 Granada, 1982-83 Fairmont & Zephyr, 1982-88 Thunderbird, 1983-88 Cougar & 1983-86 LTD & Marquis
REMOVE THE INSTRUMENT PANEL:
1.
Perform steps 1 through 17 as described under ``Heater Core, Replace, Less Air Conditioning.''