
Cougar/XR7 V8-4.6L VIN W (1997)
Hose/Line HVAC: Service and Repair
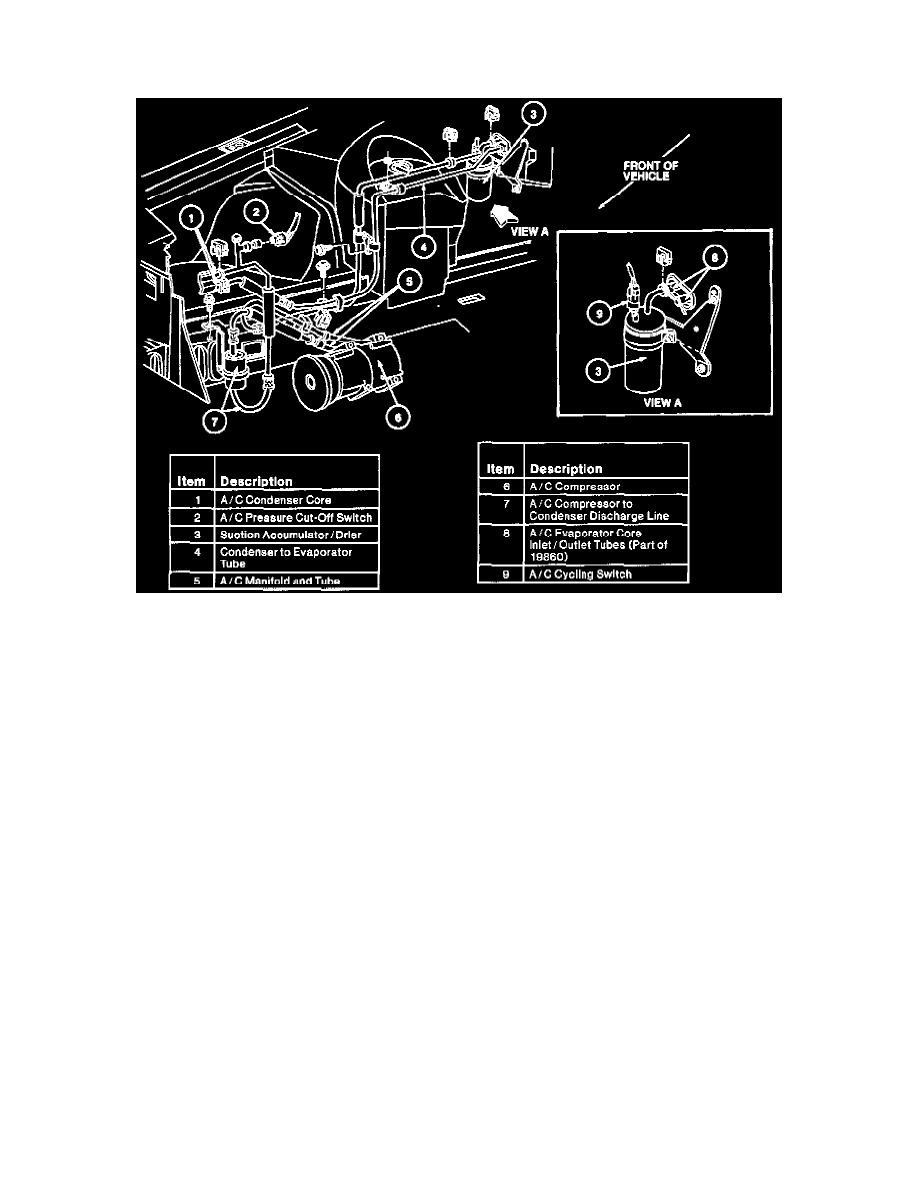
A/C Liquid Hose/Line
NOTE: Whenever a refrigerant line is replaced, it will be necessary to replace the suction accumulator/drier.
Removal
1. To remove and install condenser to evaporator tube with integral A/C evaporator core orifice, discharge refrigerant from A/C system. Observe all
safety precautions.
2. Loosen clamp from air cleaner to intake tube and position aside.
3. Remove nut retaining condenser to evaporator tube bracket on strut tower.
4. Disconnect condenser to evaporator tube at A/C condenser core outlet connection using procedure and one of spring lock coupling tools shown in
the Spring Lock Coupling illustration.
5. Disconnect A/C evaporator core inlet connection using procedure and one of spring lock coupling tools shown in the Spring Lock Coupling
illustration. Remove condenser to evaporator tube from vehicle.
Installation
1. Route new condenser to evaporator tube and integral A/C evaporator core orifice with protective caps installed.
2. Remove protective caps and connect new condenser to evaporator tube into system using new O-ring seals lubricated with clean refrigerant oil.
Connect spring lock coupling as shown in the Spring Lock Coupling illustration.
3. Install air cleaner to intake tube.
4. Leak-test, evacuate and charge refrigerant system. Observe all safety precautions.