
Grand Marquis V8-4.6L Flex Fuel (2010)
Timing Chain: Diagrams
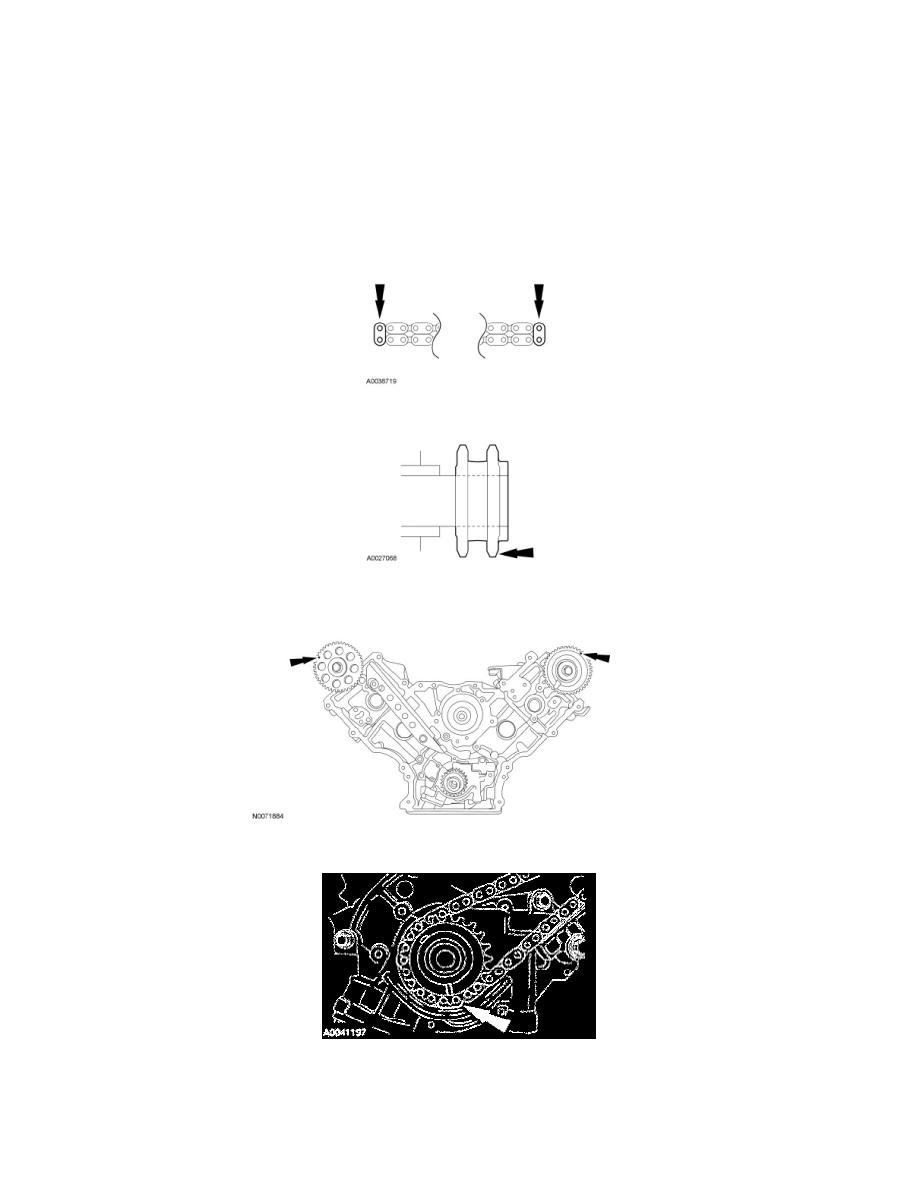
Timing Chain Alignment
NOTICE: Since the engine is not free-wheeling, timing procedures must be followed exactly or piston and valve damage can occur.
WARNING: Before servicing a vehicle equipped with a fire suppression system, depower the system by following the procedure. Failure to
follow the instructions may result in serious personal injury.
NOTICE: Timing chain procedure must be followed exactly or damage to valves and pistons will result.
If the colored links are not visible, mark one link on one end and one link on the other end, and use as timing marks.
Install the crankshaft sprocket, making sure the flange faces forward.
Rotate the RH camshaft sprocket until the timing mark is approximately at the 11 o'clock position. Rotate the LH camshaft sprocket until the timing mark
is approximately at the 1 o'clock position.
Position the LH (inner) timing chain on the crankshaft sprocket, aligning the colored (marked) link with the timing mark on the sprocket.
Install the LH timing chain on the sprocket, aligning the colored (marked) link with the timing marks on the sprocket.