
Grand Marquis V8-4.6L Flex Fuel (2010)
Body Control Module: Service and Repair
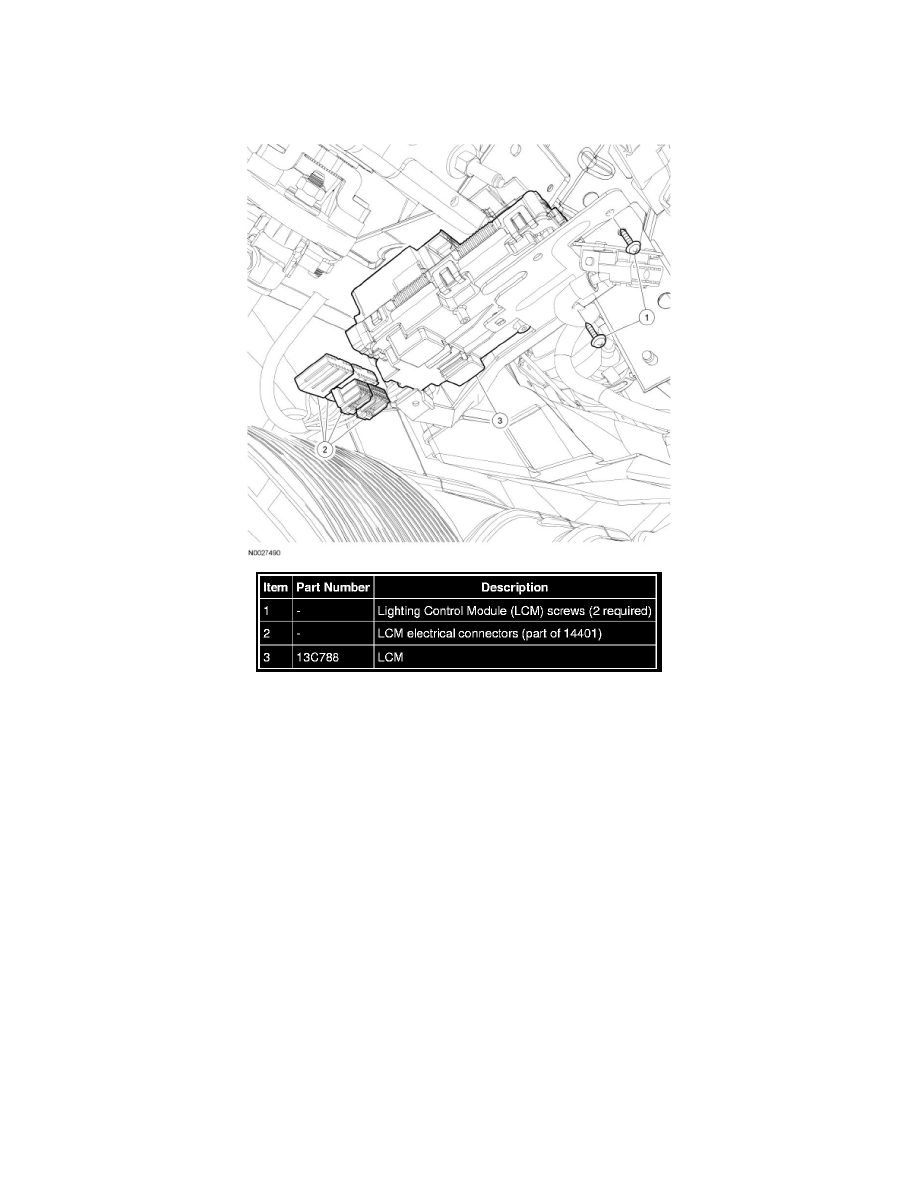
Lighting Control Module (LCM)
Lighting Control Module (LCM)
Removal and Installation
NOTE: Prior to removal of the module, it is necessary to upload module configuration information to a scan tool. This information needs to be
downloaded into the new module once installed. For additional information, refer to Information Bus.
1. NOTE: This step is only necessary if a new Lighting Control Module (LCM) is being installed.
NOTE: A new LCM is delivered in a manufacturing mode with pre-set DTC B2477. This DTC clears when the module has been successfully
configured (or Programmable Module Installation (PMI) is carried out). DTC B2477 may need to be cleared after a successful configuration (or
PMI).
Upload the module configuration information from the LCM into the scan tool. For additional information, refer to Information Bus.
2. Remove the pin-type retainers and position the LH instrument panel lower insulator aside.
3. Disconnect the courtesy lamp and remove the LH instrument panel lower insulator.
4. Remove the accelerator pedal. For additional information, refer to Fuel Delivery and Air Induction.
5. Remove the 2 screws and position the LCM aside.
6. Release the locking tabs, disconnect the electrical connectors and remove the LCM.
7. NOTE: If a new module is installed, it is necessary to download the module configuration information from the scan tool into the new module.
For additional information, refer to Information Bus.
To install, reverse the removal procedure.