
Grand Marquis V8-4.6L Flex Fuel (2010)
Suspension Control Module: Service and Repair
Vehicle Dynamics Module (VDM)
Removal and Installation
WARNING: Shut off the electrical power to the air suspension system prior to hoisting or jacking an air suspension equipped vehicle. Failure
to do so may result in unexpected inflation or deflation of the air springs, which may result in shifting of the vehicle during these operations.
Failure to follow this instruction may result in serious personal injury.
NOTICE: Electronic modules are sensitive to static electrical charges. If exposed to these charges, damage may result.
1. NOTE: This step is necessary only if a new VDM module is being installed.
Connect the scan tool and upload the module configuration information from the Vehicle Dynamics Module (VDM). For additional information,
refer to Information Bus
2. Turn the air suspension service switch to the OFF position.
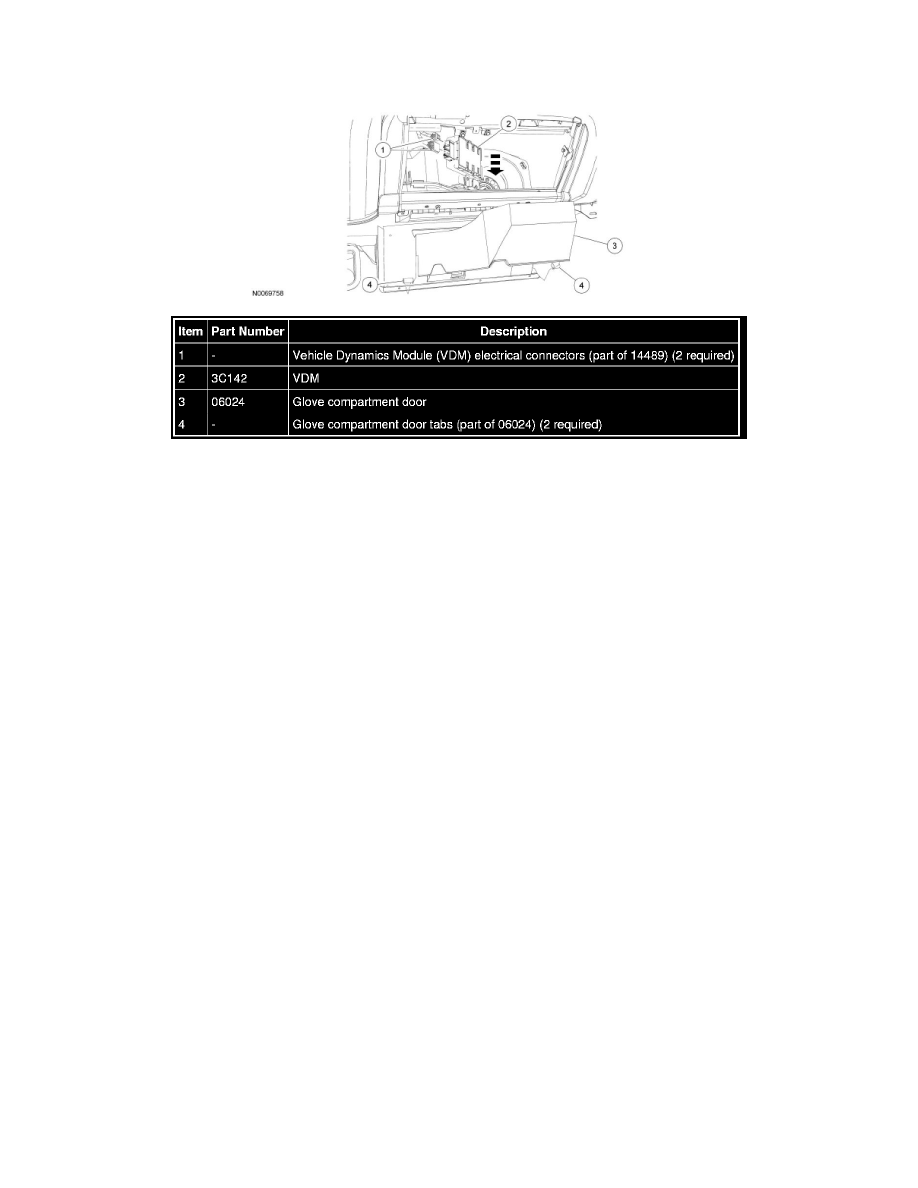
3. While pushing in on the 2 glove compartment door tabs, position the glove compartment downward.
4. Remove the VDM in the following sequence.
1. Disconnect the 2 electrical connectors.
2. Disconnect the module from the bracket.
3. Remove the VDM.
5. To install, reverse the removal procedure.
-
When installing a new VDM, it must be configured (using vehicle as-built data or module configuration information retrieved earlier in this
procedure). For additional information on configuration, refer to Programmable Module Installation (PMI) in Information Bus See:
Powertrain Management/Computers and Control Systems/Information Bus/Testing and Inspection/Programming and Relearning