
Grand Marquis V8-4.6L SOHC VIN 6 (1996)
Air Bag Control Module: Service and Repair
Removal
1. Record pre-set radio frequencies for reprogramming following completion of service procedures.
WARNING: THE BACKUP POWER SUPPLY ENERGY MUST BE DEPLETED BEFORE ANY AIR BAG COMPONENT SERVICE
IS PERFORMED. TO DEPLETE BACKUP POWER SUPPLY ENERGY, DISCONNECT THE BATTERY GROUND CABLE AND
WAIT ONE MINUTE TO AVOID ACCIDENTAL DEPLOYMENT AND POSSIBLE PERSONAL INJURY.
2. Disconnect battery ground cable. Wait one minute for backup power supply energy to be depleted.
WARNING: THE ELECTRICAL CIRCUIT NECESSARY FOR SYSTEM DEPLOYMENT IS POWERED DIRECTLY FROM THE
BATTERY. TO AVOID ACCIDENTAL DEPLOYMENT AND POSSIBLE PERSONAL INJURY, THE BATTERY GROUND CABLE
MUST BE DISCONNECTED PRIOR TO SERVICING OR REPLACING ANY SYSTEM COMPONENTS.
3. Remove RH cowl side trim panel.
4. Open glove compartment door and depress sides to release retaining tabs and allow glove compartment door to drop down.
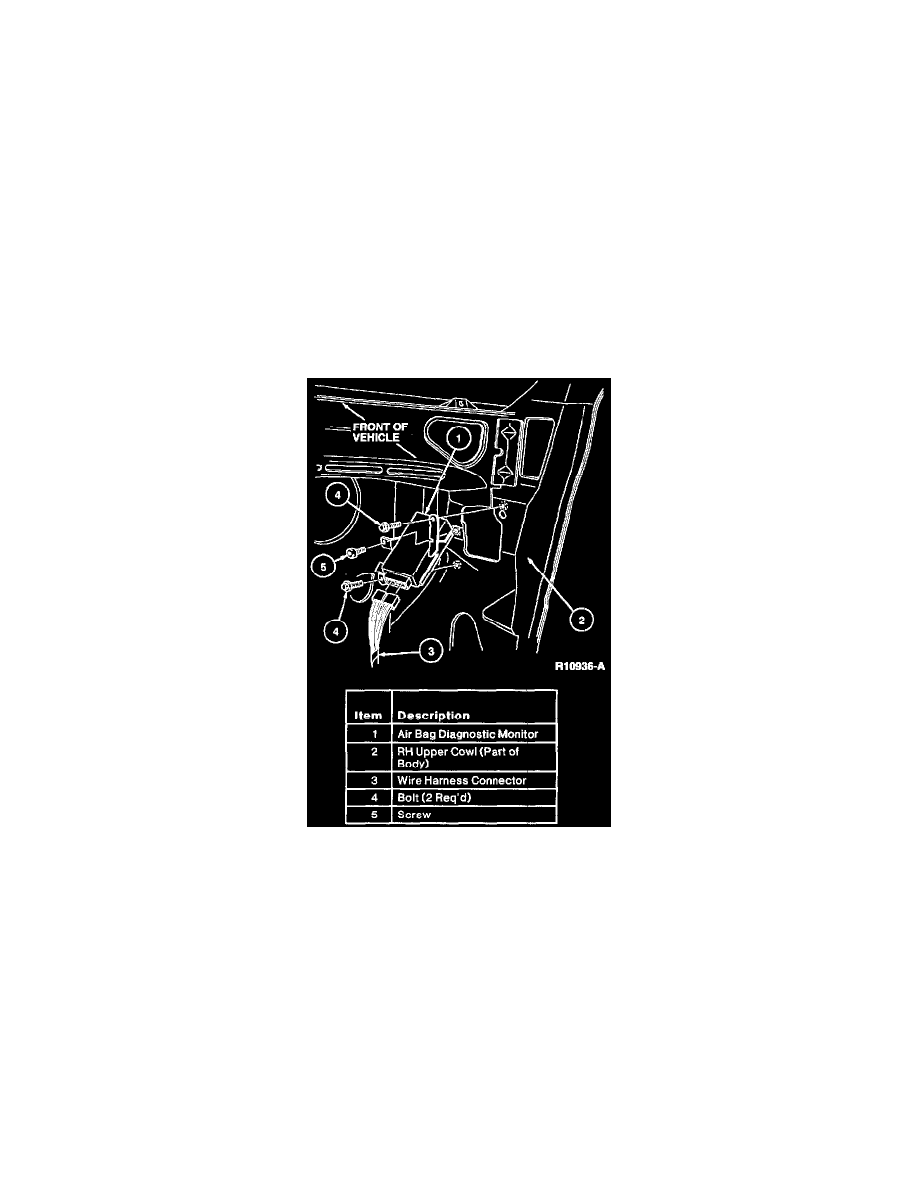
5. Move RH cowl side insulation padding to improve access to air bag diagnostic monitor.
6. Disconnect air bag diagnostic monitor electrical wiring connectors.
7. Remove screws retaining air bag diagnostic monitor to the RH upper cowl and remove air bag diagnostic monitor from vehicle.
Installation
1. In stall air bag diagnostic monitor on the RH upper cow and secure with three retaining screws.
2. Connect electrical wiring connectors to the air bag diagnostic monitor.
3. Reposition RH cowl side insulation padding.
4. Close glove compartment by pushing in on retaining tabs.
5. Install RH cowl side trim panel.
6. Reconnect battery ground cable.
7. Prove out air bag system.
8. Reprogram radio frequencies and set clock.