
Mariner 2WD V6-3.0L VIN 1 (2006)
Trunk / Liftgate Latch: Service and Repair
Liftgate Latch
LIFTGATE LATCH
Removal and Installation
1. Remove the liftgate trim panel.
2. Disconnect the liftgate ajar switch electrical connector.
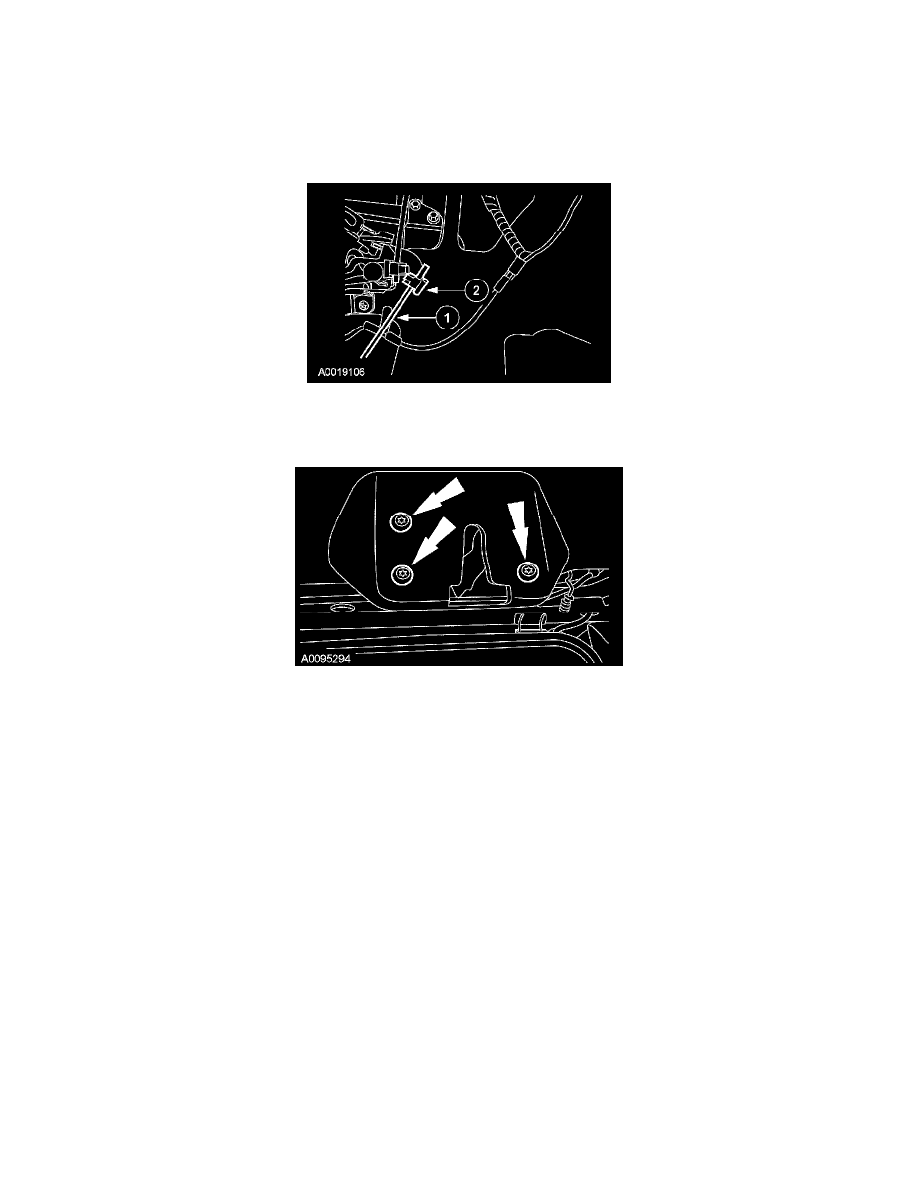
3. Disconnect the liftgate latch actuating rod.
1
Open the clip.
2
Disconnect the actuating rod.
4. Remove and discard the 3 liftgate latch bolts.
-
To install, tighten to:
-
8 Nm (71 lb-in)(vehicles built through 10/2005)
-
12 Nm (9 lb-ft)(vehicles built after 10/2005)
5. Remove the liftgate latch.
6. To install, reverse the removal procedure.
-
Lubricate the liftgate latch to striker surfaces with Krytox grease after installation.