
Mariner 4WD L4-2.5L Hybrid (2009)
Expansion Block/Orifice Tube: Service and Repair
Auxiliary Climate Control - Hybrid
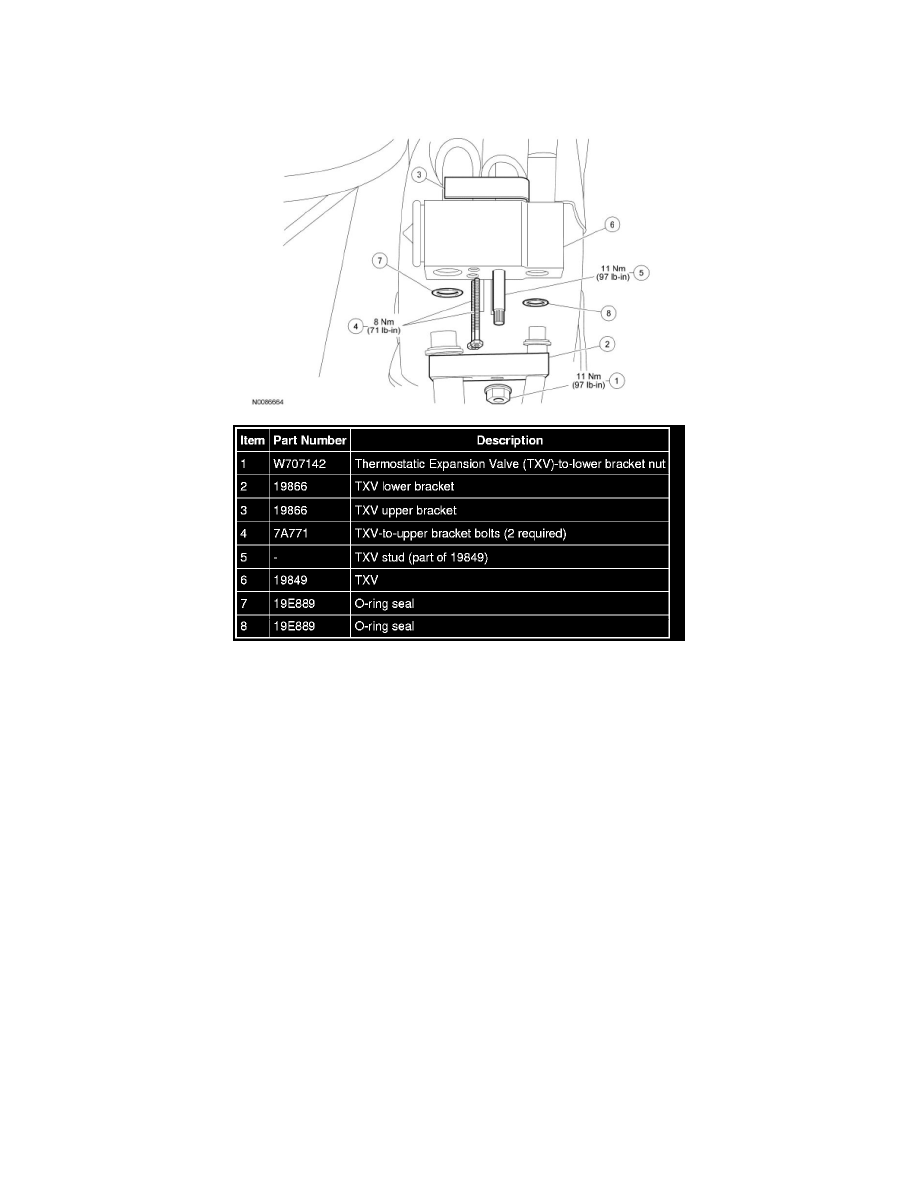
Thermostatic Expansion Valve
Removal and Installation
NOTE: Installation of a new receiver/drier is not required when repairing the A/C system, except when there is physical evidence of contamination from
a failed A/C compressor or damage to the receiver/drier.
NOTE: The auxiliary Thermostatic Expansion Valve (TXV) is not interchangeable with the front (main) system TXV.
1. Remove the auxiliary climate control housing. For additional information, refer to Auxiliary Climate Control Housing See: Housing Assembly
HVAC/Service and Repair/Removal and Replacement/Auxiliary Climate Control Housing.
2. Remove the TXV-to-lower bracket nut and disconnect the lower TXV fittings.
-
Discard the O-ring seals.
-
To install, tighten to 11 Nm (97 lb-in).
3. NOTE: The upper TXV fitting is equipped with 2 O-ring seals not shown in graphic.
Remove the 2 TXV-to-upper bracket bolts and remove the TXV.
-
Discard the O-ring seals.
-
To install, tighten to 8 Nm (71 lb-in).
4. Remove the TXV.
5. Remove the TXV stud.
-
To install, tighten to 11 Nm (97 lb-in).
6. To install, reverse the removal procedure.
-
Install new O-ring seals.