
Marquis V6-232 3.8L VIN 3 TBI (1985)
1.
Install two (2) new studs (N802378-S2) into the threaded holes in the front of the left cylinder head (Figure 2) replacing bolts (N801179-S2)
removed in Step 9. Tighten the studs to the stud's center shoulder.
2.
Position new bracket (E5DZ-6F036-A) onto the two
(2)
new studs (N802378-S2) (Figure 2).
3.
Install new bracket (E5DZ-2882-B) onto the new studs and over bracket (E5DZ-6F036-A) and install two (2) new nuts (N802827-S2) (Figure 2).
Do not tighten.
NOTE:
For LTD/Marquis vehicles with an engine damper assembly, position the engine damper mounting bracket assembly (E5DZ-6F037-A) to
bracket (E5DZ- 6F036-A) and install two (2) retaining bolts (N801179-S100). Do not tighten. Then, connect the outboard end of damper
bracket to the engine damper shock assembly (Figure 2). Install and tighten the bracket-to-shock retaining nut.
4.
Position the large plate bracket assembly (19N- 586) into place on the three (3) existing water pump mounting studs and install the three (3)
retaining nuts (N620482-S2) (Figure 2). Do not tighten.
5.
Position bracket (19D625) between front bracket assembly (19N586) and bracket (E5SZ-2882-B). Then, align the pivot bolt holes and install
pivot bolt (N802917-S2) through these three (3) brackets only.
6.
Position the embossed (raised hole) end of new rear bracket (E5SZ-2882-C) between bracket (E5DZ-6F036-A) and bracket (E5SZ-2882-B) and
install the pivot bolt through the rear brace into the threaded hole in the engine head. Do not tighten.
7.
Tighten the two (2) nuts retaining the lower rear portion of bracket (E5SZ-2882-A) to the engine head. Torque to 30-45 ft.lbs.
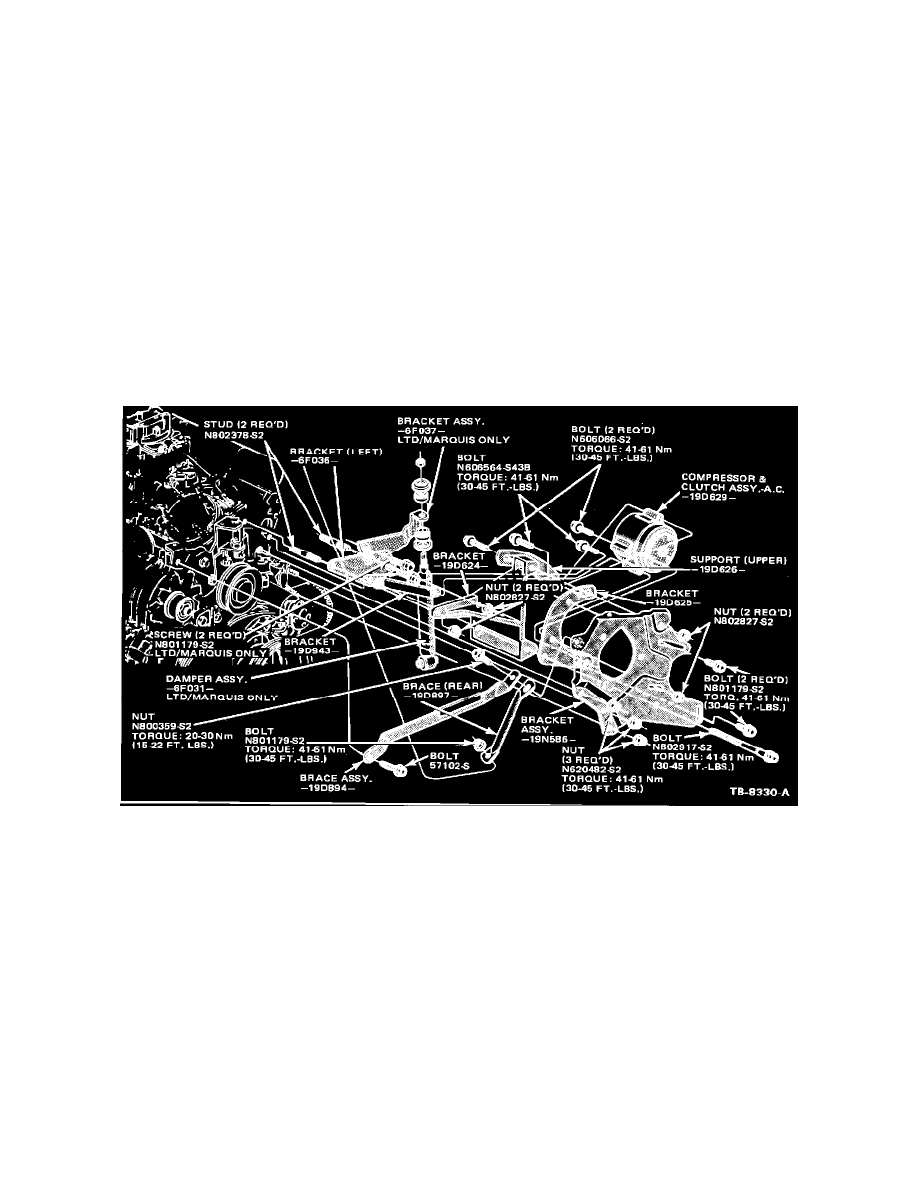
Figure 2 - A/C COMPRESSOR (HR980) BRACKETRY - 3.8L ENGINE
8.
Remove compressor retaining bolt (N606663-S2) from the bottom mounting ear of the compressor and discard, then install retaining bolt
(N606564- S43B) (Figure 2). Install the new bolt through new bracket (E5SZ-2882-C), the compressor bottom mounting ear and existing bracket
(19D625). Do not tighten.
9.
Remove compressor retaining bolt (N606663- S43B) from the top mounting ear of the A/C compressor and discard. Position new upper support
(E5SZ-2889-B) into place and install retaining bolt (N606564-S2). Install the new bolt through new upper support (E5SZ-2889-B) the
compressor's top mounting ear and bracket (19D625) (Figure 2).
10.
Install new bolt (N606066-S2) through the adjusting slot of upper support (E5SZ-2889-B) and into bracket (E5SZ-2882-B) and bracket assembly
(19N- 586). Install new nut (N80827-S2) onto the new bolt (N606066-S2) but do not tighten.