
Milan FWD V6-3.0L (2010)
Antenna Cable: Service and Repair
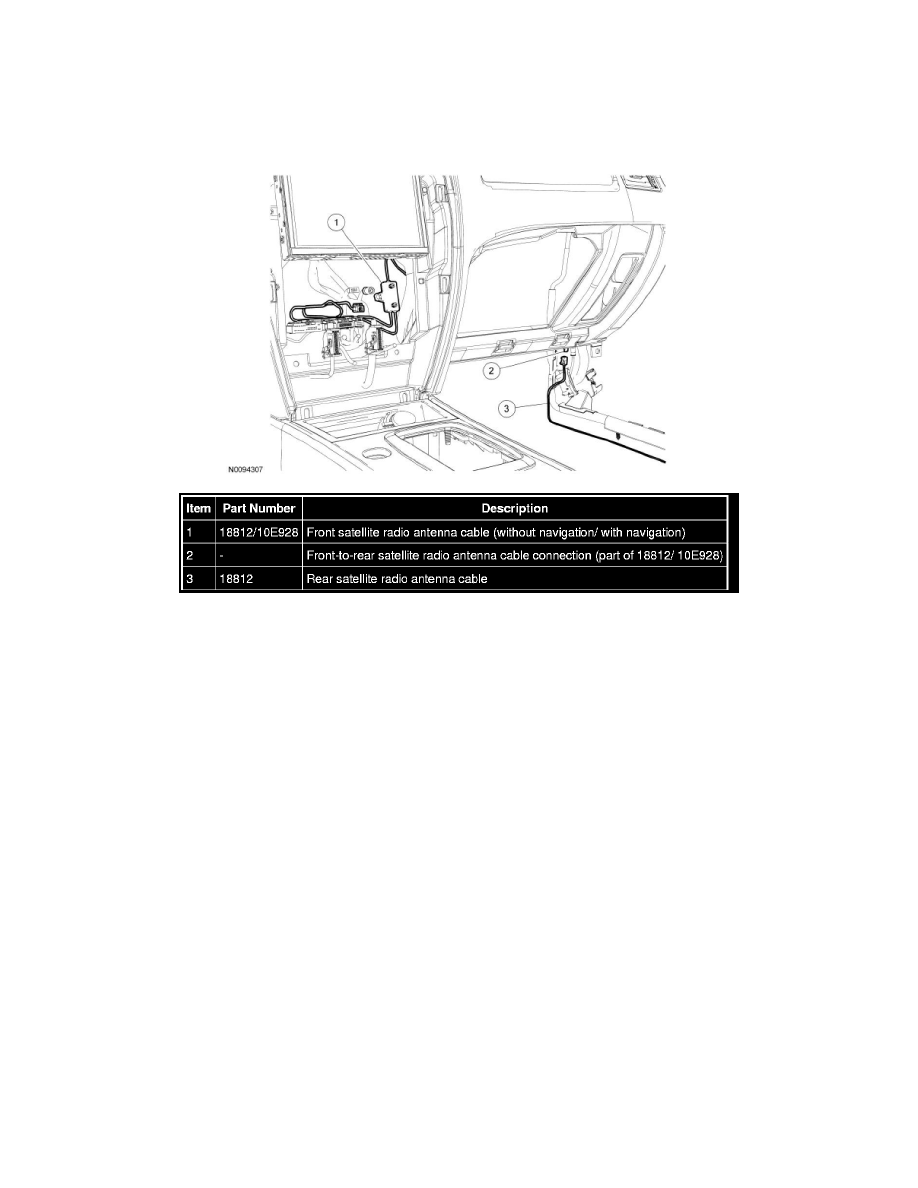
Antenna Cable - Satellite Radio
Antenna Cable - Satellite Radio
NOTE: The front satellite radio antenna cable with navigation is shown.
Removal
NOTE: Both the front and rear satellite radio antenna cables are part of the vehicle wiring harness. Because the cables cannot be removed from the
harness, this procedure applies to replacement of the cables only.
NOTE: For vehicles with navigation, a splitter is built-in to the front satellite radio antenna cable to split the satellite radio and Global Positioning
System (GPS) signals.
Front cable
1. Remove the Audio Control Module (ACM). For additional information, refer to Audio Control Module (ACM) - Fusion, Milan See: Cellular
Phone/Communications Control Module/Service and Repair/Removal and Replacement/Audio Control Module (ACM) or Audio Control Module
(ACM) - MKZ See: Cellular Phone/Communications Control Module/Service and Repair/Removal and Replacement/Audio Control Module
(ACM).
Rear cable
2. Remove the RH front and RH rear sill panels by pulling straight upward.
3. Remove the LH and RH assist handles, and the LH and RH C-pillar trim panels.
4. Loosen the antenna cable bolt and disconnect the cable from the antenna.
5. Remove the enable circuit.
1. Disconnect C237 at the RH kick panel.
2. Remove the pin retainer from the inside of the male side of the connector by pulling straight out with pliers.
3. Using a suitable tool such as a straight pick, release the locking tab and remove the enable circuit CME44 (BU) from C237-25.