
Milan FWD V6-3.0L (2010)
NOTE: RH shown, LH similar.
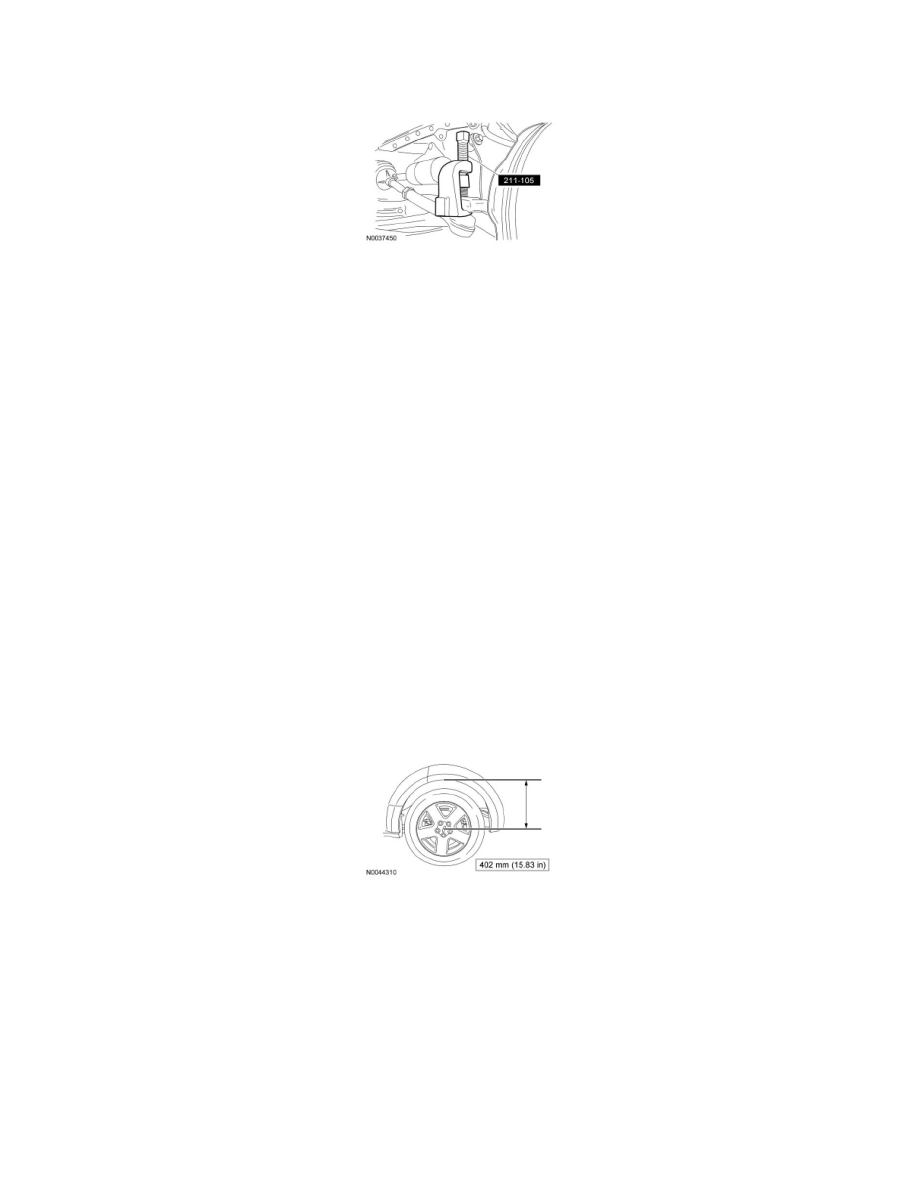
Using the Tie-Rod End Remover, separate the 2 tie-rod ends from the wheel knuckles.
12. Remove and discard the 2 catalytic converter-to-exhaust flexible pipe nuts and separate the exhaust flexible pipe.
-
To install, tighten the new nuts to 40 Nm (30 lb-ft).
All-Wheel Drive (AWD) vehicles
13. Index the rear driveshaft-to-Power Transfer Unit (PTU).
-
Remove and discard the 4 bolts and position the driveshaft aside.
-
To install, tighten the new bolts to 70 Nm (52 lb-ft).
All vehicles
14. Remove RH steering gear-to-subframe bolt.
-
To install, tighten to 107 Nm (79 lb-ft).
15. Remove the 2 LH steering gear-to-subframe bolts and position the steering gear to access the stabilizer bar LH bracket front nut.
-
To install, tighten to 107 Nm (79 lb-ft).
16. Remove and discard the 4 stabilizer bar bracket nuts and remove the 2 stabilizer bar brackets.
-
To install, tighten the new bracket nuts to 48 Nm (35 lb-ft).
17. Remove the 2 stabilizer bar bushings.
18. NOTICE: Before tightening the stabilizer bar bracket nuts, the suspension must be at the bushing fastener tightening position. Use a
suitable jack to raise the suspension until the distance between the center of the hub and the lip of the fender is equal to 402 mm (15.83
in). This will prevent incorrect clamp load and bushing damage.
To install, reverse the removal procedure.