
Montego AWD V6-3.0L VIN 1 (2005)
Seat Belt Buckle: Service and Repair
Safety Belt Buckle - Third Row, 50 Percent
SAFETY BELT BUCKLE - THIRD ROW, 50 PERCENT
Removal and Installation
WARNING: All safety belt assemblies including retractors, buckles, front seat belt buckle support assemblies (slide bar), if equipped, shoulder
belt height adjusters, if equipped, child safety seat tether bracket assemblies, if equipped, and attaching hardware should be inspected after any
collision. All belt assemblies should be replaced unless a qualified technician finds the assemblies show no damage and operate properly. Belt
assemblies not in use during a collision should also be inspected and replaced if either damage or improper operation is noted.
The Automatic Locking Retractor (ALR) feature of the safety belt retractor must be checked by a qualified technician to verify that the ALR
feature for a child seat is functioning properly, in addition to the other checks for proper safety belt system function. A belt and retractor
assembly must be replaced if the safety belt assembly's "automatic locking retractor" feature or any other safety belt function is not operating
properly when inspected according to the functional inspection procedures. Failure to replace the belt and retractor assembly could increase
the risk of injury in collisions.
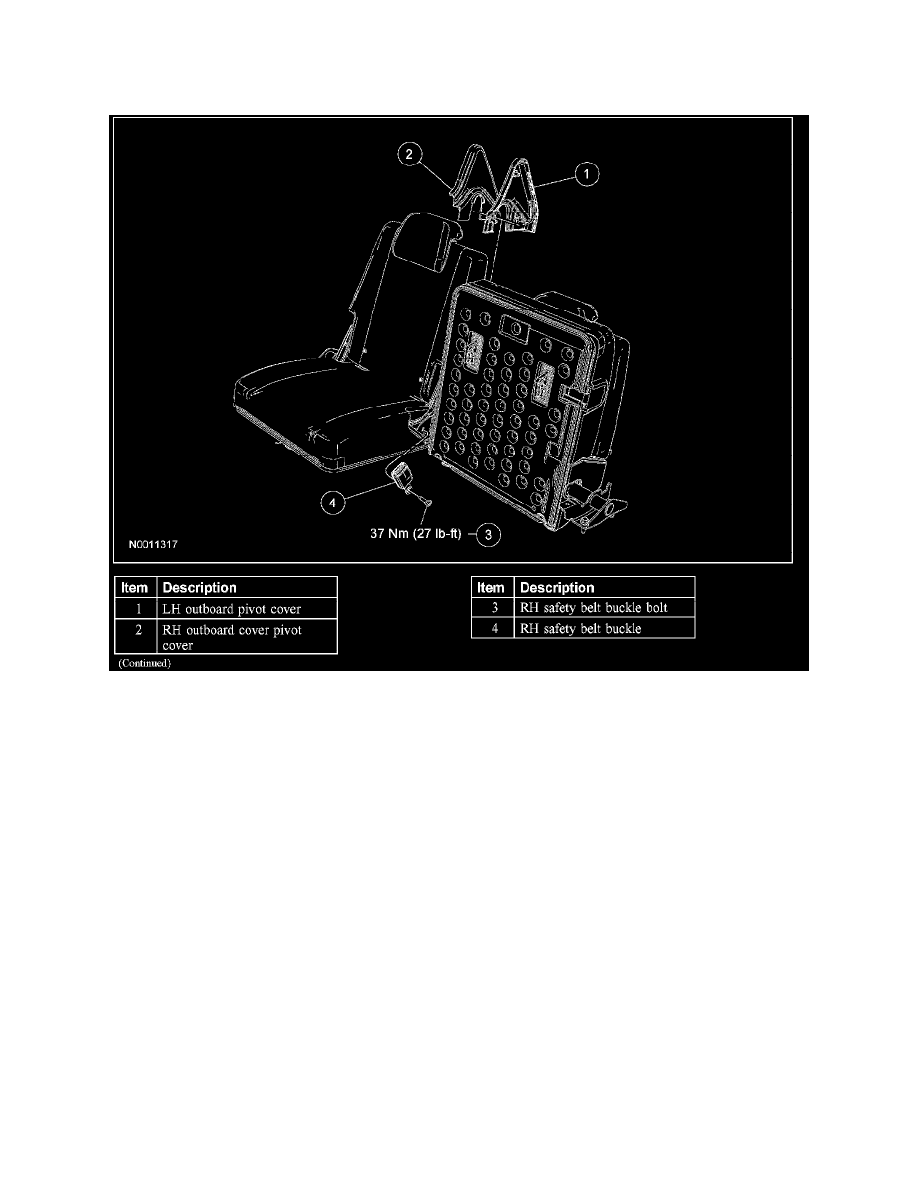
NOTE: RH buckle shown, LH buckle similar.
1. Remove the LH outboard pivot seat side cover.
2. Remove the RH outboard pivot seat side cover.
3. Position the LH seat in the fold flat and vertical position.
4. Remove the bolt and RH safety belt buckle.
-
To install, tighten to 37 Nm (27 lb-ft).
5. NOTE: Make sure the anti-rotation tab is in place before tightening fastener.
To install reverse the removal procedure.
6. Check the active restraint system for correct operation.