
Mountaineer 2WD V6-4.0L VIN K (2007)
2. With the vehicle in NEUTRAL, position it on a hoist. For additional information, refer to Maintenance/Service and Repair.
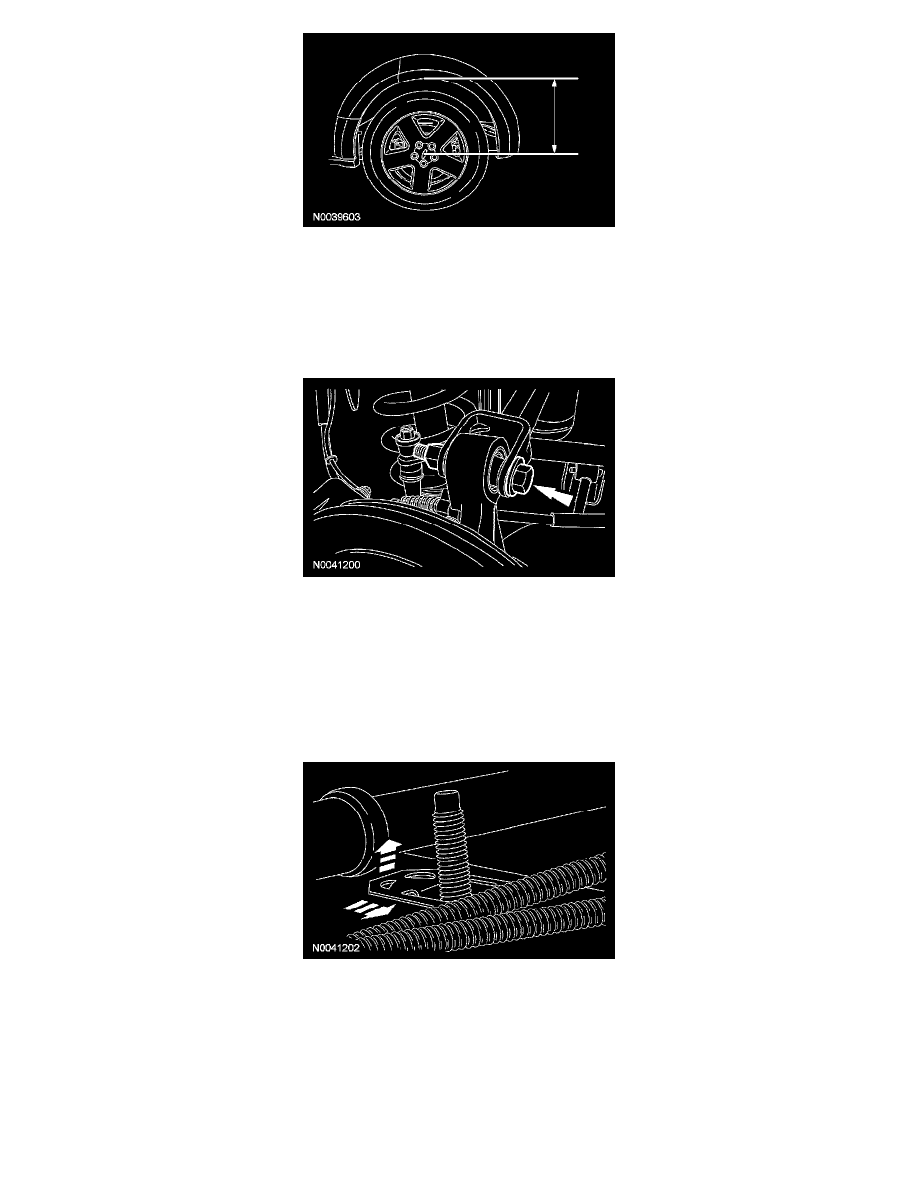
3. CAUTION: The upper arm outboard bolt must be installed with the bolt head toward the front of the vehicle or wheel damage can
occur.
Remove and discard the outboard nut and bolt from both upper arms.
^
To install, tighten to 275 Nm (203 ft. lbs.) at curb height.
4. Remove the stabilizer bar link nut and grommet, stud and link assembly.
^
Discard the nut and grommet.
^
To install, tighten to 30 Nm (22 ft. lbs.) at curb height.
5. Remove and discard the 4 stabilizer bar bracket nuts.
^
To install, tighten to 48 Nm (35 ft. lbs.)
6. Remove the 2 stabilizer bar brackets and the 2 stabilizer bar bushings.
7. Remove the 4 stabilizer bar bracket studs.
^
For the front studs, push the stud down and slide the stud toward the rear of the vehicle.
^
For the rear studs, push the stud down and slide the stud toward the front of the vehicle.
8. Disconnect the fuel vapor line.