
Mountaineer 2WD V8-4.6L (2010)
8. Remove the jack.
9. Install the wheel and tire. For additional information, refer to Wheels and Tires.
10. Check and if necessary, align the front end. For additional information, refer to Suspension &/or Alignment.
Rear Suspension
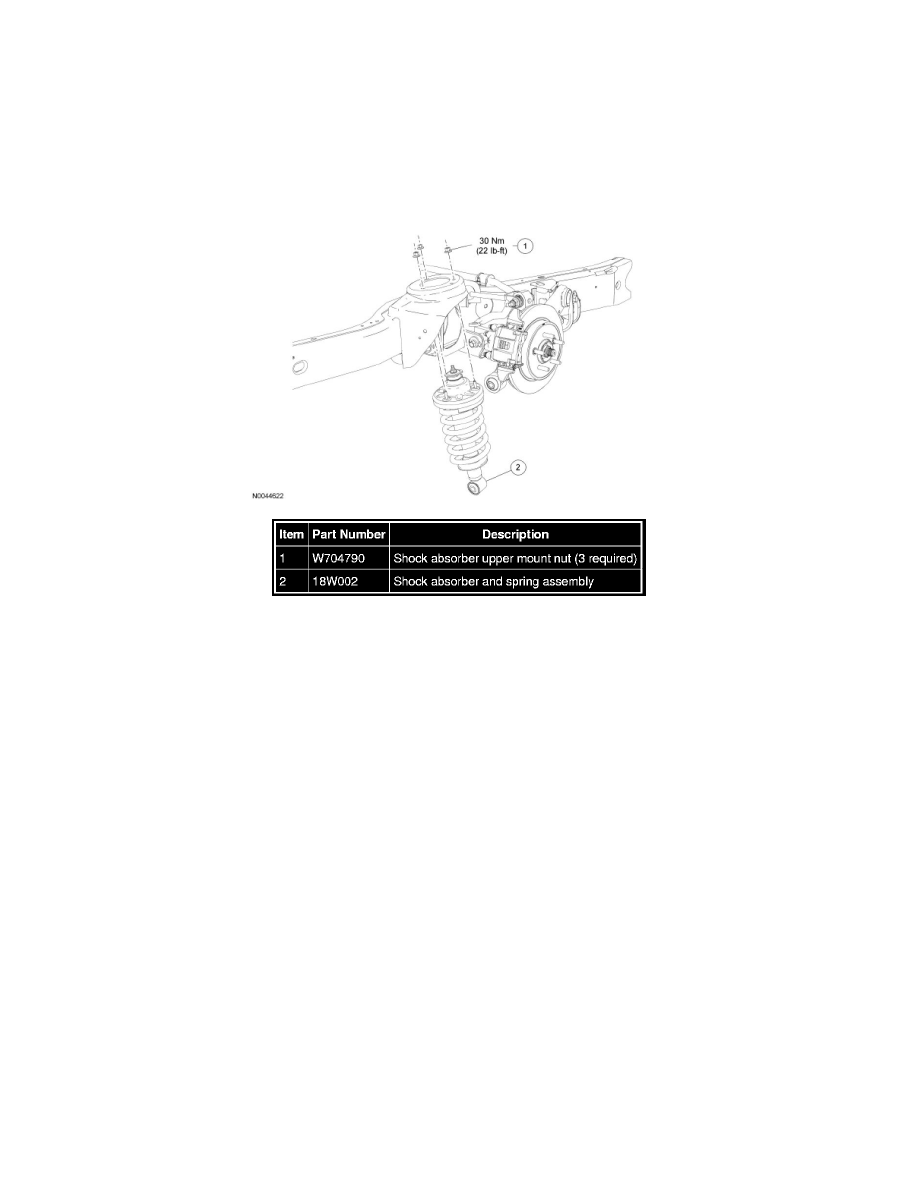
Shock Absorber and Spring Assembly
Removal
NOTICE: Suspension fasteners are critical parts because they affect performance of vital components and systems and their failure may result
in major service expense. New parts must be installed with the same part numbers or equivalent part, if replacement is necessary. Do not use a
replacement part of lesser quality or substitute design. Torque values must be used as specified during reassembly to make sure of correct
retention of these parts.
1. Remove the lower arm. For additional information, refer to Lower Arm See: Control Arm/Service and Repair/Rear Suspension/Lower Arm.
2. Remove and discard the 3 shock absorber upper mount nuts and remove the shock absorber and spring assembly.
-
To install, tighten the new nuts to 30 Nm (22 lb-ft).
3. For additional information on the disassembly and assembly of the shock absorber and spring assembly, refer to Shock Absorber and Spring
Assembly See: Suspension Strut / Shock Absorber/Service and Repair/Overhaul/Rear Suspension.
4. To install, reverse the removal procedure.