Mountaineer AWD V6-4.0L (2008)

Removal and Installation
1. With the vehicle in NEUTRAL, position it on a hoist.
2. Recover the refrigerant.
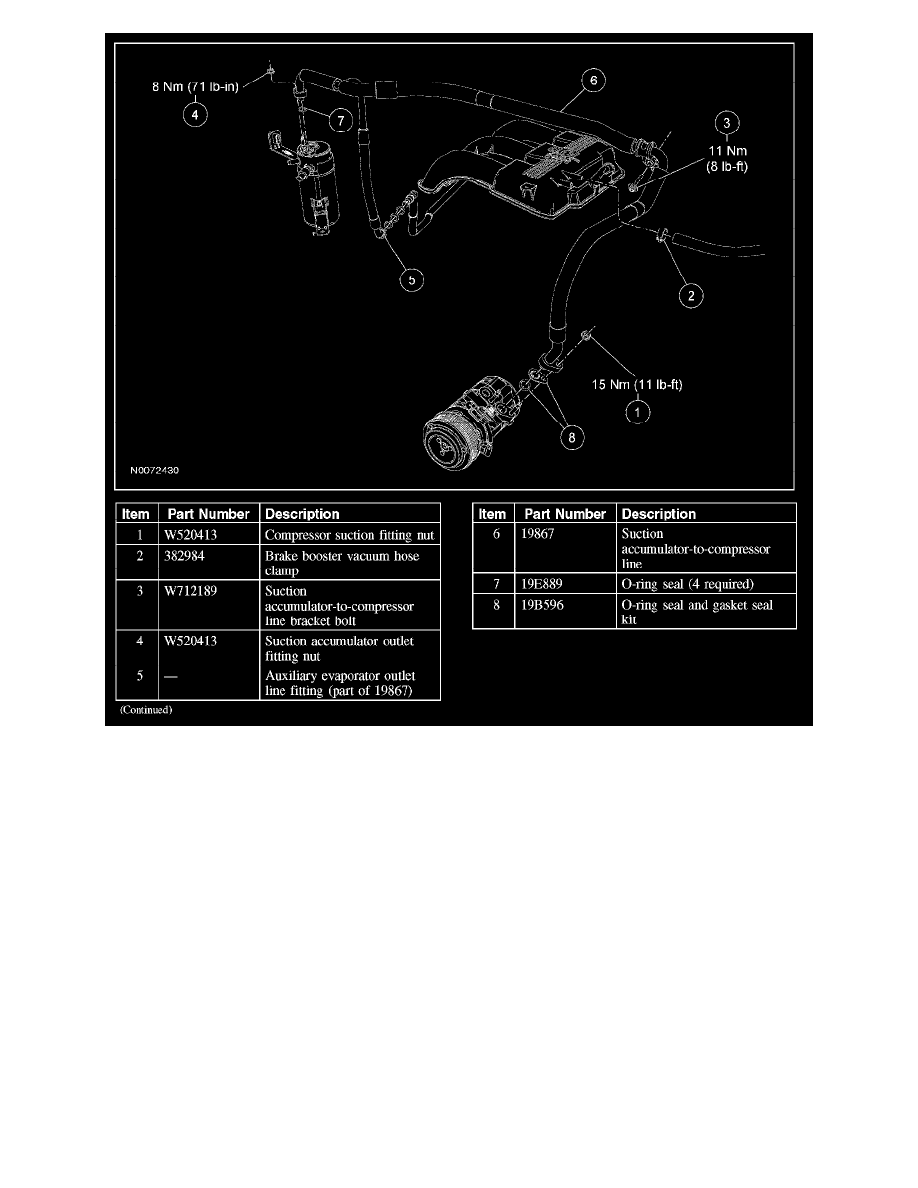
3. Remove the compressor suction fitting nut and disconnect the fitting.
- Discard the O-ring seal and gasket seal.
- To install, tighten to 15 Nm (11 lb-ft).
4. Release the brake booster vacuum hose clamp and disconnect the hose.
5. Remove the suction accumulator-to-compressor line bracket bolt at the dash panel.
-
To install, tighten to 11 Nm (8 lb-ft).
6. Remove the suction accumulator outlet fitting nut.
-
To install, tighten to 8 Nm (71 lb-in).
7. Disconnect the auxiliary evaporator outlet line fitting (if equipped).
-
Discard the O-ring seals.
8. Remove the suction accumulator-to-compressor line.
-
Discard the O-ring seal.
9. To install, reverse the removal procedure.
-
Install new O-ring seals and a new gasket seal.
-
Lubricate the refrigerant system with the correct amount of clean PAG oil.
