
Sable V6-183 3.0L DOHC VIN S MFI (1997)
Trim Panel: Service and Repair
Door
Front
Removal and Installation
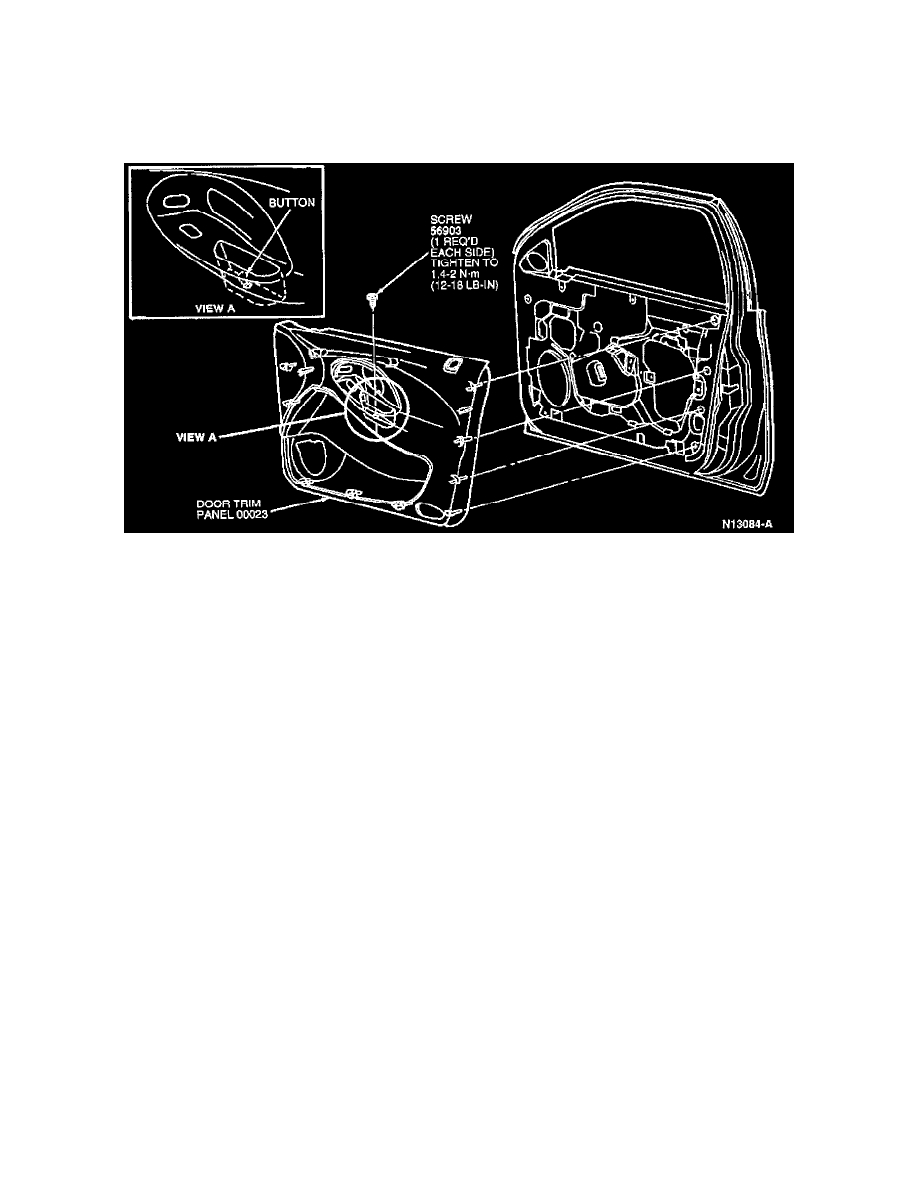
Front Door Trim Panel
1. Remove cover behind inside door handle.
2. Remove plug button from bottom of pull cup.
3. Remove screw retaining front door trim panel.
4. Remove sail speaker grill, if equipped.
5. Starting at bottom of trim panel, carefully remove door panel by pulling away from door.
NOTE: Do not attempt to remove more than one pushpin at a time.
6. Disconnect electrical connectors as necessary.
7. Replace all removed pushpins with new pushpins.
8. To install, reverse removal procedure. Tighten door panel retaining screw to 1.4-2.0 N-m (12-18 lb-in).
Rear
Removal and Installation
1. Remove cover behind inside door handle.
2. Remove plug button from bottom of pull cup.
3. Remove screw retaining rear door trim panel. Remove lock knob.
4. Starting at bottom of rear door trim panel, carefully remove door panel by pulling away from door.
5. Disconnect electrical connections as necessary.
6. To install, reverse Removal procedure. Tighten door panel retaining screw to 1.4-2.0 N-m (12-18 lb-in).