
Sable V6-183 3.0L DOHC VIN S MFI (1997)
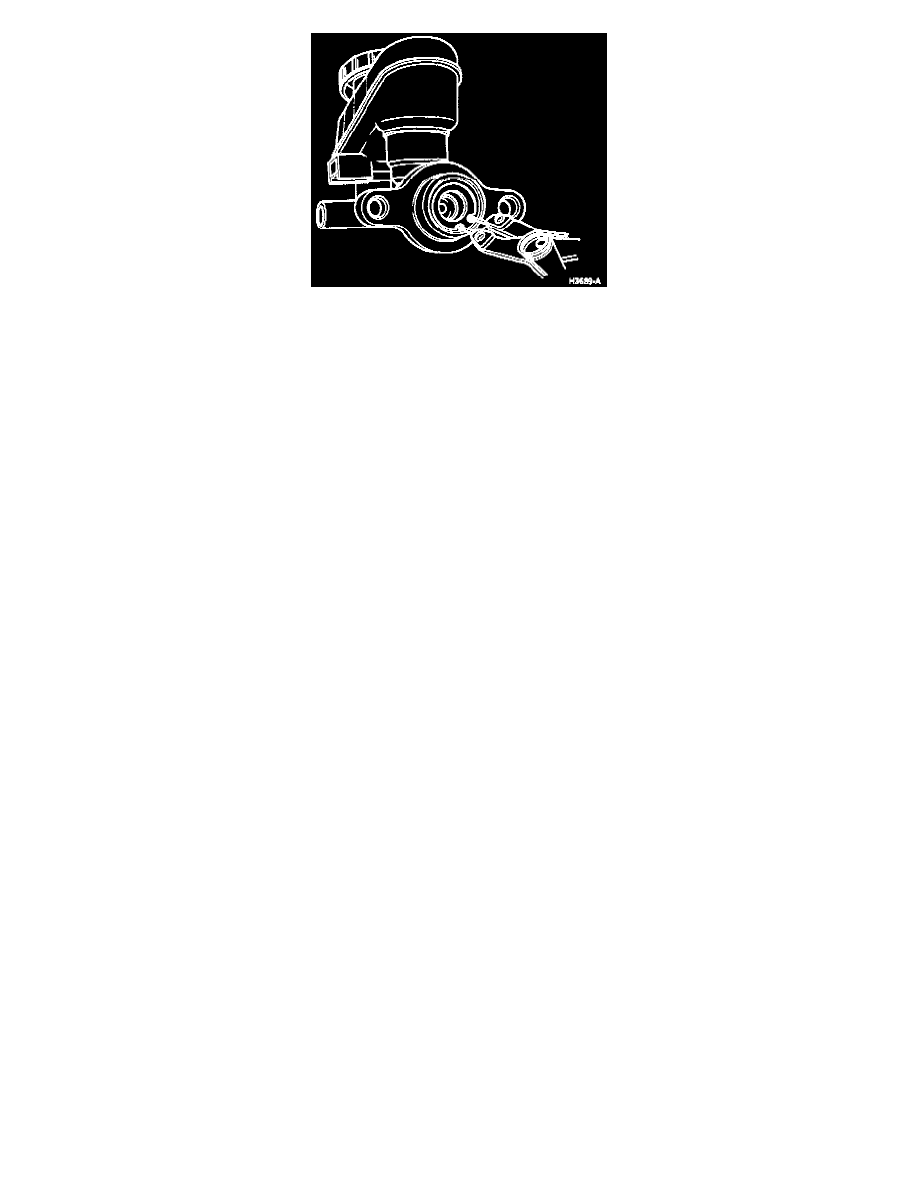
Snap Ring
5. Depress primary piston and remove snap ring from retaining groove at open end of bore.
6. Remove primary and secondary piston assemblies from brake master cylinder. Tap open end of brake master cylinder on bench to remove pistons.
If secondary piston does not readily come out, carefully apply air pressure to secondary outlet port to assist removal.
CLEANING AND INSPECTION
1. Wash brake master cylinder body, especially bore, along with primary and secondary piston assemblies in clean brake fluid. Denatured or
isopropyl alcohol can also be used.
CAUTION: Blistering or swelling indicates contamination of brake fluid by petroleum-based solvent or oil.
2. Inspect for blistering or swelling. If found, all rubber components in brake hydraulic system must be inspected and replaced and entire system must
be flushed with clean brake fluid to prevent recontamination. The components which must be replaced are:
-
front brake caliper seals.
-
rubber front brake hoses.
-
rear wheel cylinder seals.
-
rubber rear brake hoses.
-
brake pressure control valves.
-
primary and secondary piston assemblies.
-
reservoir grommets.
-
cap assemblies.
CAUTION: Honing of the bore on aluminum master cylinders is not permitted because the anodic coating and hardness could be removed.
3. Inspect seals on primary and secondary piston assemblies for cuts, nicks, scratches or signs of wear and for presence of any blistering or swelling.
NOTE: The aluminum body of the brake master cylinder (2140) is anodized. Some signs of bore wear, as evidenced by lighter areas of the
anodized surface, are normal and not detrimental.
4. Inspect master cylinder bore for pitting, corrosion or heavy wear. Heavy wear is characterized by scoring or galling of metal.
5. Replace any damaged or worn parts.
ASSEMBLY
1. Dip replacement piston assemblies in clean DOT-3 motor vehicle brake fluid for lubrication prior to assembly into cylinder.
2. Install secondary piston (smaller) assembly into bore, spring end first.
3. Install primary piston assembly, spring end first.
4. Depress primary piston and install snap ring.
5. Install brake master cylinder filler cap on brake master cylinder reservoir and secure.
INSTALLATION
1. Position brake master cylinder on studs on power brake booster assembly.
2. Install retaining nuts. Tighten to 26-39 Nm (20-28 ft.lbs).
3. Connect cowl top inner panel tube to cowl.
4. Install nut retaining cowl top inner panel tube to brake master cylinder and tighten to 21-29 Nm (16-21 ft.lbs).
5. Install primary and secondary brake tubes to brake master cylinder outlet ports. Tighten to 16-20 Nm (12-14 ft.lbs).
6. Connect brake fluid level warning switch connector.
7. Fill brake master cylinder reservoir with specified brake fluid to MAX line with High Performance DOT-3 Motor Vehicle Brake Fluid.
8. Bleed brake system.