
Sable V6-183 3.0L DOHC VIN S MFI (1997)
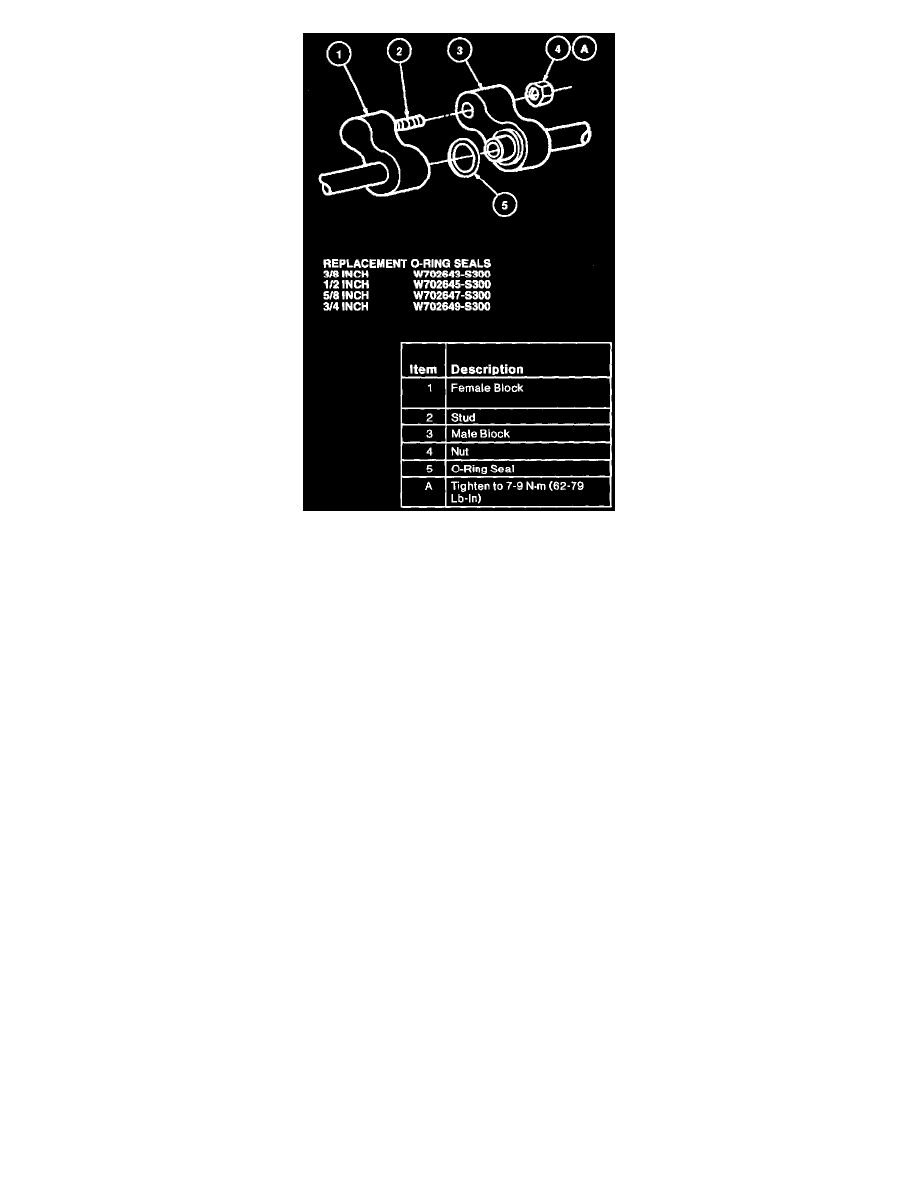
4. Connect A/C manifold and tube to A/C condenser core inlet tube using new O-ring seals lubricated with clean Motorcraft YN-12b refrigerant oil
or equivalent meeting Ford specification WSH-M1C231-B. Refer to Peanut Fitting illustration.
5. Install lower radiator air deflector. Tighten three splash shield-to-radiator screws to 7-11 N.m (62-97 lb-in) and remaining 11 screws to 2-3 N.m
(18-26 lb-in).
6. Lower vehicle to floor.
7. Connect A/C manifold and tube to suction accumulator/drier using new O-ring seals lubricated with clean Motorcraft YN-12b refrigerant oil or
equivalent meeting Ford specification WSH-M1C231-B.
8. Install A/C pressure cut-off switch electrical connector.
9. Lubricate new O-ring seals with clean refrigerant oil and position them in O-ring seal grooves of A/C manifold and tube.
10. Apply Pipe Sealant with Teflon®- D8AZ-19554-A or equivalent meeting Ford specifications WSK-M2G350-AZ and ESR-M18P7-A to threads of
manifold retaining bolt.
11. Position A/C manifold and tube with O-ring seals to A/C compressor. Install retaining bolt and tighten to 17-23 N.m (13-16 lb-ft).
12. Leak-test, evacuate and charge system following recommended procedures. Observe all safety precautions.