
Sable V6-183 3.0L DOHC VIN S MFI (1997)
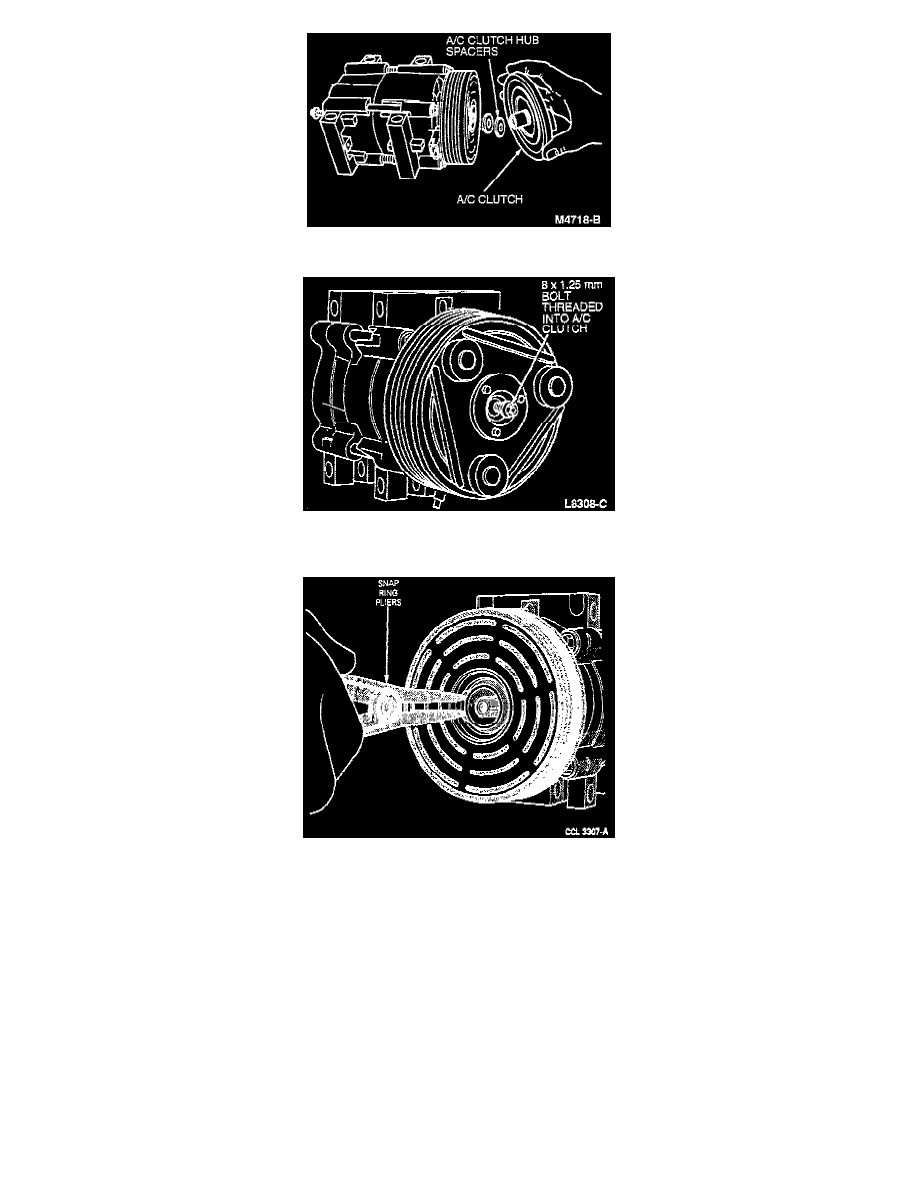
2. Pull A/C clutch and A/C clutch hub spacers from A/C compressor shaft.
3. If A/C clutch cannot be pulled from A/C compressor shaft. screw an 8 x 1.25 mm bolt into the shaft hole of the A/C clutch to force it from the
shaft.
Pulley Retaining Snap Ring - Removal
4. Remove A/C clutch pulley retaining snap ring.
5. Pull the A/C clutch pulley from the A/C compressor.
INSTALLATION
1. Clean pulley bearing surface of A/C compressor head to remove any dirt or corrosion.
2. Install A/C clutch pulley on A/C compressor. The bearing is a slip-fit on the A/C compressor head and, if properly aligned, should slip on easily.
3. Install A/C clutch pulley retaining snap ring with bevel side of snap ring out.
4. Place one medium thickness A/C clutch hub spacer inside the A/C clutch hub spline opening and slide the A/C clutch on the end of the compressor
shaft.
5. Thread a new 6 mm A/C clutch hub retaining bolt into end of A/C compressor shaft. Hold A/C clutch with Compressor Clutch Holding Tool
T94P-19703-AH and tighten A/C clutch hub retaining bolt to 11-14 N.m (8-10 lb-ft).
6. Check and adjust air gap as described in Adjustments.
7. When installing a new A/C clutch, cycle it 10 times at idle to burnish it and prevent slippage.