
Sable V6-183 3.0L DOHC VIN S MFI (1997)
3. Dip the seal protector and shaft seal in clean Motorcraft YN-12b Refrigerant Oil or equivalent meeting Ford specification WSH-M10231-B.
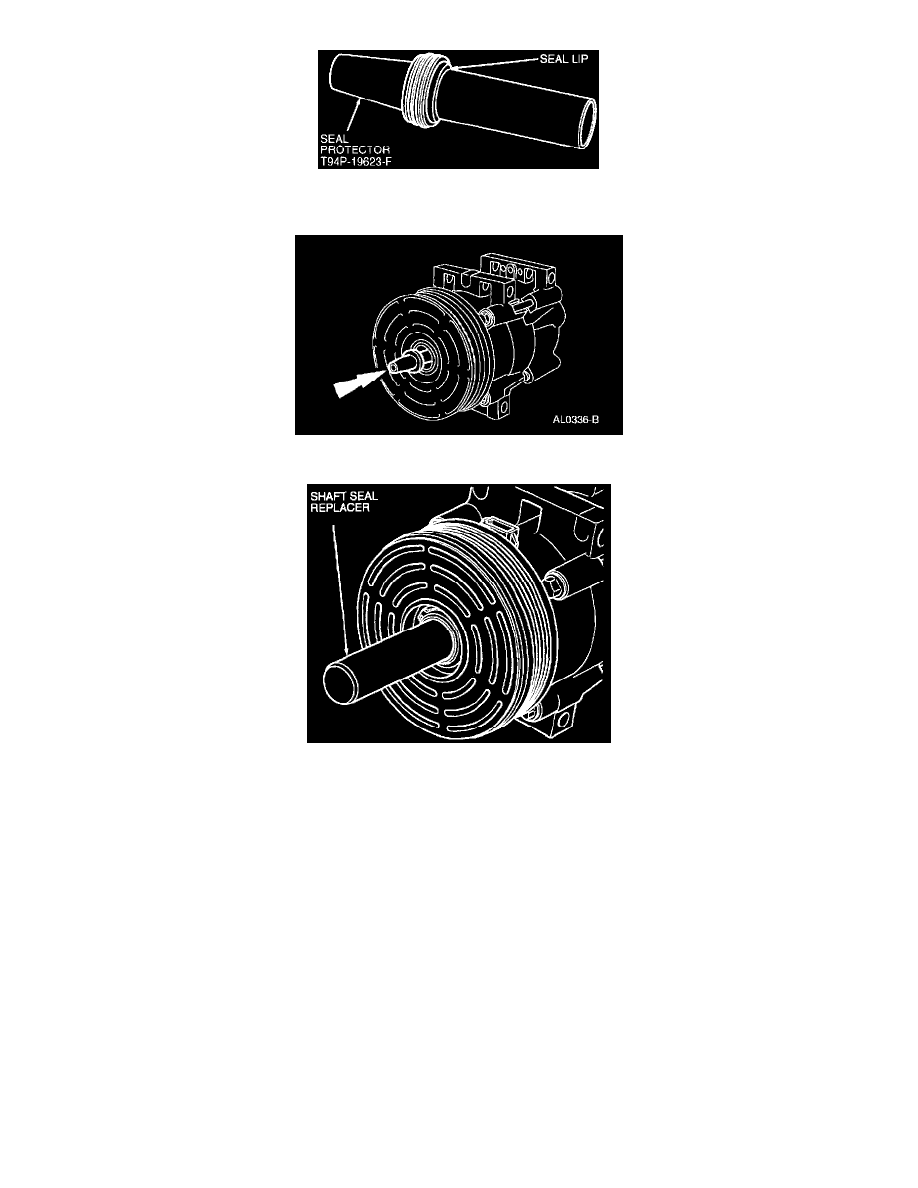
Position the shaft seal on the protector with the lip of the seal pointing toward the large end of the protector as shown.
4. Place the seal protector with shaft seal over the end of the A/C compressor shaft.
5. Using Shaft Seal Replacer T89P-19623-AH, slowly push seal down shaft protector onto A/C compressor shaft until seated.
6. Remove Shaft Seal Replacer T89P-19623-AH and Seal Protector T94P-19623-F from A/C compressor shaft.
7. Place a new shaft seal retaining snap ring into the compressor nose opening and seat the snap ring into the groove.
8. Leak-test the shaft seal installation after rotating the compressor shaft about 10 revolutions with the A/C clutch. Refer to A/C Compressor External
Leak Test. See: Testing and Inspection
9. Install a new shaft seal (felt) into the nose of A/C compressor.
10. Install A/C clutch on A/C compressor.
11. Check and adjust the air gap as described in Adjustments.
12. Install A/C compressor on vehicle.