
Sable V6-183 3.0L DOHC VIN S MFI (1997)
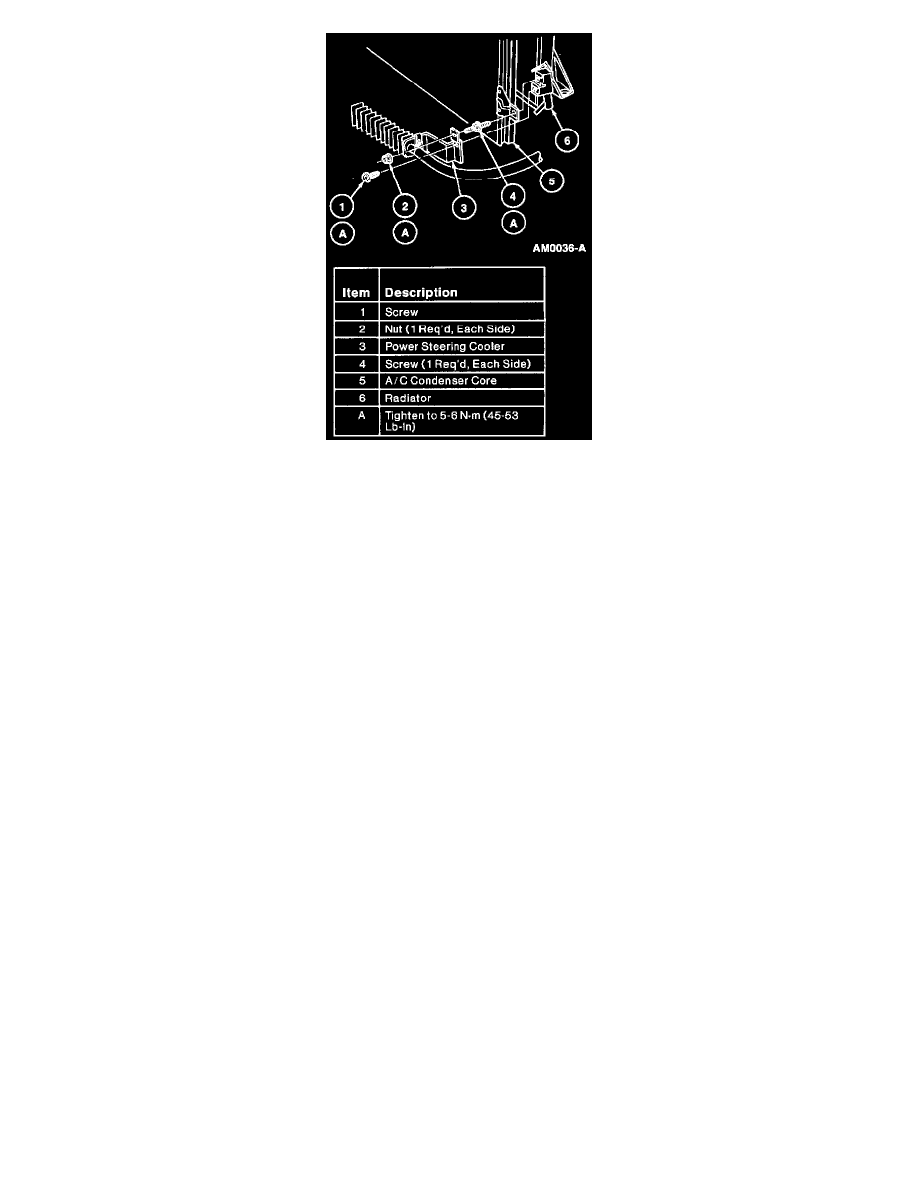
5. Remove two nuts and one screw retaining power steering cooler to A/C condenser core and position cooler aside.
6. Disconnect condenser to evaporator tube from A/C condenser core outlet tube. Plug the lines to prevent dirt and excessive moisture from entering.
7. Disconnect A/C manifold and tube from A/C condenser core inlet tube. Plug the lines to prevent dirt and excessive moisture from entering.
8. Remove two screws retaining A/C condenser core to radiator.
9. Lift A/C condenser core off support brackets on radiator and lower A/C condenser core out of vehicle.
INSTALLATION
1. If the A/C condenser core is to be replaced, add 2.9 ml (1 oz) of clean Motorcraft YN-12b refrigerant oil or equivalent meeting Ford specification
WSH-M1C231-B to the new A/C condenser core.
2. Install A/C condenser core to radiator. Tighten screws to 5-6 N.m (45-53 lb-in).
3. Remove the plugs from the two refrigerant lines and install new O-ring seals after dipping into clean refrigerant oil.
4. Connect the A/C manifold and tube and the condenser to evaporator tube to the A/C condenser core. Tighten peanut fitting retaining nut to 7-9
N.m (62-79 lb-in).
5. Install power steering cooler to A/C condenser core. Tighten screws and nuts to 5-6 N.m (45-53 lb-in).
6. Install lower radiator air deflector. Tighten three splash shield-to-radiator screws to 7-11 N.m (62-97 lb-in) and remaining 11 screws to 2-3 N.m
(18-26 lb-in).
7. Lower vehicle to floor.
8. Install two bolts retaining A/C condenser core to radiator. Tighten screws to 5-6 N.m (45-53 lb-in).
9. Leak-test, evacuate and charge refrigerant system. Observe all safety precautions.
10. Check the A/C system for proper operation.