
Sable V6-183 3.0L DOHC VIN S MFI (1997)
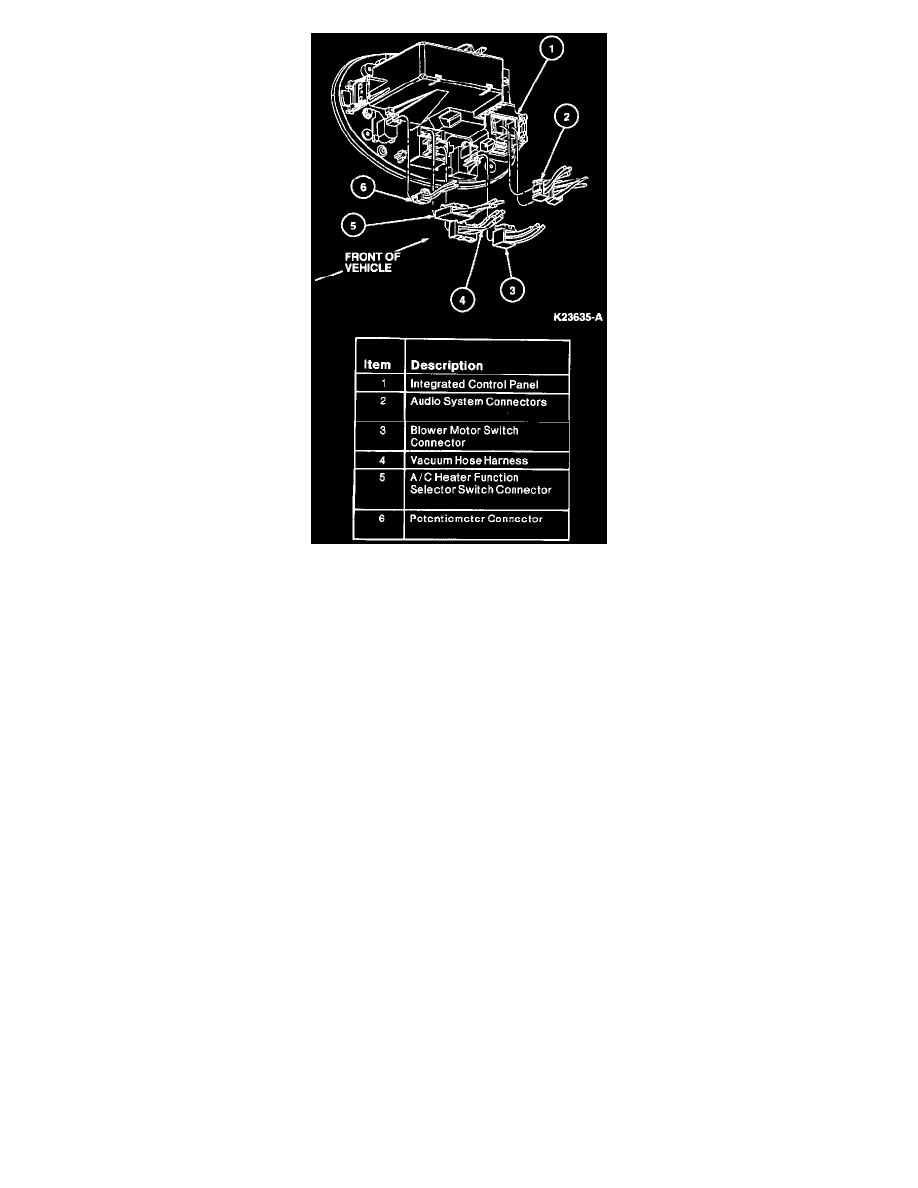
4. Disconnect wiring connectors and vacuum hose harness.
INSTALLATION
1. Connect wiring connectors and vacuum hose harness to integrated control panel.
2. Slide integrated control panel into instrument panel, making sure that rear support is engaged on upper support rail.
3. Push integrated control panel inward until retaining clips are fully engaged.
4. Connect battery ground cable.
Switch Knobs
REPLACEMENT
1. Rotate knob to straight up and down position, grasp knob and pull rearward.
NOTE: Do not pry the knob off its shaft. Damage to the surface of the integrated control panel may result.
2. If the D-shaped spring clip which sits inside the back end of knob remains on shaft when knob is pulled off, remove it with needle nose pliers and
install on knob.
3. To install knob, align its keyed surface with mating surface on shaft, rotate to straight up and down position and press knob forward unit fully
seated in control shaft.