
Sable V6-183 3.0L DOHC VIN S MFI (1997)
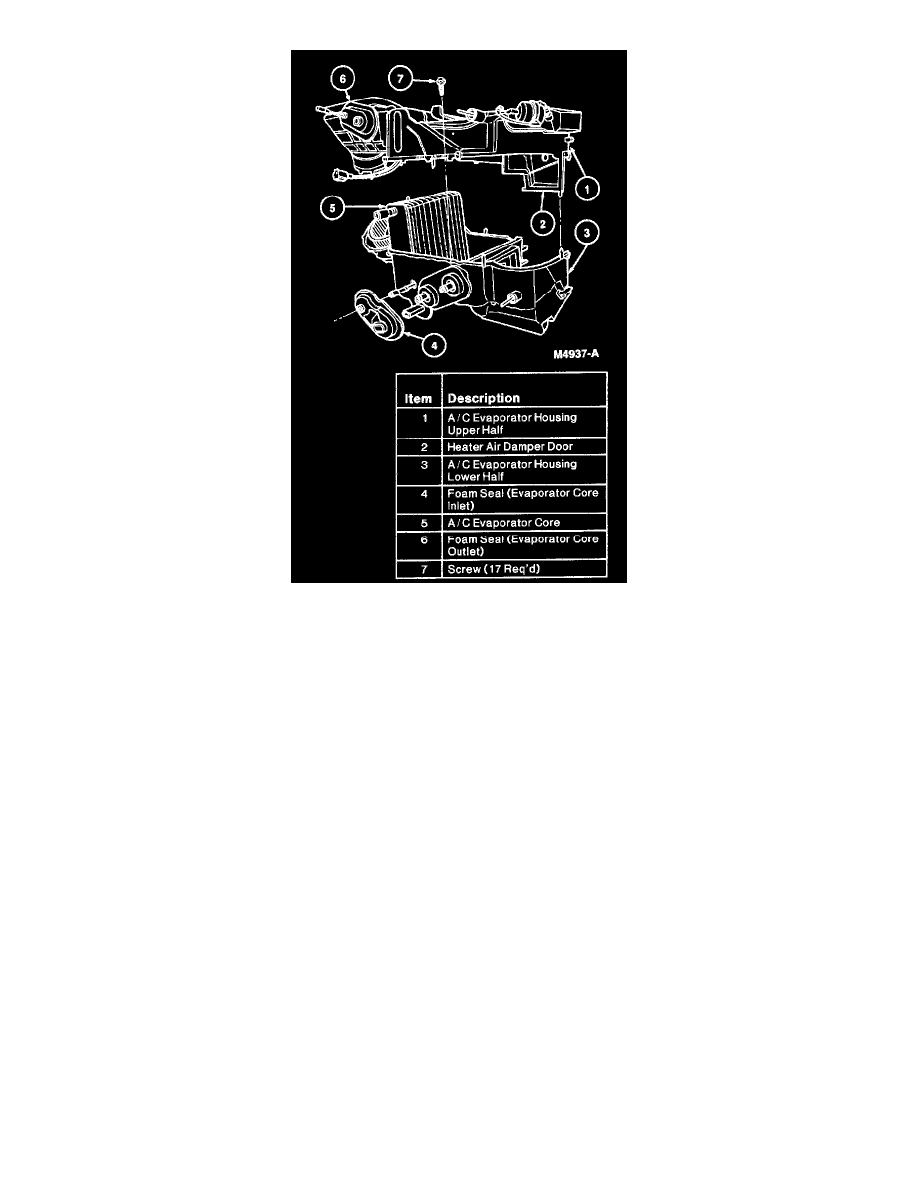
10. Remove A/C evaporator core from lower evaporator case housing.
INSTALLATION
1. Transfer two foam seals to new A/C evaporator core.
2. Position A/C evaporator core in lower evaporator case housing.
3. Install upper evaporator case housing to lower evaporator case housing, making sure heater air damper door lower post is positioned in pivot hole
in lower evaporator case housing.
4. Install retaining screws around flange joint of A/C evaporator housing.
5. Install metal link over pin on primary A/C air temperature control door shaft.
6. Install secondary A/C air temperature control door lever on metal link.
7. Install secondary A/C air temperature control door lever to secondary A/C air temperature control door end.
8. Engage spring to heater core cover and secondary A/C air temperature control door lever.
9. Install A/C electronic blend door actuator to A/C evaporator housing with four retaining screws.
10. Install foam seals over evaporator tubes.
11. Install A/C evaporator housing assembly, please refer to Heating and Air Conditioning/Evaporator Case/Service and Repair/ See: Evaporator
Housing/Service and Repair