
Sable V6-183 3.0L DOHC VIN S MFI (1997)
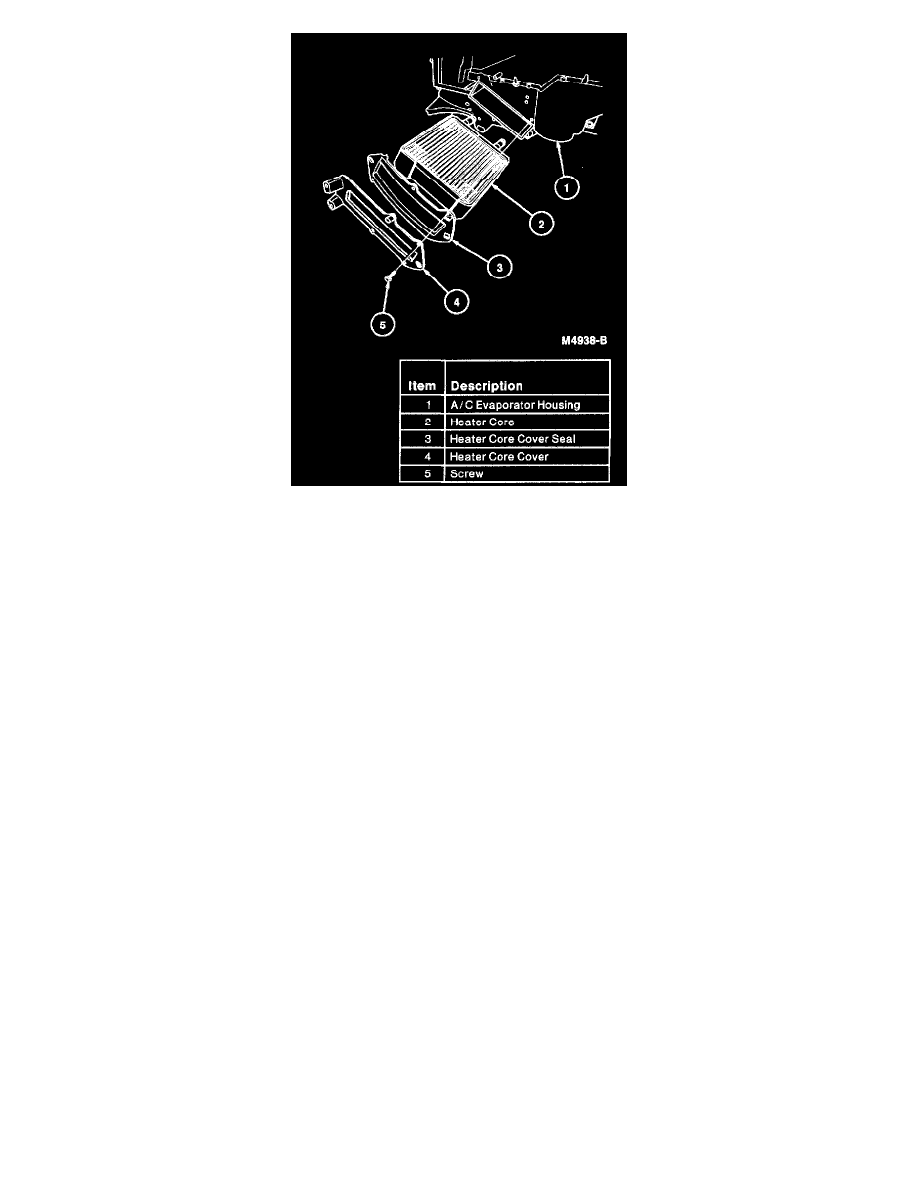
9. Remove heater core and seal from A/C evaporator housing by pushing on heater core tubes.
INSTALLATION
1. Transfer foam core seal to new heater core.
2. Install heater core and foam core seal into A/C evaporator housing.
3. Position heater core cover and seal on A/C evaporator housing and install three retaining screws.
4. Install metal link over pin on primary A/C air temperature control door lever.
5. Install secondary A/C air temperature control door lever on metal link.
6. Install secondary A/C air temperature control door lever to secondary A/C air temperature control door end.
7. Engage spring to heater core cover and secondary A/C air temperature control door lever.
8. Install A/C electronic blend door actuator to A/C evaporator housing with four retaining screws.
9. Connect heater water hoses to heater core.
10. Fill radiator to correct level with previously removed coolant or specified mixture of coolant and water.
11. Install instrument panel, refer to Body and Frame/Interior Trim/ Dash Board/Service and Repair/ See: Body and Frame/Interior Moulding /
Trim/Dashboard / Instrument Panel/Service and Repair
12. Check system for proper operation.