
Sable V6-183 3.0L DOHC VIN S MFI (1997)
Receiver Dryer: Service and Repair
Replacement Guidelines
SUCTION ACCUMULATOR/DRIER REPLACEMENT GUIDELINES
Replacement of the suction accumulator/drier is necessary whenever a major component of the refrigerant system is replaced:
^
A/C condenser core
^
A/C compressor
^
A/C evaporator core
^
refrigerant hose(s) or line(s)
An A/C evaporator core orifice or O-ring seal is not considered a major component, but the A/C evaporator core orifice should be replaced
whenever the A/C compressor is replaced.
In addition to the preceding condition, the suction accumulator/drier should also be replaced if one of the following conditions exist:
^
The suction accumulator/drier is perforated.
^
The refrigerant system has been opened to the atmosphere for a period of time longer than required to make a minor repair.
^
There is evidence of moisture in the system such as internal corrosion of metal refrigerant lines or the refrigerant oil is thick and dark.
NOTE: The compressor oil from vehicles equipped with the FS-10 A/C compressor may have a dark color while maintaining a normal oil
viscosity. This is normal for this A/C compressor because carbon from the A/C compressor piston rings will discolor the oil.
When replacing the suction accumulator/drier, the procedure given here must be followed to make sure that the total oil charge in the system is
correct after the new suction accumulator/drier is installed.
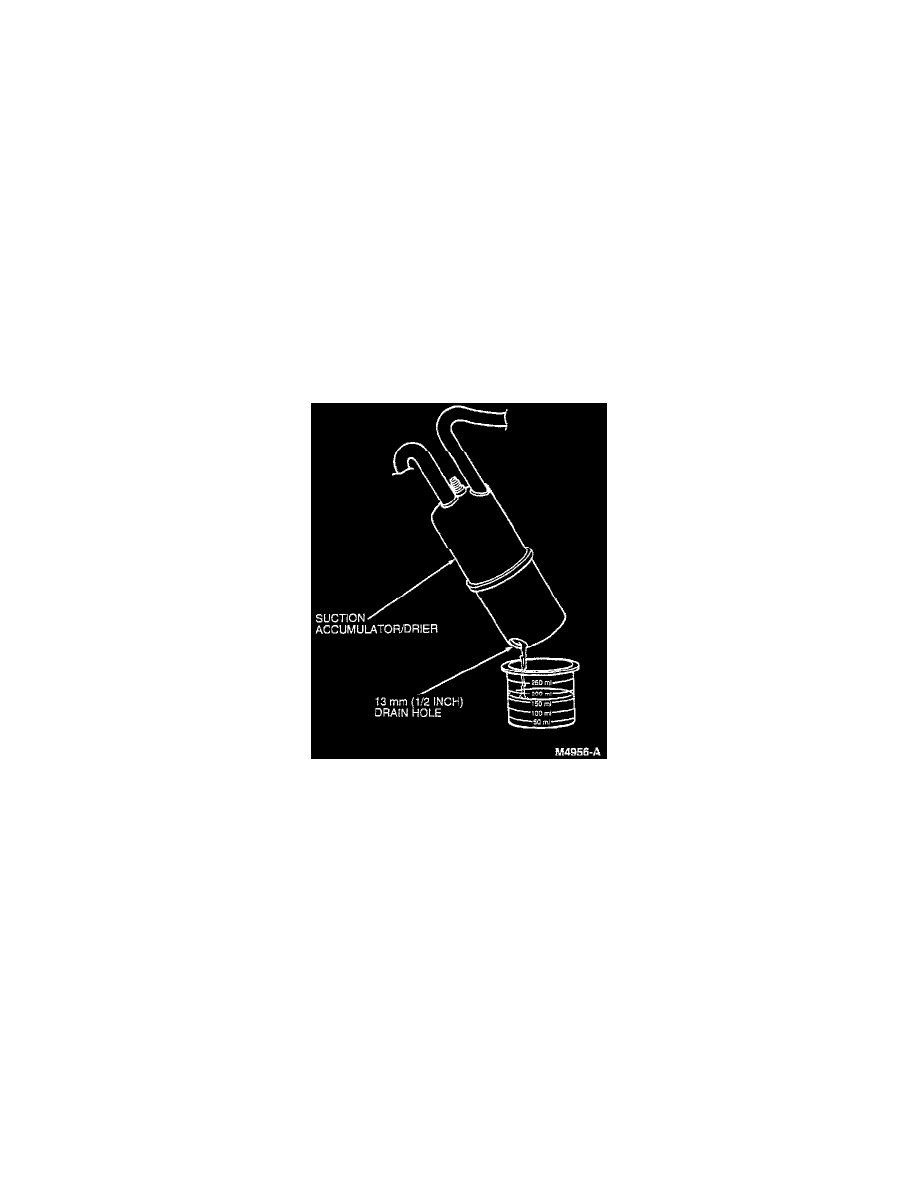
1. Drain the oil from the removed suction accumulator/drier into a suitable measuring container. Drill two 13 mm (0.5 inch) holes in the bottom
of the old suction accumulator/drier to make sure that all the oil has drained Out.
2. Add the same amount of clean new refrigerant oil plus 60 ml (2 ounces) to the new suction accumulator/drier. Use only Motorcraft YN-12b or
an equivalent meeting Ford specification WSH-MlC231-B.