
Sable V6-183 3.0L DOHC VIN S MFI (1997)
5.
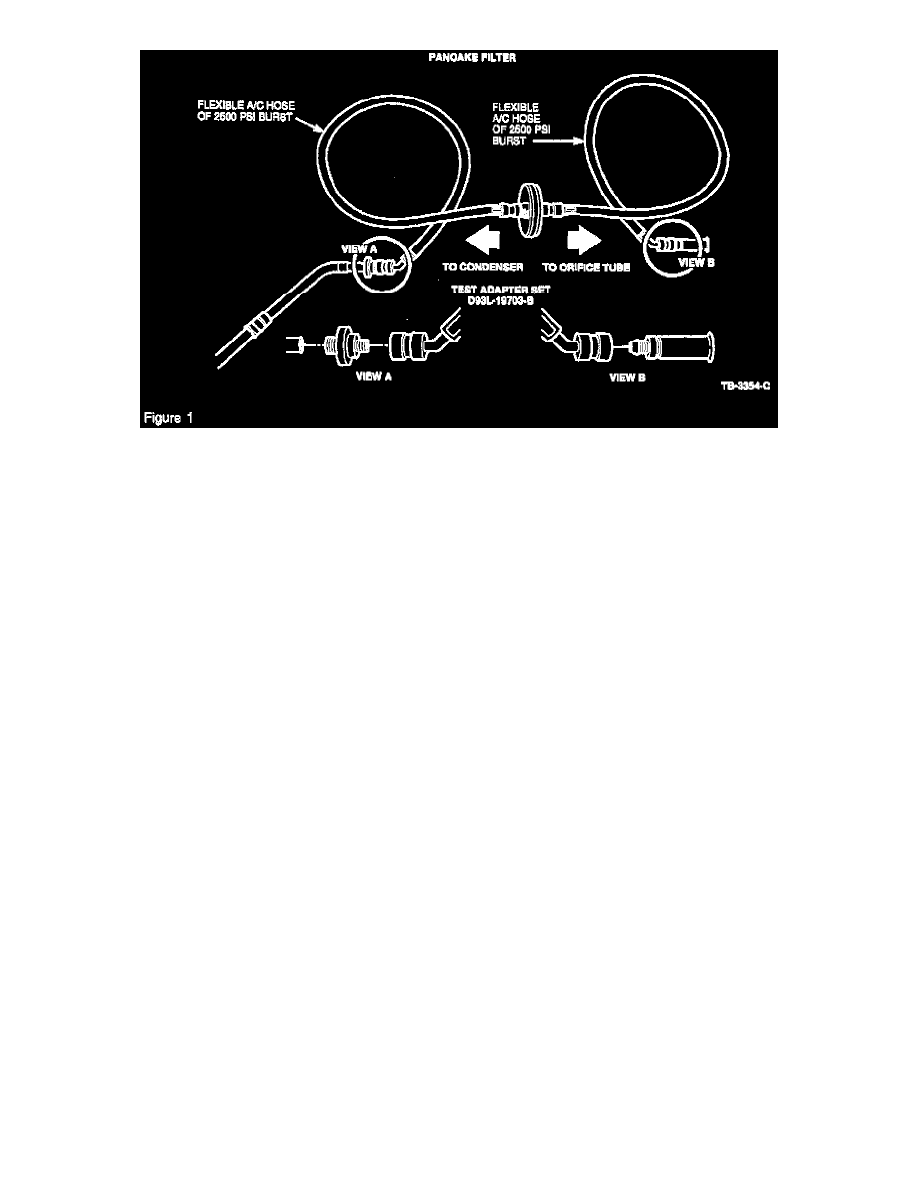
Install pancake filter in the liquid line between the condenser and the orifice tube, Figure 1.
a.
Be sure orifice inlet is toward the condenser.
b.
Connections can be made using Test Adapter Set D93L-19703-B, or equivalent, and flexible refrigerant hose of 2500 psi burst rating.
Individual fittings are also available.
6.
Remove the old compressor following Service/Workshop Manual procedures. Drain the oil into a calibrated container.
7.
Drain the oil from the replacement compressor into a clean calibrated container.
NOTE:
IT WILL BE NECESSARY TO TRANSFER THE MAGNET CLUTCH FROM THE OLD COMPRESSOR TO THE REPLACEMENT
COMPRESSOR. FOLLOW SERVICE/WORKSHOP MANUAL PROCEDURES.
8.
A new FX-15 service compressor contains 207 mL (7 oz.) of R-12 refrigerant oil. A new FS-10 service compressor does not contain any oil and
can be used with an R-12 or an R-134a system.
CAUTION
REMEMBER TO USE YN-9-A (MINERAL) OIL WITH R-12 SYSTEMS AND YN-12-C (PAG) OIL WITH R-134a SYSTEMS. FAILURE TO
USE THE CORRECT REFRIGERANT OIL MAY RESULT IN DAMAGE TO SYSTEM COMPONENTS.
^
If the amount of oil drained from the removed compressor is between 90 and 148 mL (3-5 oz), pour the same amount of clean refrigerant oil into the
new compressor.
^
If the amount of oil drained from the old compressor is greater than 90 mL (3 oz), pour 90 mL (3 oz) of clean refrigerant oil into the new compressor.
9.
Install the new compressor following Service/Workshop Manual procedures. Make sure all mounting bolts are tightened properly. Check the
tension of the compressor drive belt. Adjust if necessary.
10.
Evacuate, charge and leak test the system, following Service/Workshop Manual procedures.
11.
Check all refrigerant system hoses, lines and the position of the newly-installed filters to make sure they do not interfere with other engine
compartment components. If necessary, use tie straps to make adjustments.
12.
Set the A/C control on Max A/C, high blower and temperature control at full cold.
a.
Start engine and let idle briefly.
b.
Be sure A/C system is operating properly.