
Sable V6-183 3.0L DOHC VIN S MFI (1997)
Brake Light Switch: Service and Repair
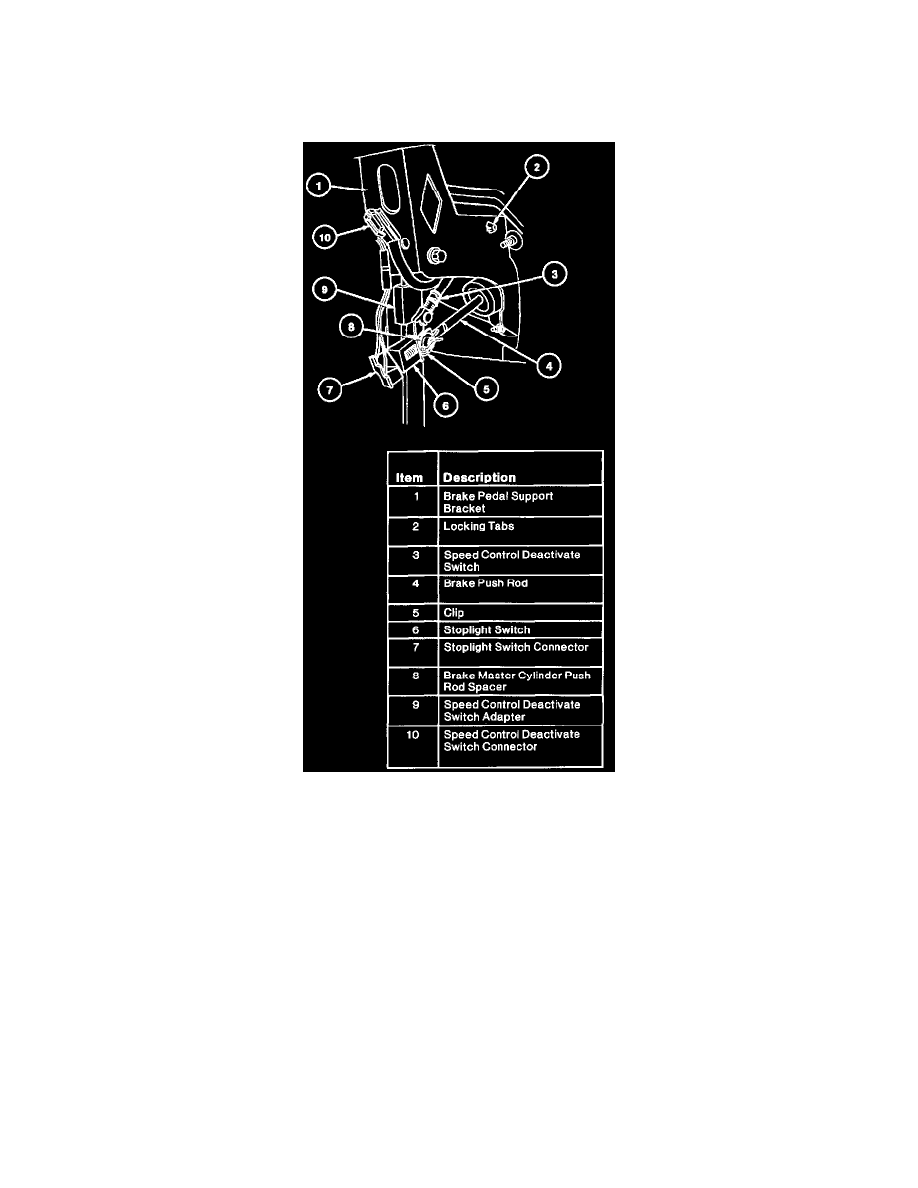
REMOVAL
1. Disconnect the connector from the stoplight switch.
NOTE: Locking tab must be lifted before stoplight switch electrical connector can be removed.
2. Remove hairpin retainer and white nylon washer. Slide stoplight switch and push rod away from pedal. Remove stoplight switch by sliding it
down.
NOTE: Since the switch side plate nearest the brake pedal is slotted, it is not necessary to remove the brake master cylinder push rod black
bushing or white speed control deactivate switch bracket nearest the pedal arm from the brake pedal pin.
INSTALLATION
1. Position stoplight switch so U-shaped side is nearest pedal and directly over/under pin. The black bushing must be in position in push rod eyelet
with washer face on side away from brake pedal arm.
CAUTION: Do not substitute other types of pin retainers. Replace only with production hairpin retainer.
2. Slide stoplight switch up and down, trapping master cylinder push rod and black bushing between switch side plates. Push stoplight switch and
push rod assembly firmly toward brake pedal arm. Assemble outside white nylon washer to brake pedal pin. Install hairpin retainer to trap whole
assembly.
3. Assemble wire harness connector to stoplight switch.
NOTE: Stoplight switch wire harness must have sufficient length to travel with stoplight switch during full stroke at pedal. If wire length is
insufficient, reroute harness or service as required.
4. Check stoplight switch for proper operation. Stoplamps should illuminate with less than 27 N (6 Lbs) applied to brake pedal at pad.