
Sable V6-183 3.0L DOHC VIN S MFI (1997)
SECOND/DRIVE* .............................................................................................................................................................................. 190 to 232
FIRST ...................................................................................................................................................................................................... 78 to 95
* Same values for SECOND (electronic transaxle with separate positions for DRIVE and OVERDRIVE).
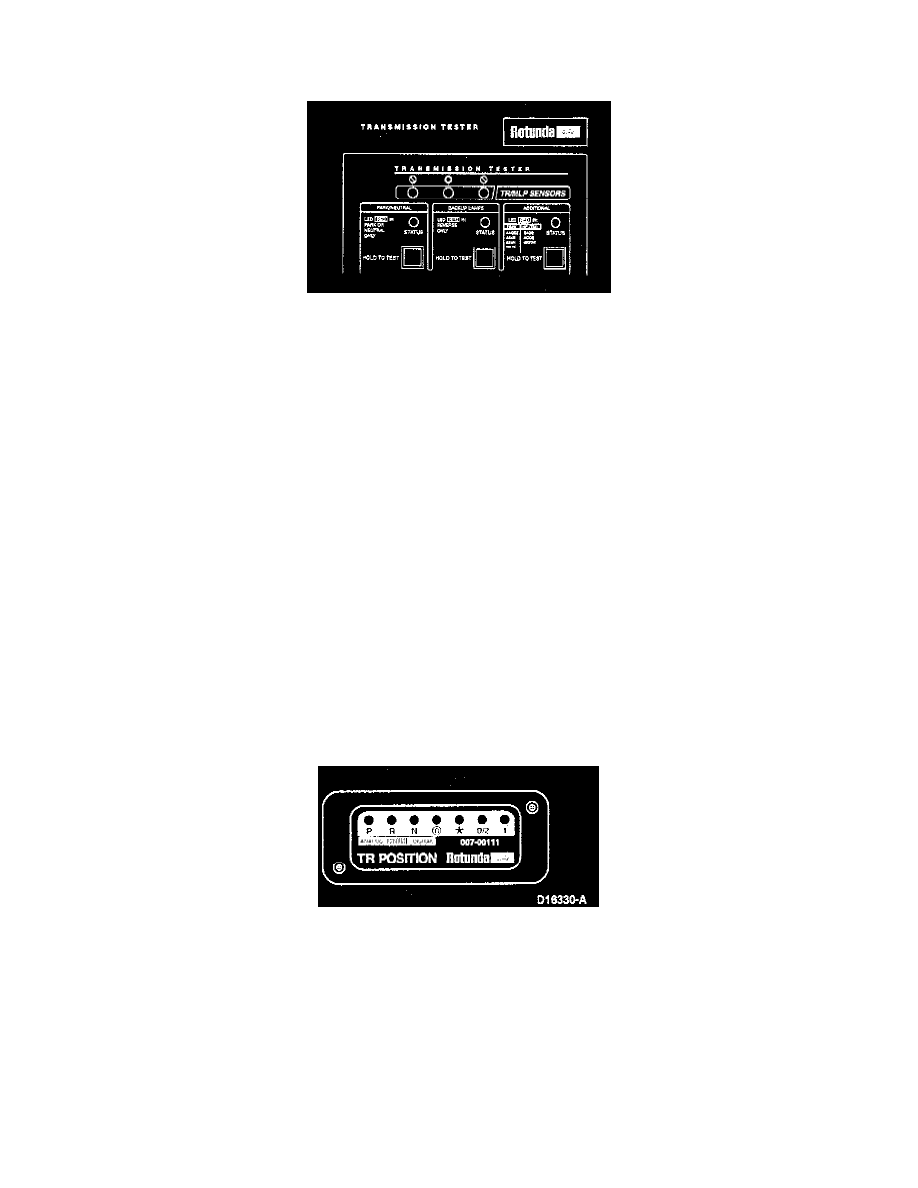
VOLTAGE TESTS - PARK/NEUTRAL, BACKUP LAMP AND OPTIONAL CIRCUITS
NOTE:
^
LED turns OFF when circuit is open.
^
LED lights RED when circuit is closed.
1. Press and hold each test button while moving the shift lever to each gear position.
2. Monitor each STATUS LED:
a. The LED in the appropriate gear position you are retesting should light red.
b. If the LED for the applicable gear position fails to light red, or if it lights for a position other than the gear selected:
1. Verify shift linkage adjustment with the shifter in the overdrive position.
2. Verify TR sensor alignment in the neutral position.
3. Retest.
3. If the sensor fails, replace it.
4. If sensor is OK, perform diagnosis of starter, backup lamps and optional circuits.
5. After you finish testing, continue to Disconnecting the Tester.
TR SENSOR RANGE CIRCUITS (ILLUMINATED INSTRUMENT PANEL ONLY)
1. Using cable E, perform the following test steps for diagnosis of the transmission range selection instrument panel circuits.
CAUTION: Be sure that the correct 12-pin sensor connector is connected to the proper sensor. Make sure the correct TR-E cable connector is
used (ANALOG or DIGITAL). If the wrong connection is made or the slide switch is in the wrong position, the LEDs on the TR position cable
will give a false or no response during testing. This will cause the replacement of good parts.
2. Place vehicle transaxle range selector lever into PARK.
3. Move transaxle range selector lever through all ranges.
4. Monitor the instrument panel status lights located in the TR sensor E cable. The LED should illuminate red for the appropriate range selected.
5. If the LED for the applicable gear range position fails to illuminate red or if it lights for a position other than the gear selected:
a. verify test cable connections at sensor and tester.
b. verify transmission shift linkage for proper adjustment.
c. verify TR sensor for proper adjustment.
d. retest.
6. If the sensor still fails to illuminate the LED red for the selected gear range or indicates incorrect gear position, replace it.
7. If sensor is OK, perform diagnosis of instrument panel and vehicle harness.
DISCONNECTING THE TESTER
1. Disconnect transmission tester from transaxle connector.
CAUTION: Do not attempt to pry off connectors with a screwdriver. This will damage the connector and could result in a transaxle concern.