
Sable V6-183 3.0L DOHC VIN S MFI (1997)
Transmission Position Switch/Sensor: Testing and Inspection
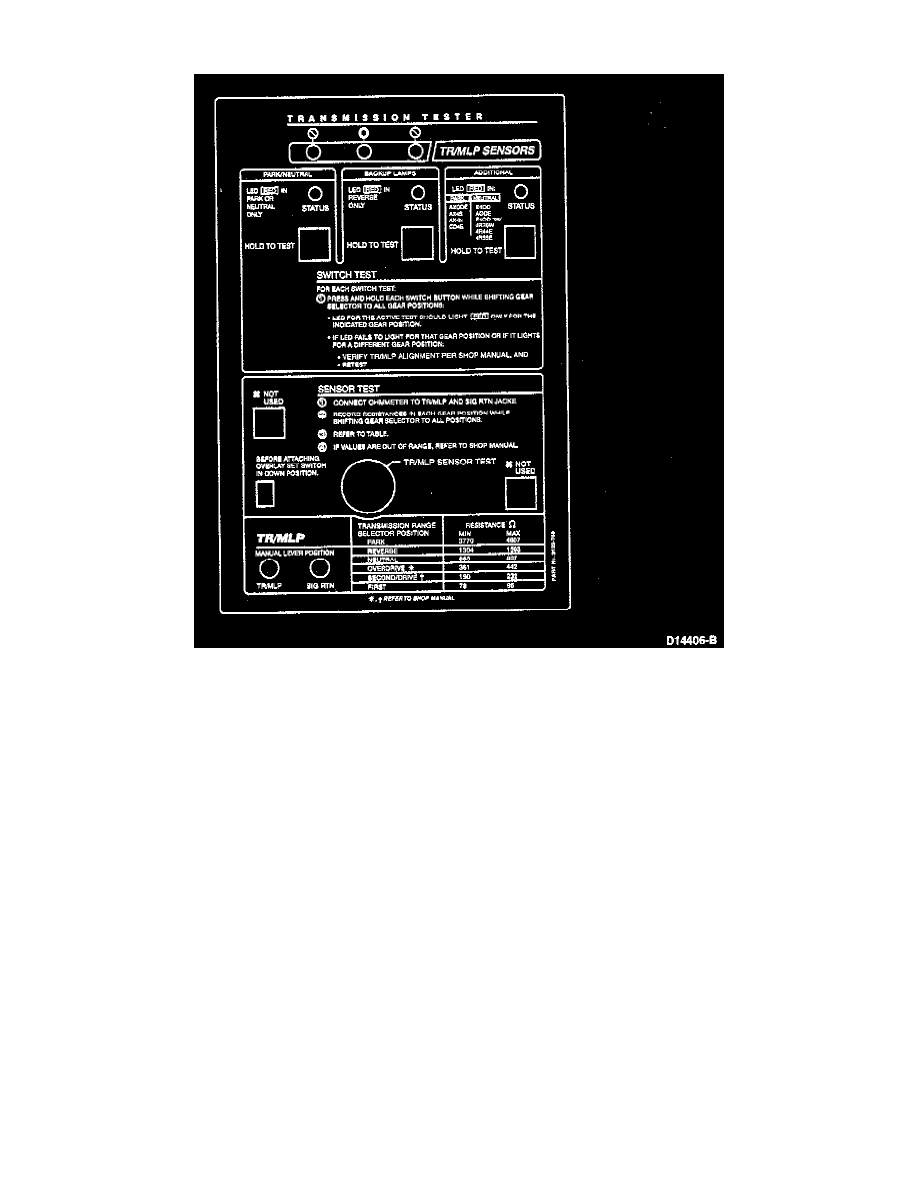
Rotunda TR/MLP Sensor Tester Overlay
INTRODUCTION
CAUTION: Do not attempt to pry off transmission harness connector with a screwdriver. This will damage the connector and could result in a
transmission concern.
The transmission tester allows a technician to operate the electrical portion of the Transmission Range (TR) sensor. The TR/MLP tester usage is
divided into six steps:
1. Preliminary testing and diagnosis.
2. Transmission tester installation (Set-Up Procedure).
3. Testing TR sensor.
4. Park/Neutral, backup lamp and optional circuit voltage tests.
5. Testing TR sensor range indicator circuit for instrument cluster.
6. Transmission tester removal and clearing diagnostic trouble codes (DTCs).
NOTE: Installing the transmission tester at the transaxle harness connector allows the separation of the TR sensor electronics from the vehicle
electronics.
CAUTION: Testing may cause additional diagnostic trouble codes (DTC's) to be set. Therefore, it is important that you erase all DTCs
whenever you make repairs. To verify elimination of all DTCs, rerun On-Board Diagnostics.
PRELIMINARY TESTING AND DIAGNOSIS
Before you start testing, perform the following preliminary checks. Be sure to write down your findings, especially any DTCs, for future reference.
1. Know and understand the customer's concern.
2. Verify that TR sensor is properly adjusted in NEUTRAL.
3. Verify customer concern (when does it occur?):
a. upshift