
Sable V6-183 3.0L DOHC VIN S MFI (1997)
Control Arm: Service and Repair
Front
REMOVAL
1. Turn ignition switch to the off position and place steering column in the unlock position.
2. Raise vehicle on hoist.
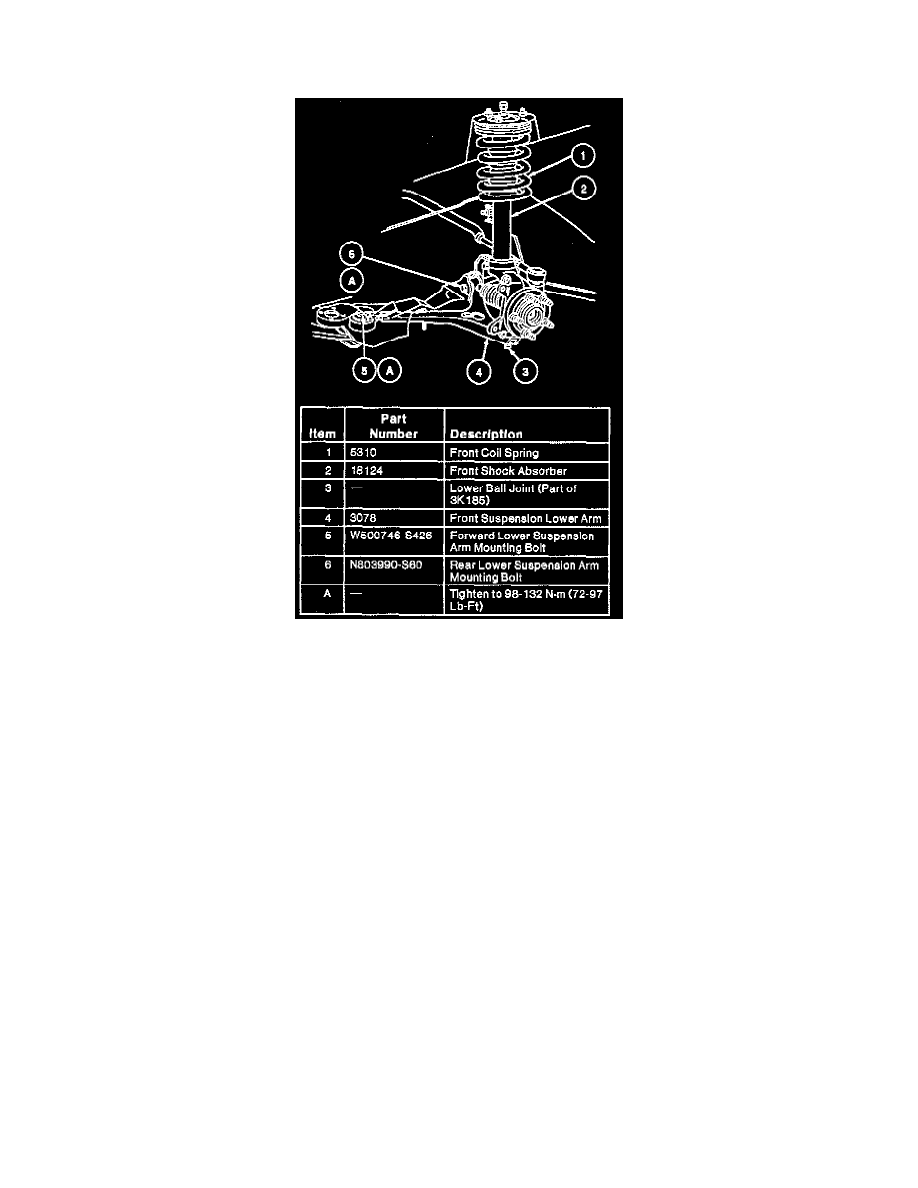
3. Remove and discard lower ball joint nut. Using Ball Joint Remover T96P-3010-A and Tie Rod End Remover Adapter T81P-3504-W, separate
lower ball joint from front suspension lower arm.
4. Using Rotunda Spring Compressor 164-R3571 or equivalent compress front coil spring until lower ball joint clears front suspension lower arm.
5. Remove forward lower suspension arm mounting nut and bolt.
6. Remove rear lower suspension arm mounting nut and bolt. Remove front suspension lower arm from vehicle.
INSTALLATION
1. Position front suspension lower arm into front sub-frame. Install forward and rear lower suspension mounting bolts and nuts. Tighten rear bolt to
98-132 Nm (72-97 ft. lbs.). Tighten front bolt to 77-103 Nm (57-75 ft. lbs.).
2. Release Rotunda Spring Compressor 164-R3571 or equivalent while guiding lower ball joint into front suspension lower arm. Remove spring
compressor.
3. Install new lower ball joint nut. Tighten to 68-92 Nm (50-67 ft. lbs.).
4. Install wheel and tire assembly. Tighten lug nuts to 115-142 Nm (85-104 ft. lbs.).
5. Lower vehicle.