
Sable V6-183 3.0L DOHC VIN S MFI (1997)
Fluid Line/Hose: Service and Repair
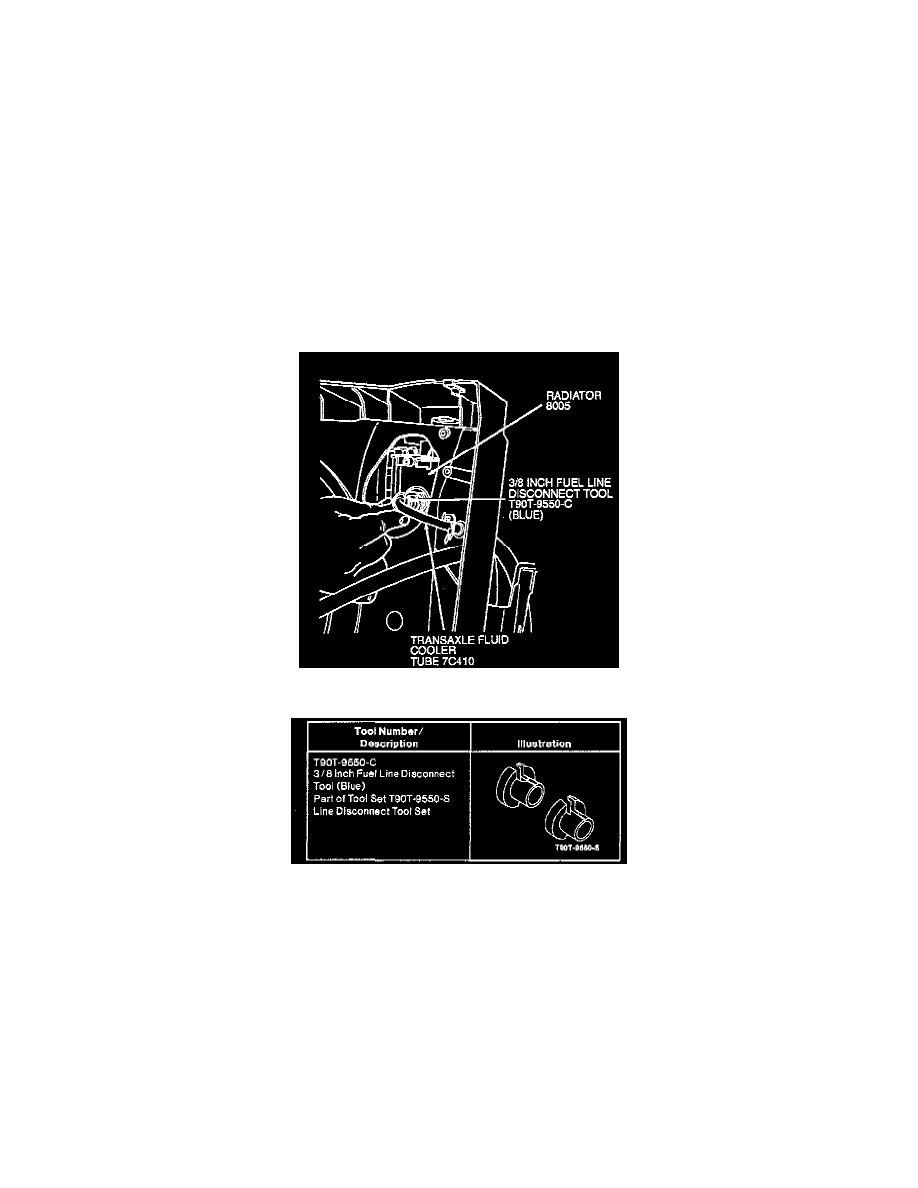
Line Disconnect Tool Usage - at Radiator
1. Slide tool over tube.
NOTE: On some applications, it may not be possible to insert the removal tool into the fitting due to vehicle component interference. If this
condition exists, the transaxle fluid tube connector must be removed from the radiator without disconnecting the transaxle fluid cooler inlet tube.
Turning the connector without removing the cooler line may damage the internal O-ring of the connector causing a leak. If the fitting is removed
without disconnecting the cooler line first, the connector should be replaced.
NOTE: For transaxle cooler line service at the radiator, the 3/8 inch Fuel Line Disconnect Tool (Blue) T90T-9550-C is required. The Cooling
Line Disconnect Tool Usage image shows the tool end and its proper position for disassembly of tube from fitting. The purpose of the tool is to
spread the duck-bill retainer to disengage the tube bead. The following steps are necessary for use of the tool.
NOTE: To aid in the use of the tool, remove tube retaining clip, and then clean the road dirt from the fitting before inserting the tool into the
transaxle fluid tube connector. It is also important to avoid any contamination of the fitting. Dirt in the fitting could cause an 0-ring leak.
2. Align opening of tool with one of two tabs on the fitting duck-bill retainer.
Cooling Line Disconnect Tool Usage
3/8 Inch Line Disconnect Tool (blue), T90T-9550-C
3. Firmly insert tool into transmission fluid tube connector until it seats against tube bead. (A definite click should be heard.)
4. With thumb held against tool, firmly pull back on transaxle fluid cooler inlet tube and transaxle fluid cooler tube until they disengage from fitting.
CAUTION: Do not attempt to separate cooler line from fitting by prying with another tool. This will break the plastic insert in fitting and bend
the cooler lines at junction to fitting.
5. Before assembling the lines in the fitting, inspect the plastic retainer in the fitting for a broken tab. If a tab is broken, the fitting must be replaced.
Also inspect the cooler lines to make sure they are not bent at the junction of the fitting.
6. Tube assembly is accomplished by inserting the tube into the fitting until the retainer engages the tube bead. (A definite click should be heard.)
Pull back on the tube to ensure full engagement. Install tube retaining clip.