
Sable V6-183 3.0L DOHC VIN S MFI (1997)
flushing procedures are now available. These procedures should be followed before an overhauled or replacement A/T is installed.
ACTION
Refer to the following Service Procedure to properly power flush the oil cooler(s) and lines.
SERVICE PROCEDURE
Before power flushing, be sure to inspect the hoses and clamps. Power flushing MUST begin with back flushing followed by forward flushing,
otherwise, the restriction could be further trapped in the internal mesh-type baffle of the cooler and flushing will not be effective or possible.
INSPECTING OIL HOSES AND CLAMPS
Be sure to inspect the lines (hoses/pipes) for cuts/scratches, crimps (pinched), cracks/splits or any other damage before reusing the oil hose. If any
problem exists or the hose comes off when applying oil pressure, replace it with a new one.
NOTE
ALWAYS USE NEW CLAMPS WHEN REPLACING THE HOSES.
BACK FLUSHING
1.
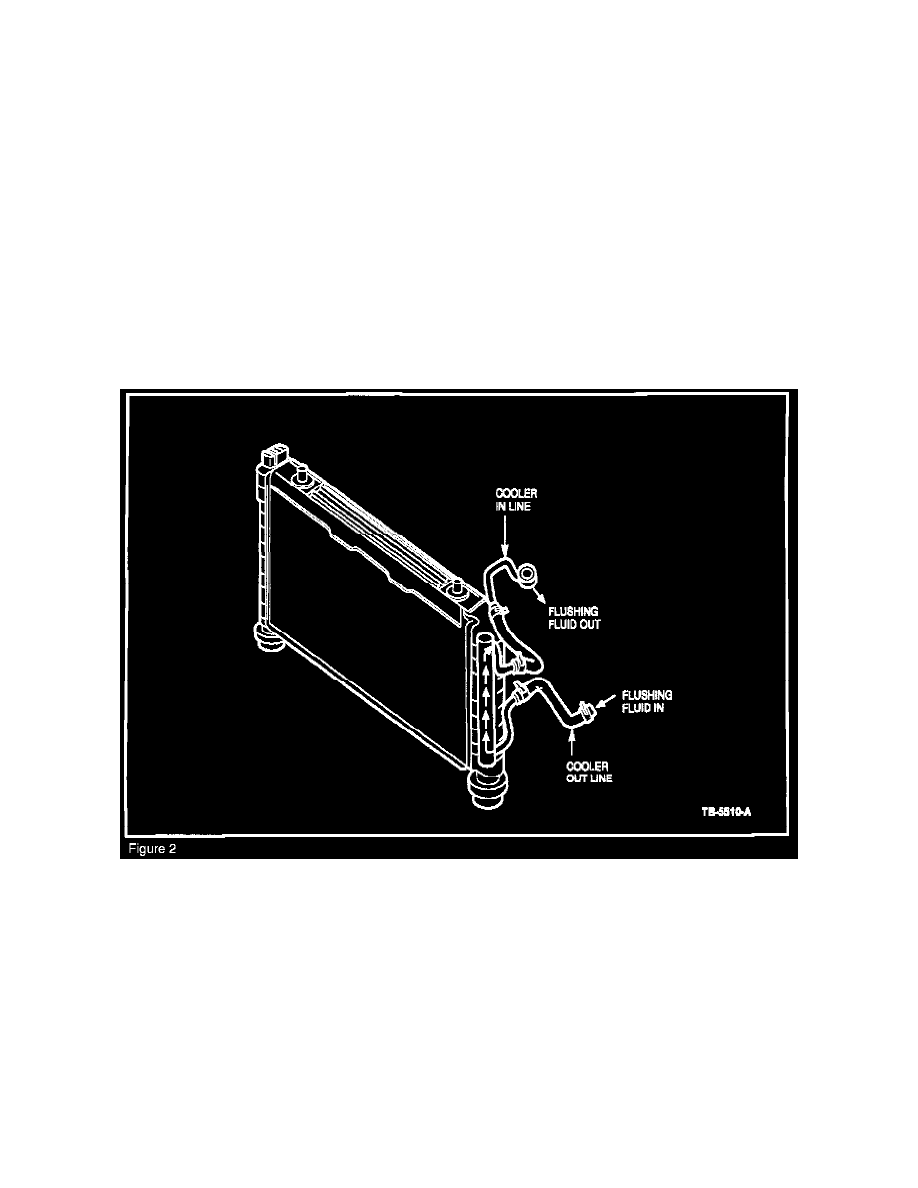
Using the Power Flushing Equipment manufacturer's instructions, connect the equipment so that the flushing fluid flows in the opposite direction
of normal fluid flow. Refer to the Power Flushing Equipment instructions to determine normal fluid flow. See typical example in Figure 2.
2.
Flush oil cooler/lines until discharge fluid is clean.
CAUTION
IF THE COOLER CANNOT BE PROPERLY FLUSHED USING RECOMMENDED EQUIPMENT, SEND THE RADIATOR OUT FOR
SUBLET CLEANING OR REPLACE.
NOTE
CONFIRM THAT DEBRIS NO LONGER EXISTS IN THE FLUSHED FLUID, THEN BACK FLUSHING IS COMPLETED.
FORWARD FLUSHING