
Sable V6-232 3.8L (1988)
Camshaft Gear/Sprocket: Service and Repair
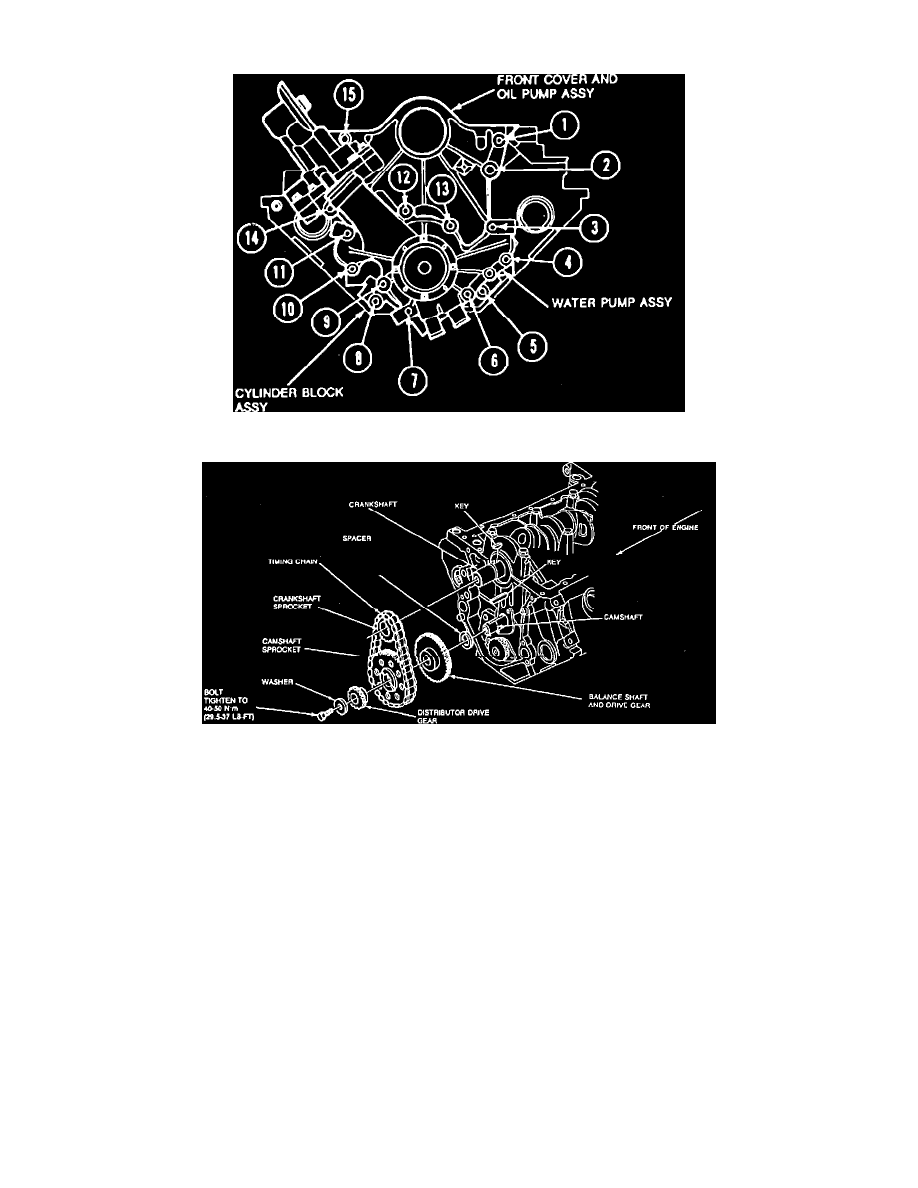
Fig. 8 Front Cover Attaching Bolt Locations
Fig. 9 Timing Chains & Sprocket Removal
1.
Relieve fuel system pressure as outlined under MAINTENANCE PROCEDURES/FUEL SYSTEM PRESSURE RELIEF.
2.
Disconnect battery ground cable, then drain cooling system.
3.
Remove air cleaner assembly and air intake duct.
4.
Remove cooling fan shroud attaching bolts, cooling fan clutch attaching bolts, then cooling fan clutch assembly and the fan shroud.
5.
Remove drive belt, then the water pump pulley.
6.
Remove power steering pump bracket attaching bolts, then position bracket and pump aside.
7.
Remove A/C compressor front support bracket, if equipped.
8.
Disconnect coolant bypass hose and heater hose from water pump.
9.
Disconnect upper radiator hose from thermostat housing.
10.
Disconnect coil wire from distributor cap, then remove cap and plug wires.
11.
Remove distributor hold-down clamp, then the distributor.
12.
Raise and support vehicle.
13.
Remove crankshaft pulley and damper using suitable puller.
14.
Remove oil filter, then disconnect lower radiator hose from water pump.
15.
Remove oil pan as described under OIL PAN.
16.
Lower vehicle, then remove front cover attaching bolts, Fig. 8. Be sure to remove attaching bolt located behind oil filter adapter. Cover will
be damaged if pried on prior to bolt removal.
17.
Remove ignition timing indicator, then front cover and water pump as an assembly.
18.
Remove camshaft bolt and washer from end of camshaft.
19.
Remove distributor drive gear, then camshaft sprocket, crankshaft sprocket and timing chain.