
Sable V6-3.0L DOHC VIN S (2002)
incorrect curing can adversely affect the retention of the windshield.
1.
Dry fit the windshield glass to the existing urethane adhesive bead on the body pinch weld. Align the windshield glass in the opening for a uniform
fit.
2.
Use a non-permanent pencil to make alignment marks on the windshield glass at the setting blocks and the body to aid in the installation alignment
of the windshield glass.
3.
Remove the windshield glass.
4.
NOTE: Avoid scratching the pinch weld.
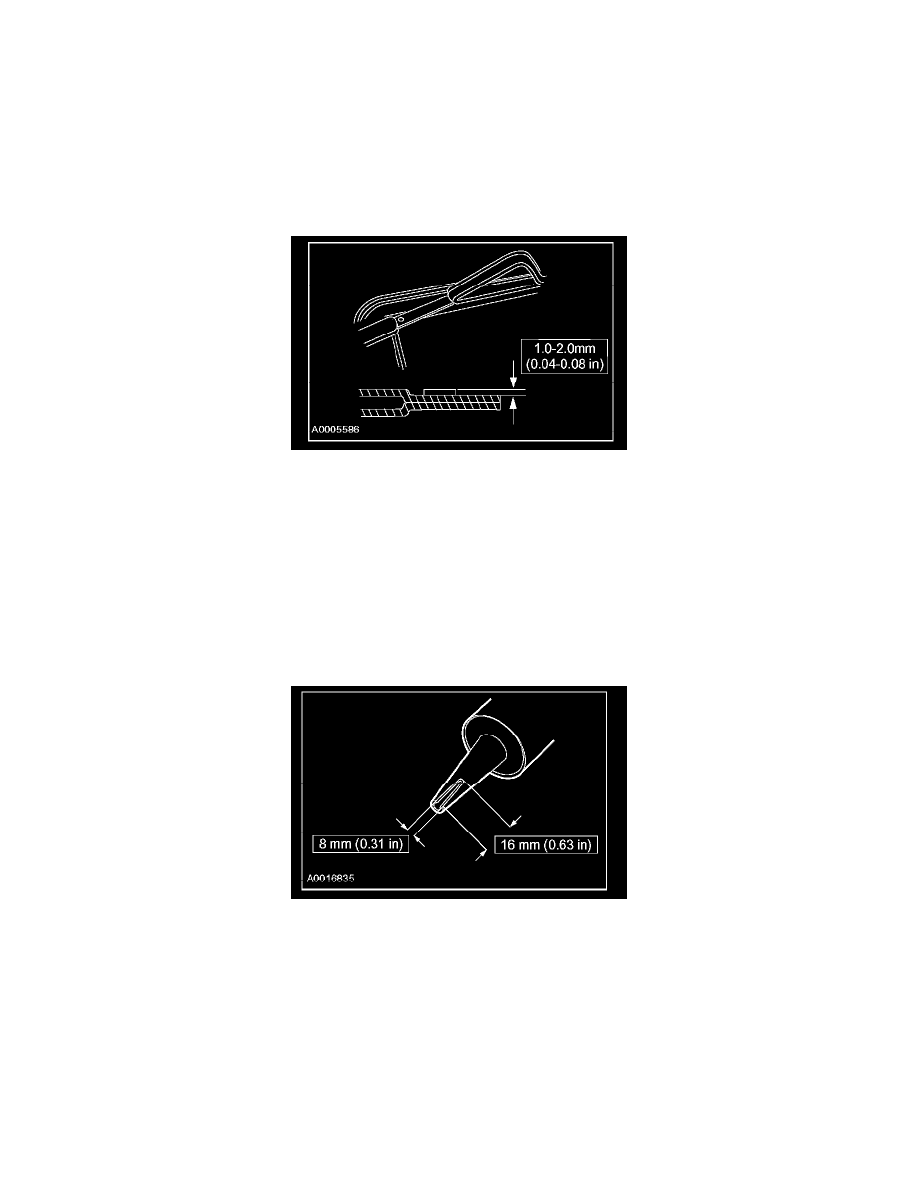
Trim the remaining urethane adhesive on the pinch weld, be sure to leave a layer of urethane approximately 1-2 mm thick on the flange. The
urethane adhesive must be smooth and free of cuts and contamination after trimming. Avoid touching the urethane surface after preparation.
5.
Apply urethane metal primer to minor scratches or exposed metal on the pinch weld caused during removal. Do not apply primer to the existing
urethane adhesive.
6.
CAUTION: Cleaning the inside of the glass with a non-alcohol based cleaner is absolutely necessary for proper adhesion.
Clean the inside of the windshield glass surface with a non-alcohol based glass cleaner.
7.
On the new windshield, apply the one-step primer to the area on the windshield where the urethane will make contact. Allow five (5) to seven (7)
minutes to dry.
8.
Cut the urethane adhesive applicator tip to specifications.
9.
NOTE: Use either a high ratio caulk gun or an electric or battery powered caulk gun to apply the urethane using less effort. Warming the tube of
urethane undera 100 watt bulb for a few minutes will also help when dispensing it from the tube.