
Sable V6-3.0L VIN U (1999)
Trunk / Liftgate Weatherstrip: Service and Repair
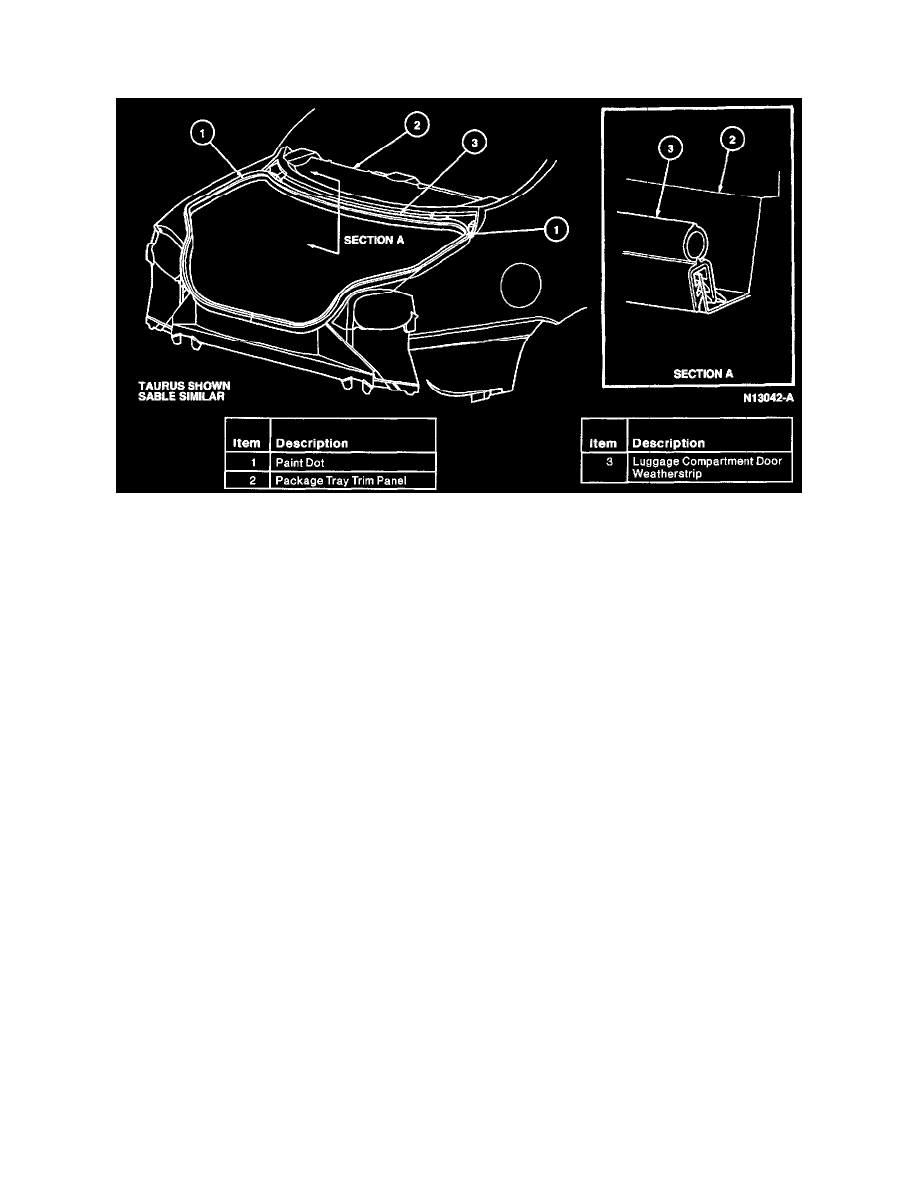
Luggage Compartment Door
REMOVAL
1. Locate paint dot on upper corners of luggage compartment door weatherstrip and mark location on body using removable marker or grease pencil.
NOTE: The luggage compartment door weatherstrip may contain a stringy sealer which can stick to the flange when luggage compartment door
weatherstrip is removed. Cover the luggage compartment floor cover to prevent getting sealer on it.
2. Grasp luggage compartment door weatherstrip at center of lower back panel by latch strike and pull firmly up. Move around luggage compartment,
pulling luggage compartment door weatherstrip vertically until fully disengaged from flange.
NOTE: If luggage compartment door weatherstrip is to be reinstalled, remove it slowly in small sections to prevent stretching.
3. Pull luggage compartment door weatherstrip over luggage compartment door and discard.
4. Remove any remaining sealer from flanges.
5. Correct any damage to the luggage compartment flange with a pair of locking pliers or a hammer.
INSTALLATION
1. Place new luggage compartment door weatherstrip over luggage compartment door. Locate paint dot on each corner of luggage compartment door
weatherstrip and position at joint in sheet metal or location mark made during removal. Seat luggage compartment door weatherstrip using palm of
hand.
NOTE: Luggage compartment door weatherstrips are mechanically retained. No adhesive is required for retention.
2. Press grip edge of luggage compartment door weatherstrip over luggage compartment flange. Press luggage compartment door weatherstrip onto
flange working in both directions starting at the striker and continuing up luggage compartment sides. Compress excess length of luggage
compartment door weatherstrip along package tray area between luggage compartment door hinges.