
Tracer L4-110 1.8L DOHC (1995)
Heated Oxygen (HO2S) Sensor: Description and Operation
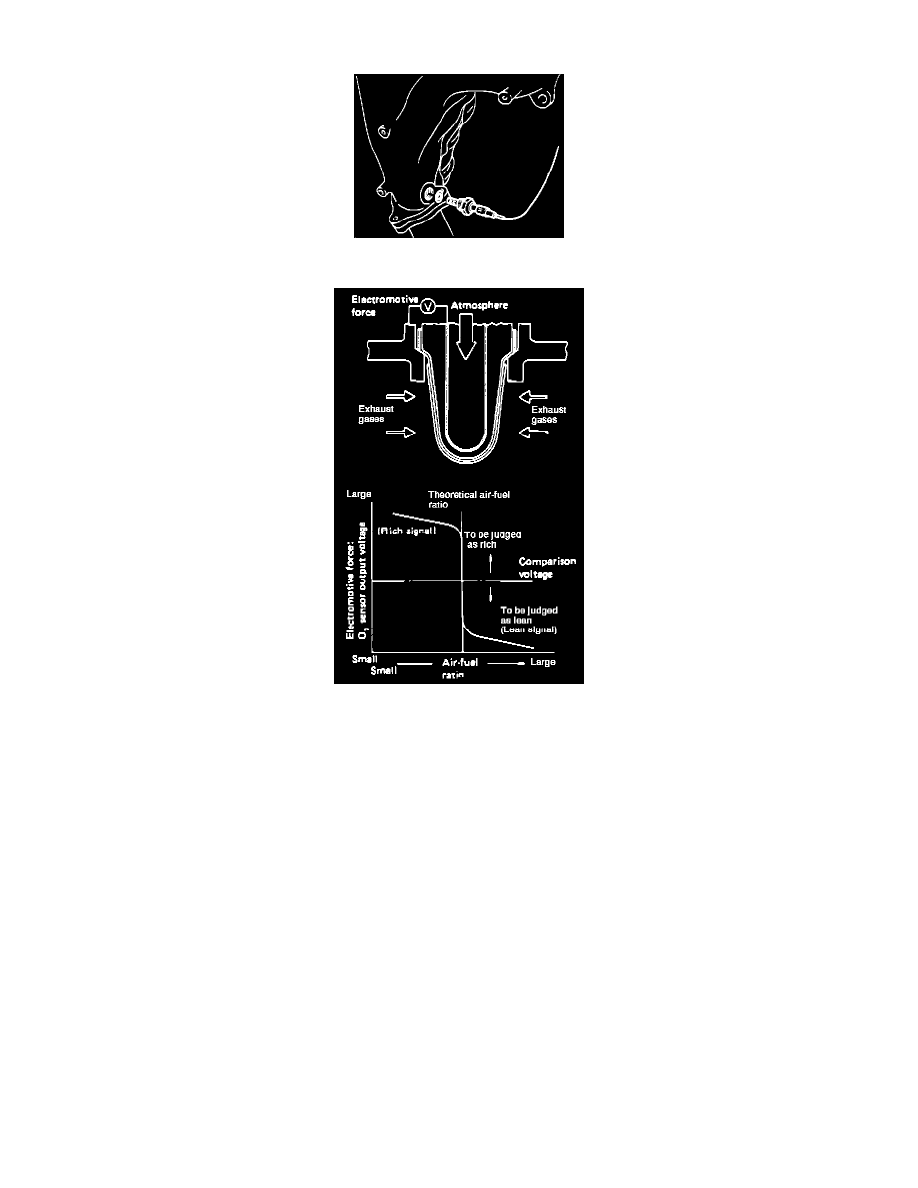
Oxygen Sensor
Oxygen Sensor Operation
PURPOSE
Measures oxygen content of exhaust gas and sends a voltage signal to the Powertrain Control Module (PCM). PCM determines air/fuel ratio based
on voltage generated and makes appropriate adjustments to maintain the optimum ratio of 14.7:1.
OPERATION
Sensors generate voltage according to exhaust gas oxygen content. Voltage range is approximately 0.1-1.0 Volts. Voltage increases when oxygen
content is low (rich) and decreases when oxygen content is high (lean). Difference in oxygen concentration changes greatly in the area of optimum
air/fuel ratio, resulting in large voltage changes that are easily calculated by the PCM. To operate at peak efficiency, oxygen sensors must heat up
to approximately 300-400°C (572-752°F).
CONSTRUCTION
Sensors incorporate a platinum coated ceramic zirconia tube which generates voltage if there is a difference in oxygen concentration between
inside (exhaust gas) and outside (fresh air) of tube. To reach operating temperature more quickly, sensors are equipped with heating elements.
An electrical heating element helps warm up the sensor to operating temperature more quickly and maintain its temperature during times when the
sensor may cool off, such as prolonged idle or deceleration. Heating elements are self-regulating PTC (positive temperature coefficient) heaters.
When cold, resistance is low. As the elements warm up resistance increases, reducing current until a steady state of temperature equilibrium is
reached. Elements get battery power at one terminal from the main relay. The other terminal is connected directly to ground. The heater operates
continuously while the ignition is ON.