
Tracer L4-110 1.8L DOHC (1995)
Clutch Disc: Service and Repair
REMOVAL
1. Remove transaxle.
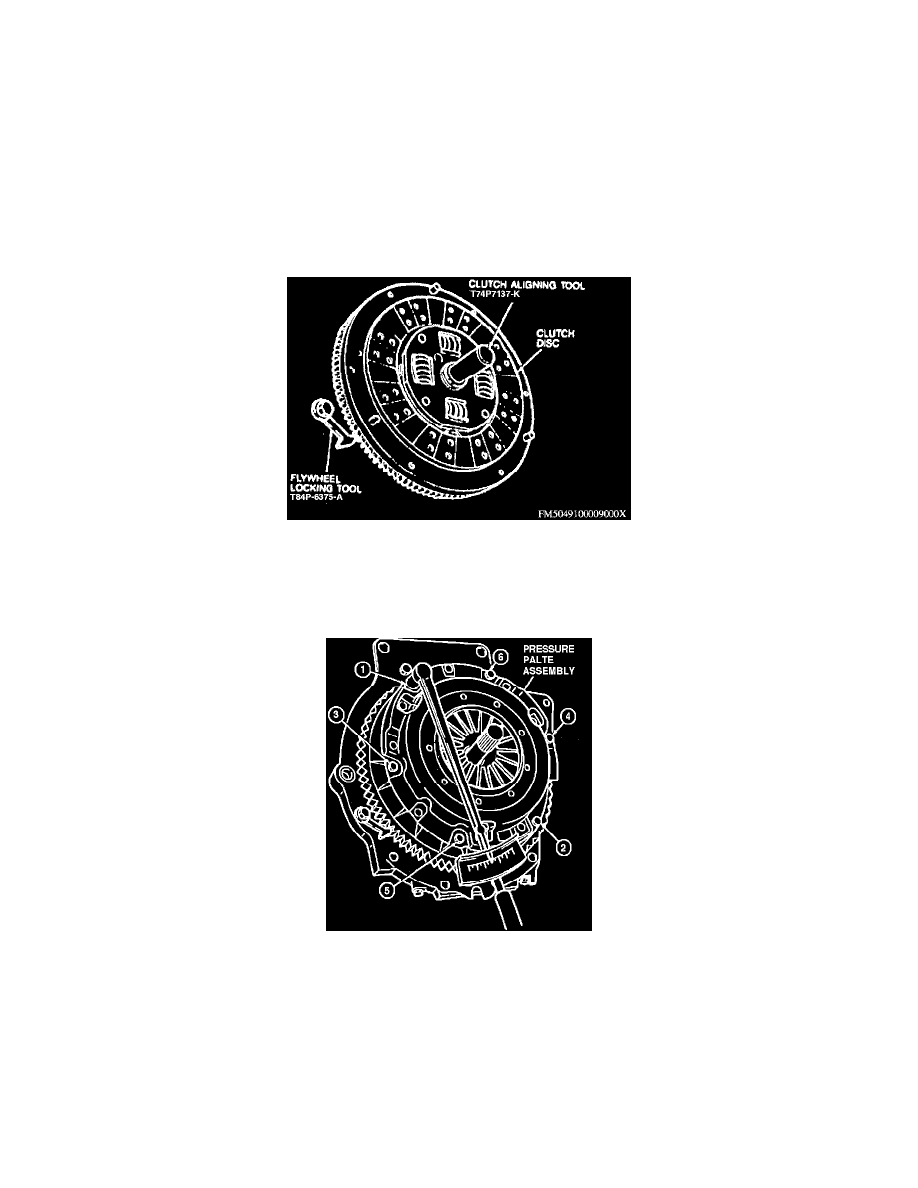
2. Install Flywheel Locking tool No. T84P-6375-A or equivalent in a transaxle mounting hole on engine block, then engage tooth of locking tool into
flywheel ring gear.
3. Loosen pressure plate cover attaching bolts evenly to avoid distorting cover. If same pressure plate and cover are to be installed, mark cover and
flywheel so pressure plate can be installed in original position.
4. Remove pressure plate and clutch disc from flywheel.
INSTALLATION
1. Reverse procedure to install, noting the following:
a. Clean splines on clutch disc and transaxle input shaft, then apply a small amount of Clutch Grease part No. C1AZ-19590-B or equivalent to
clutch disc and input shaft splines. Avoid getting grease on clutch face.
Clutch Disc Installation
b. Position clutch disc plate onto flywheel
c. Ensure three dowel pins on flywheel are aligned with dowel pins on pressure plate.
d. Finger tighten cover attaching bolts, then align clutch disc using tool No. T74P-7137-K or equivalent.
Pressure Plate Tightening Sequence
e. Evenly torque bolts to 13-20 ft lbs in sequence shown.
f.
Remove alignment tool, then install transaxle and perform clutch bleed procedure.